If you have two videos that are combined in one file and you want to separate them, here is how to do that:
1. Open Final Cut Pro X

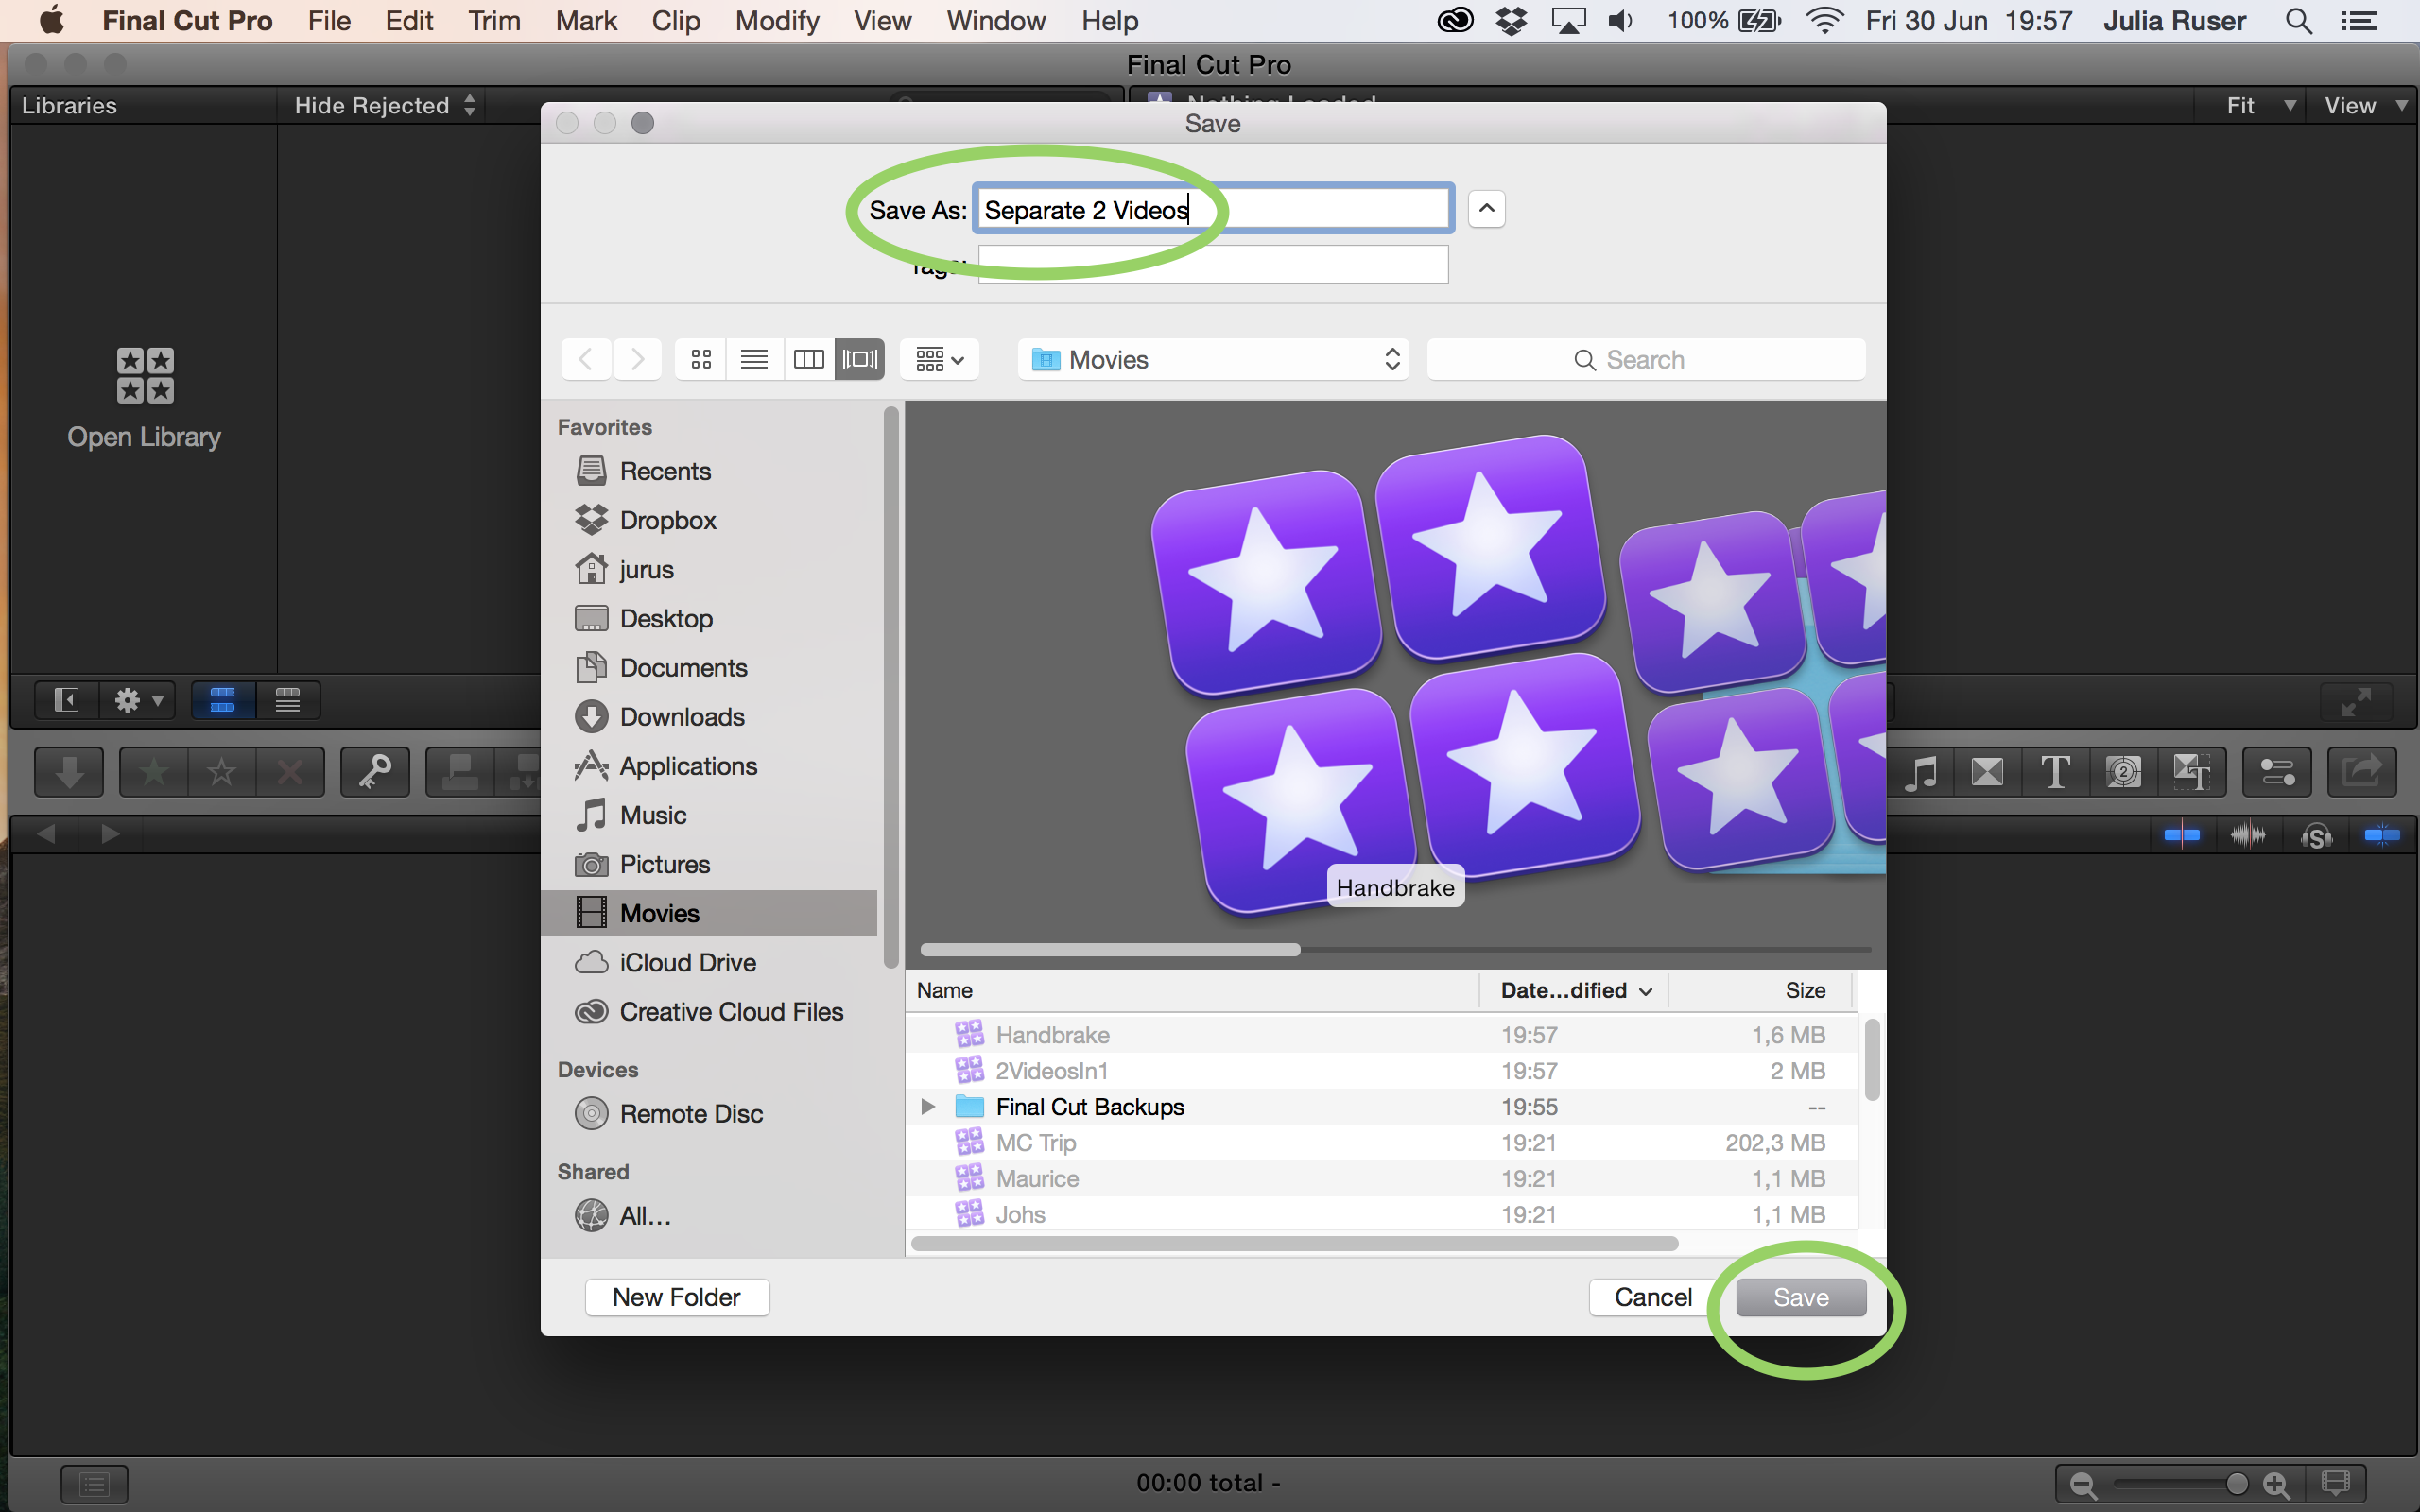
2. If necessary: Go to “File”, “New” and click “Library”. Give it a name and click “Save”

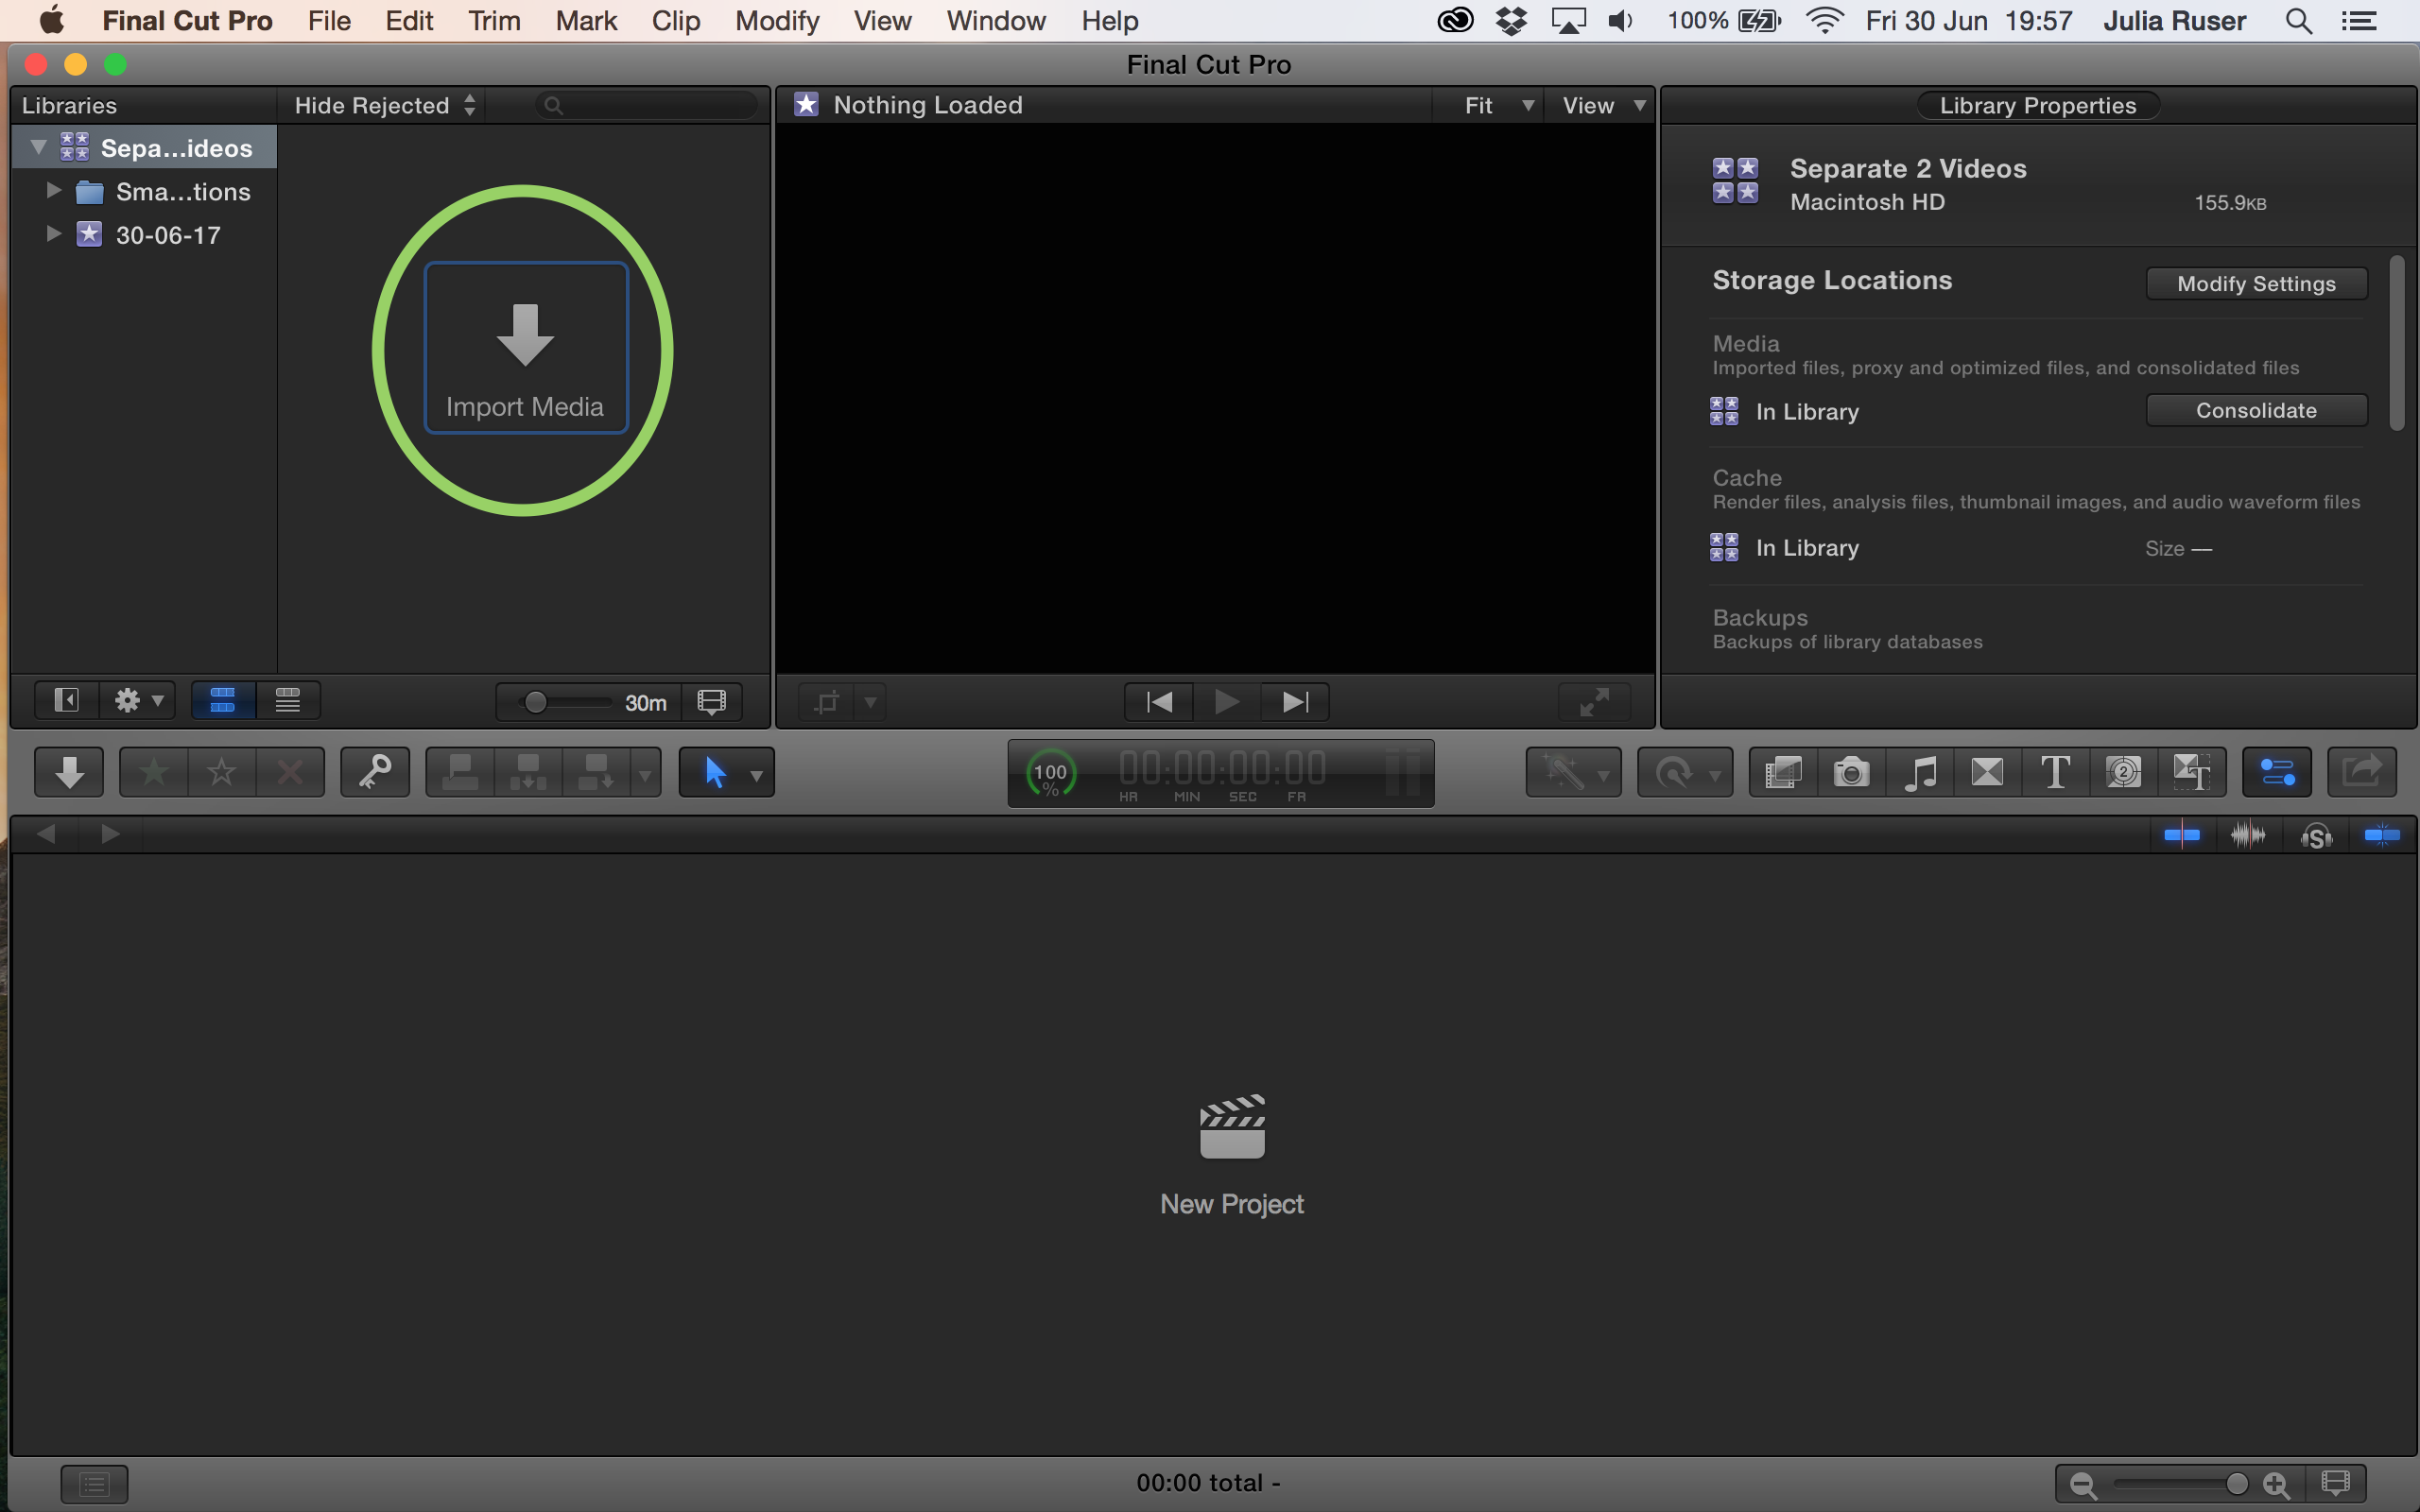
3. Click “Import Media”
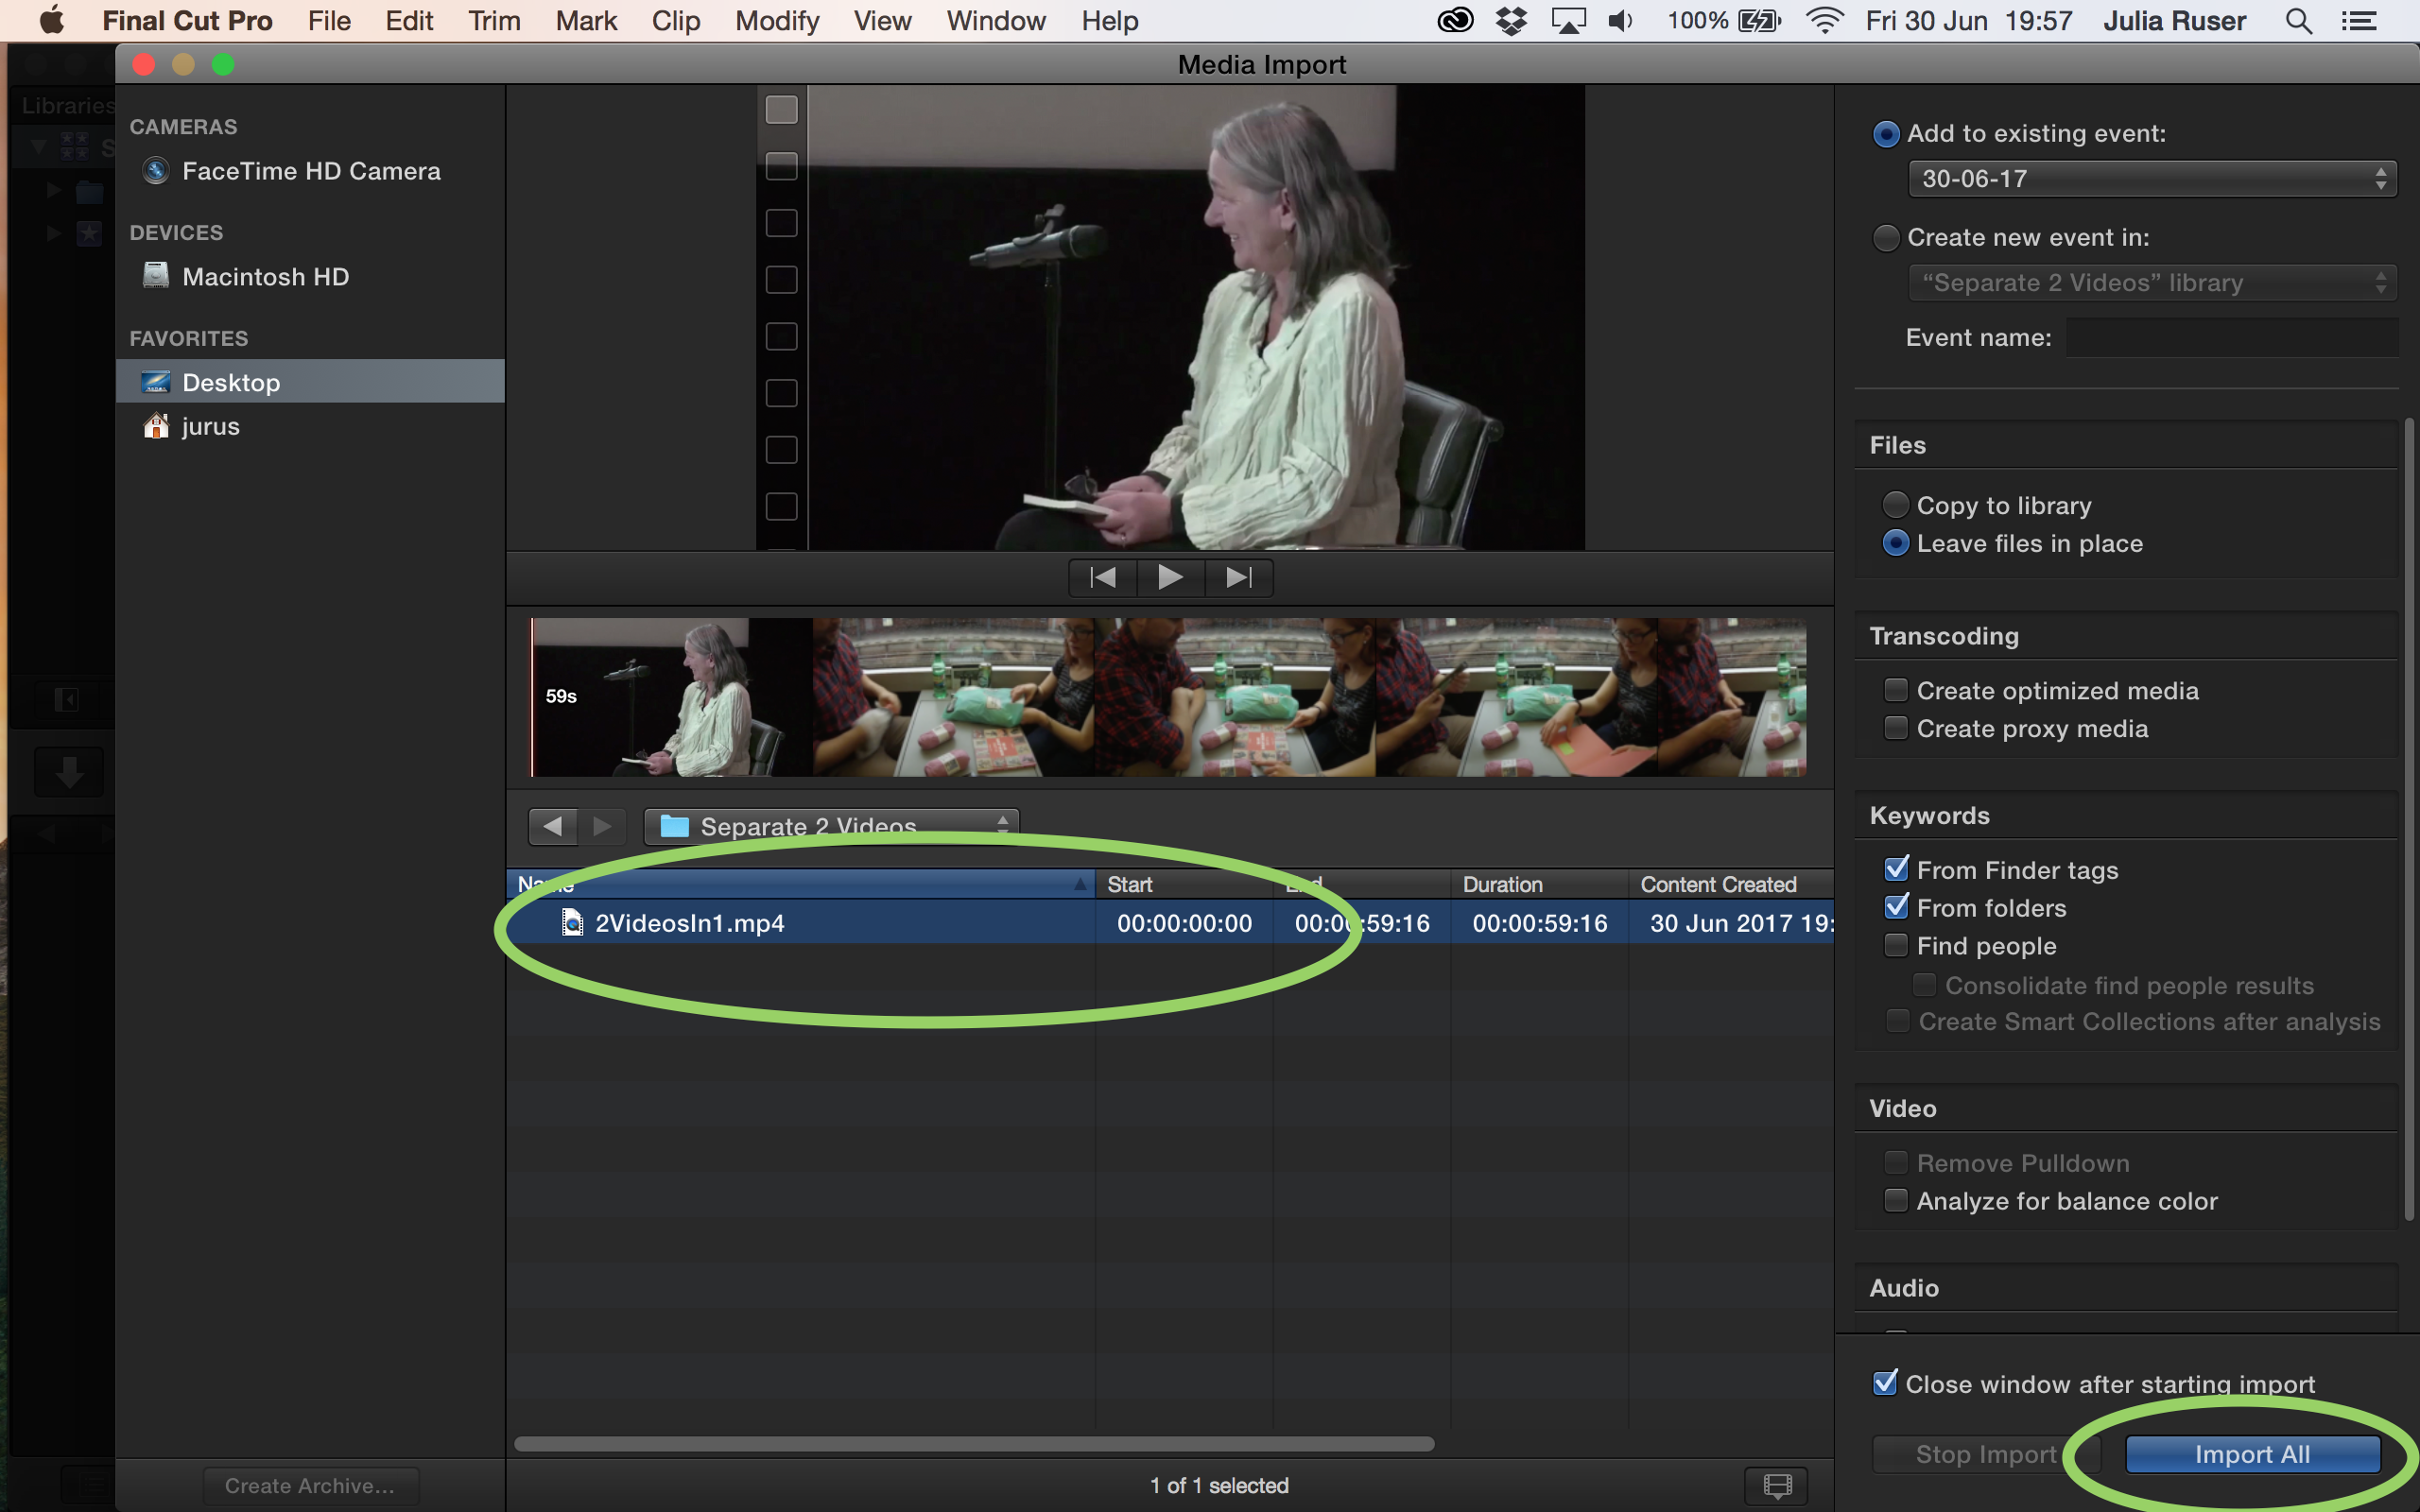
4. Select the file you want to edit and click “Import”
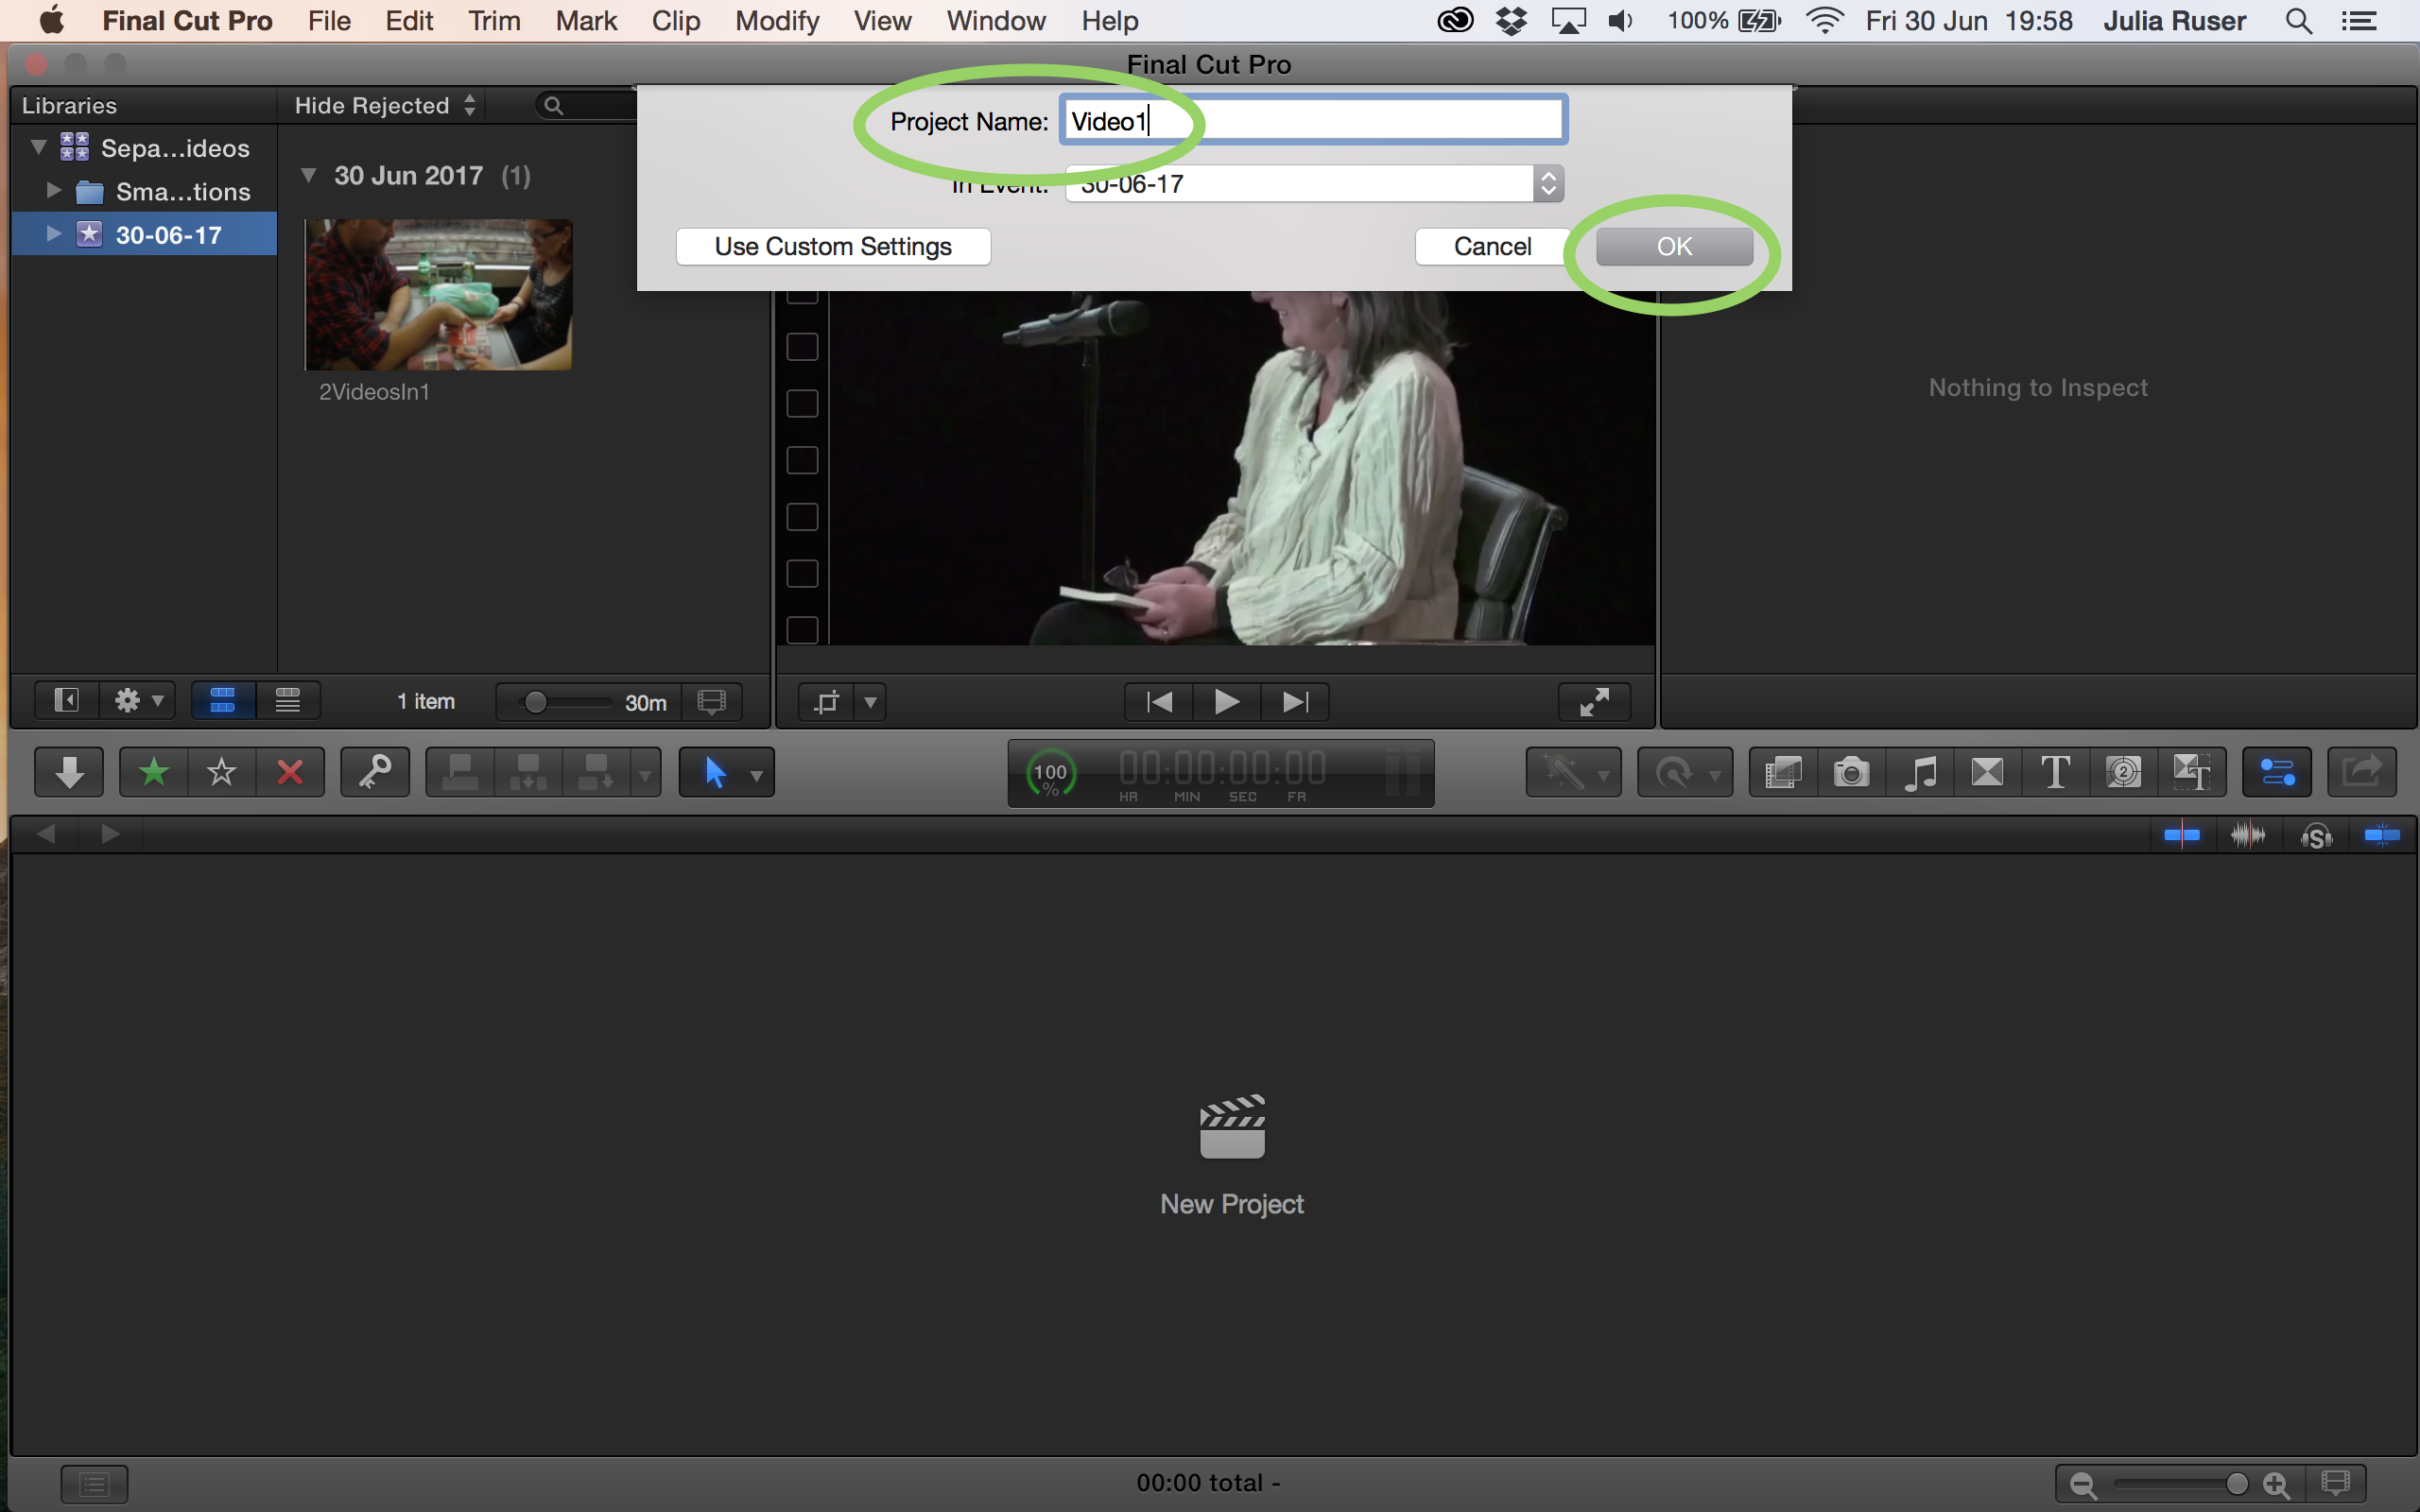
5. Ctrl click on the event and click “New Project”

6. Give the project a name and click “OK”
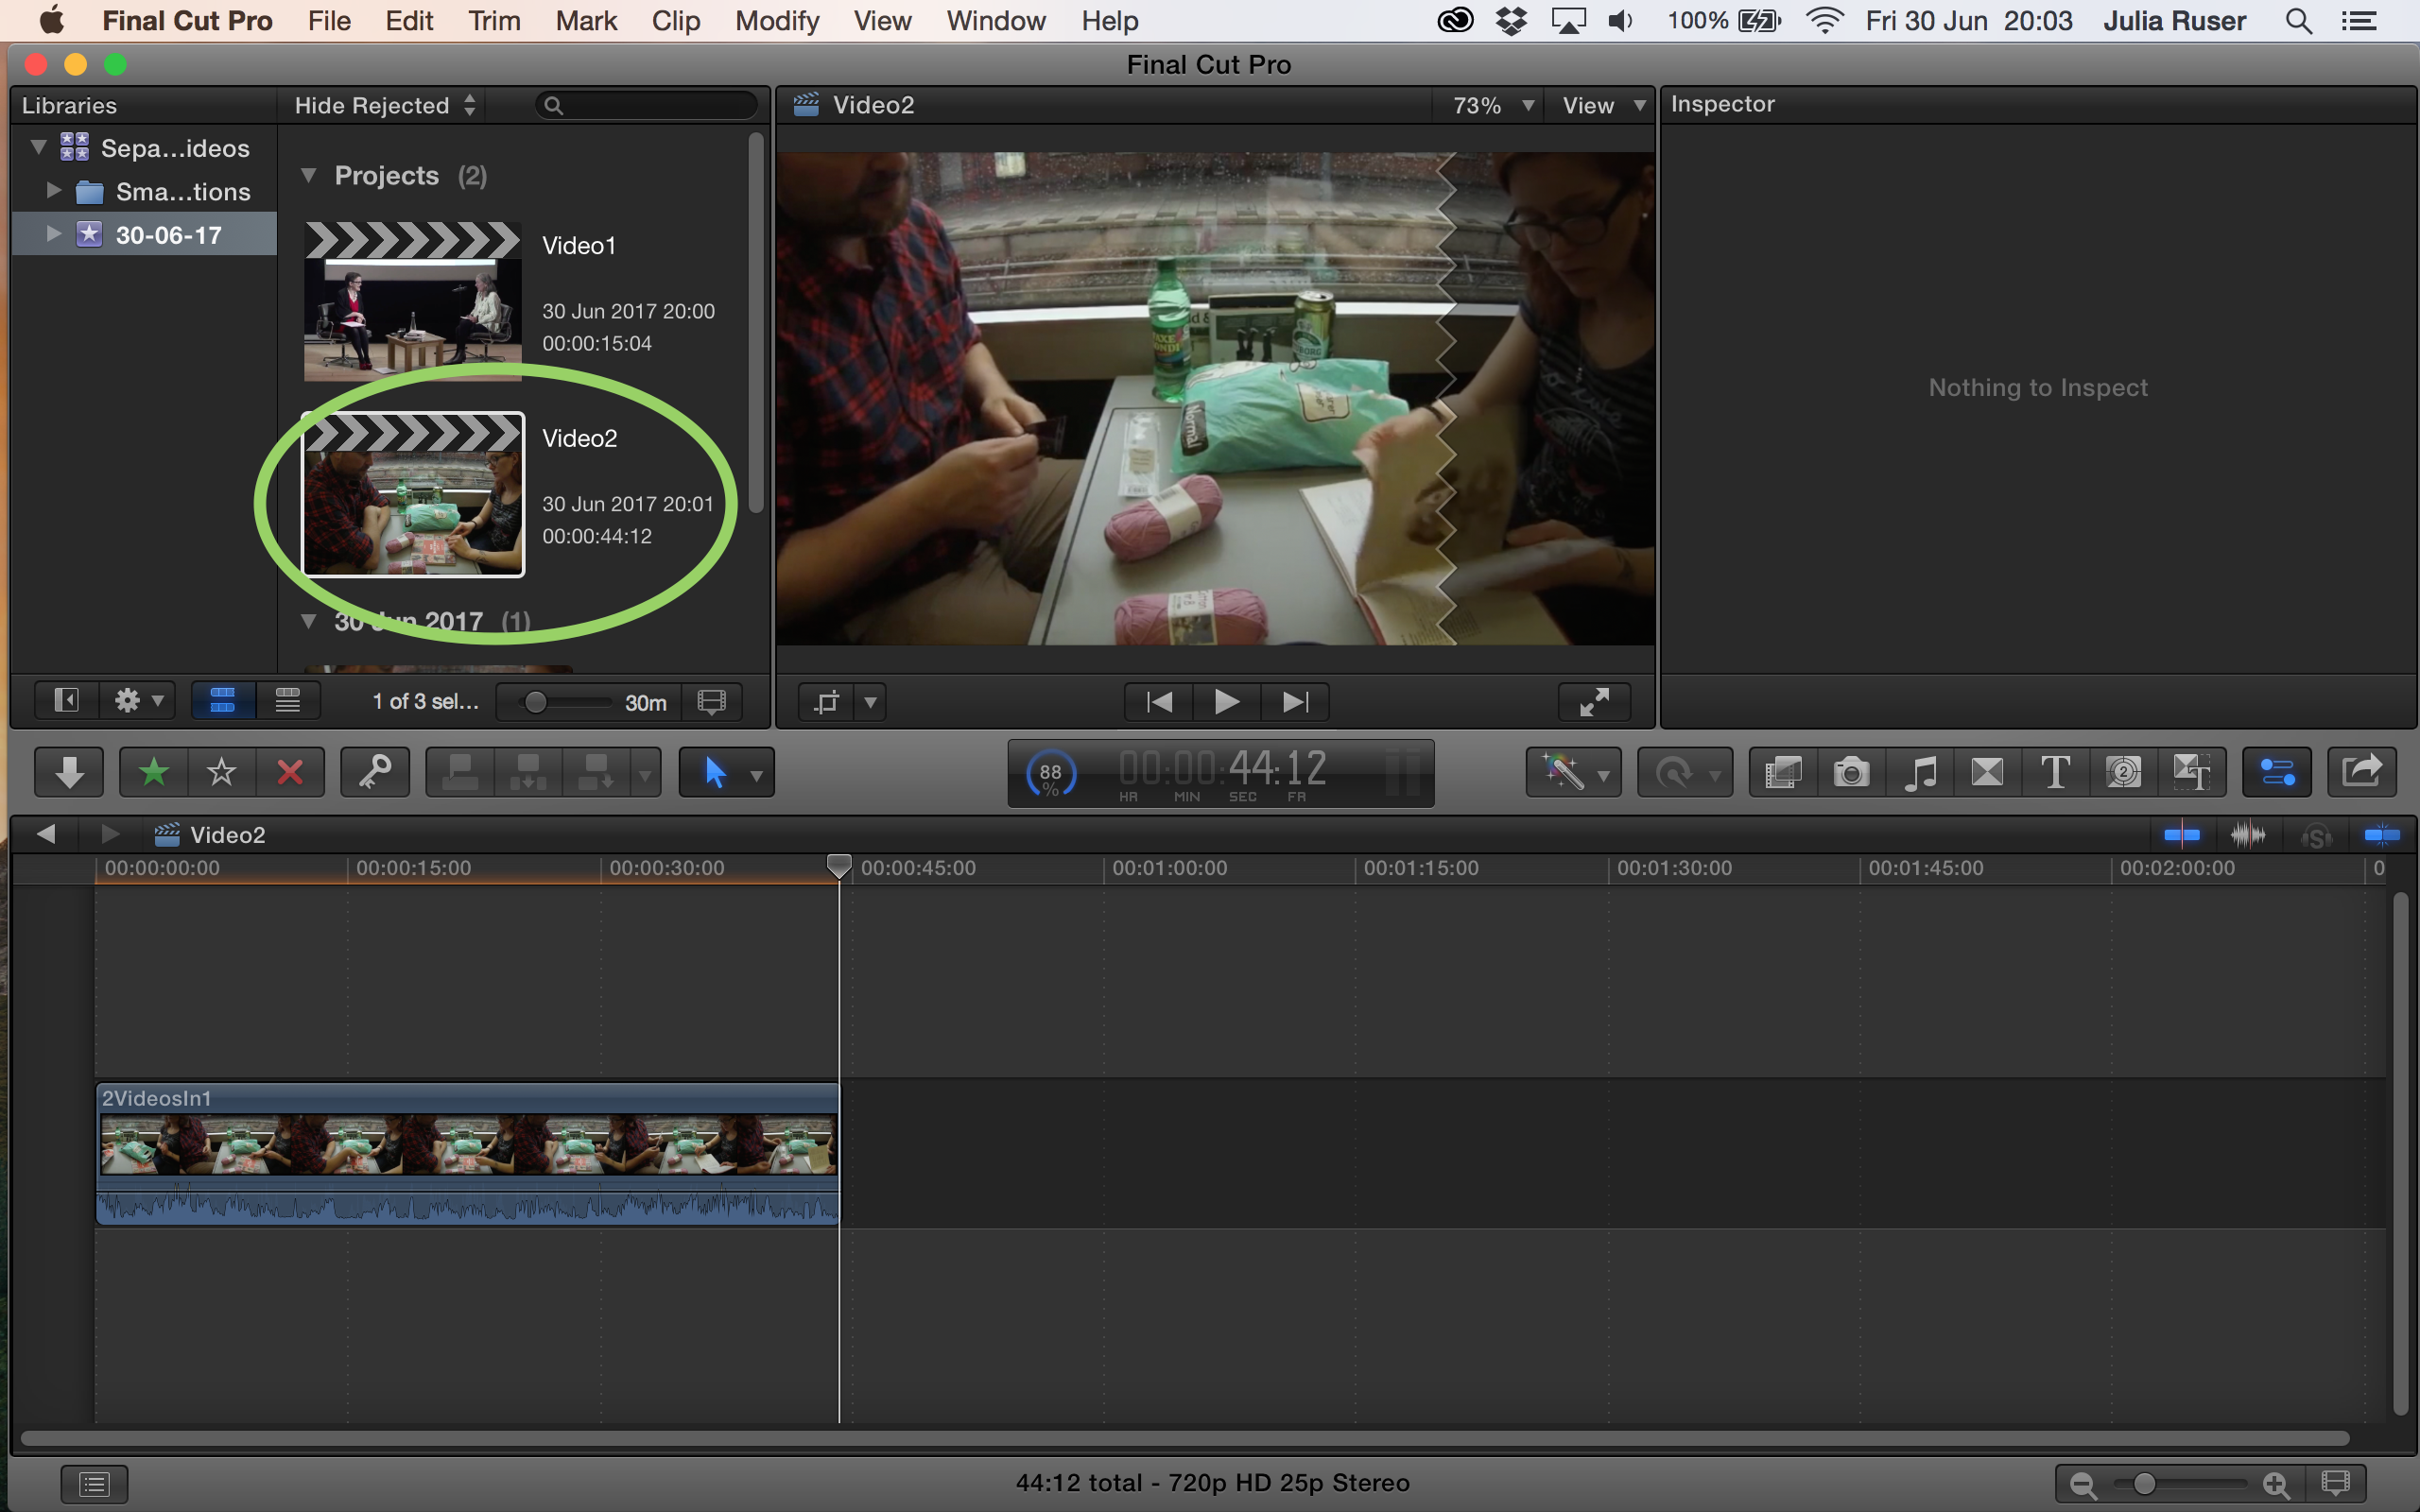
7. Click and hold the clip and drag it into the timeline.

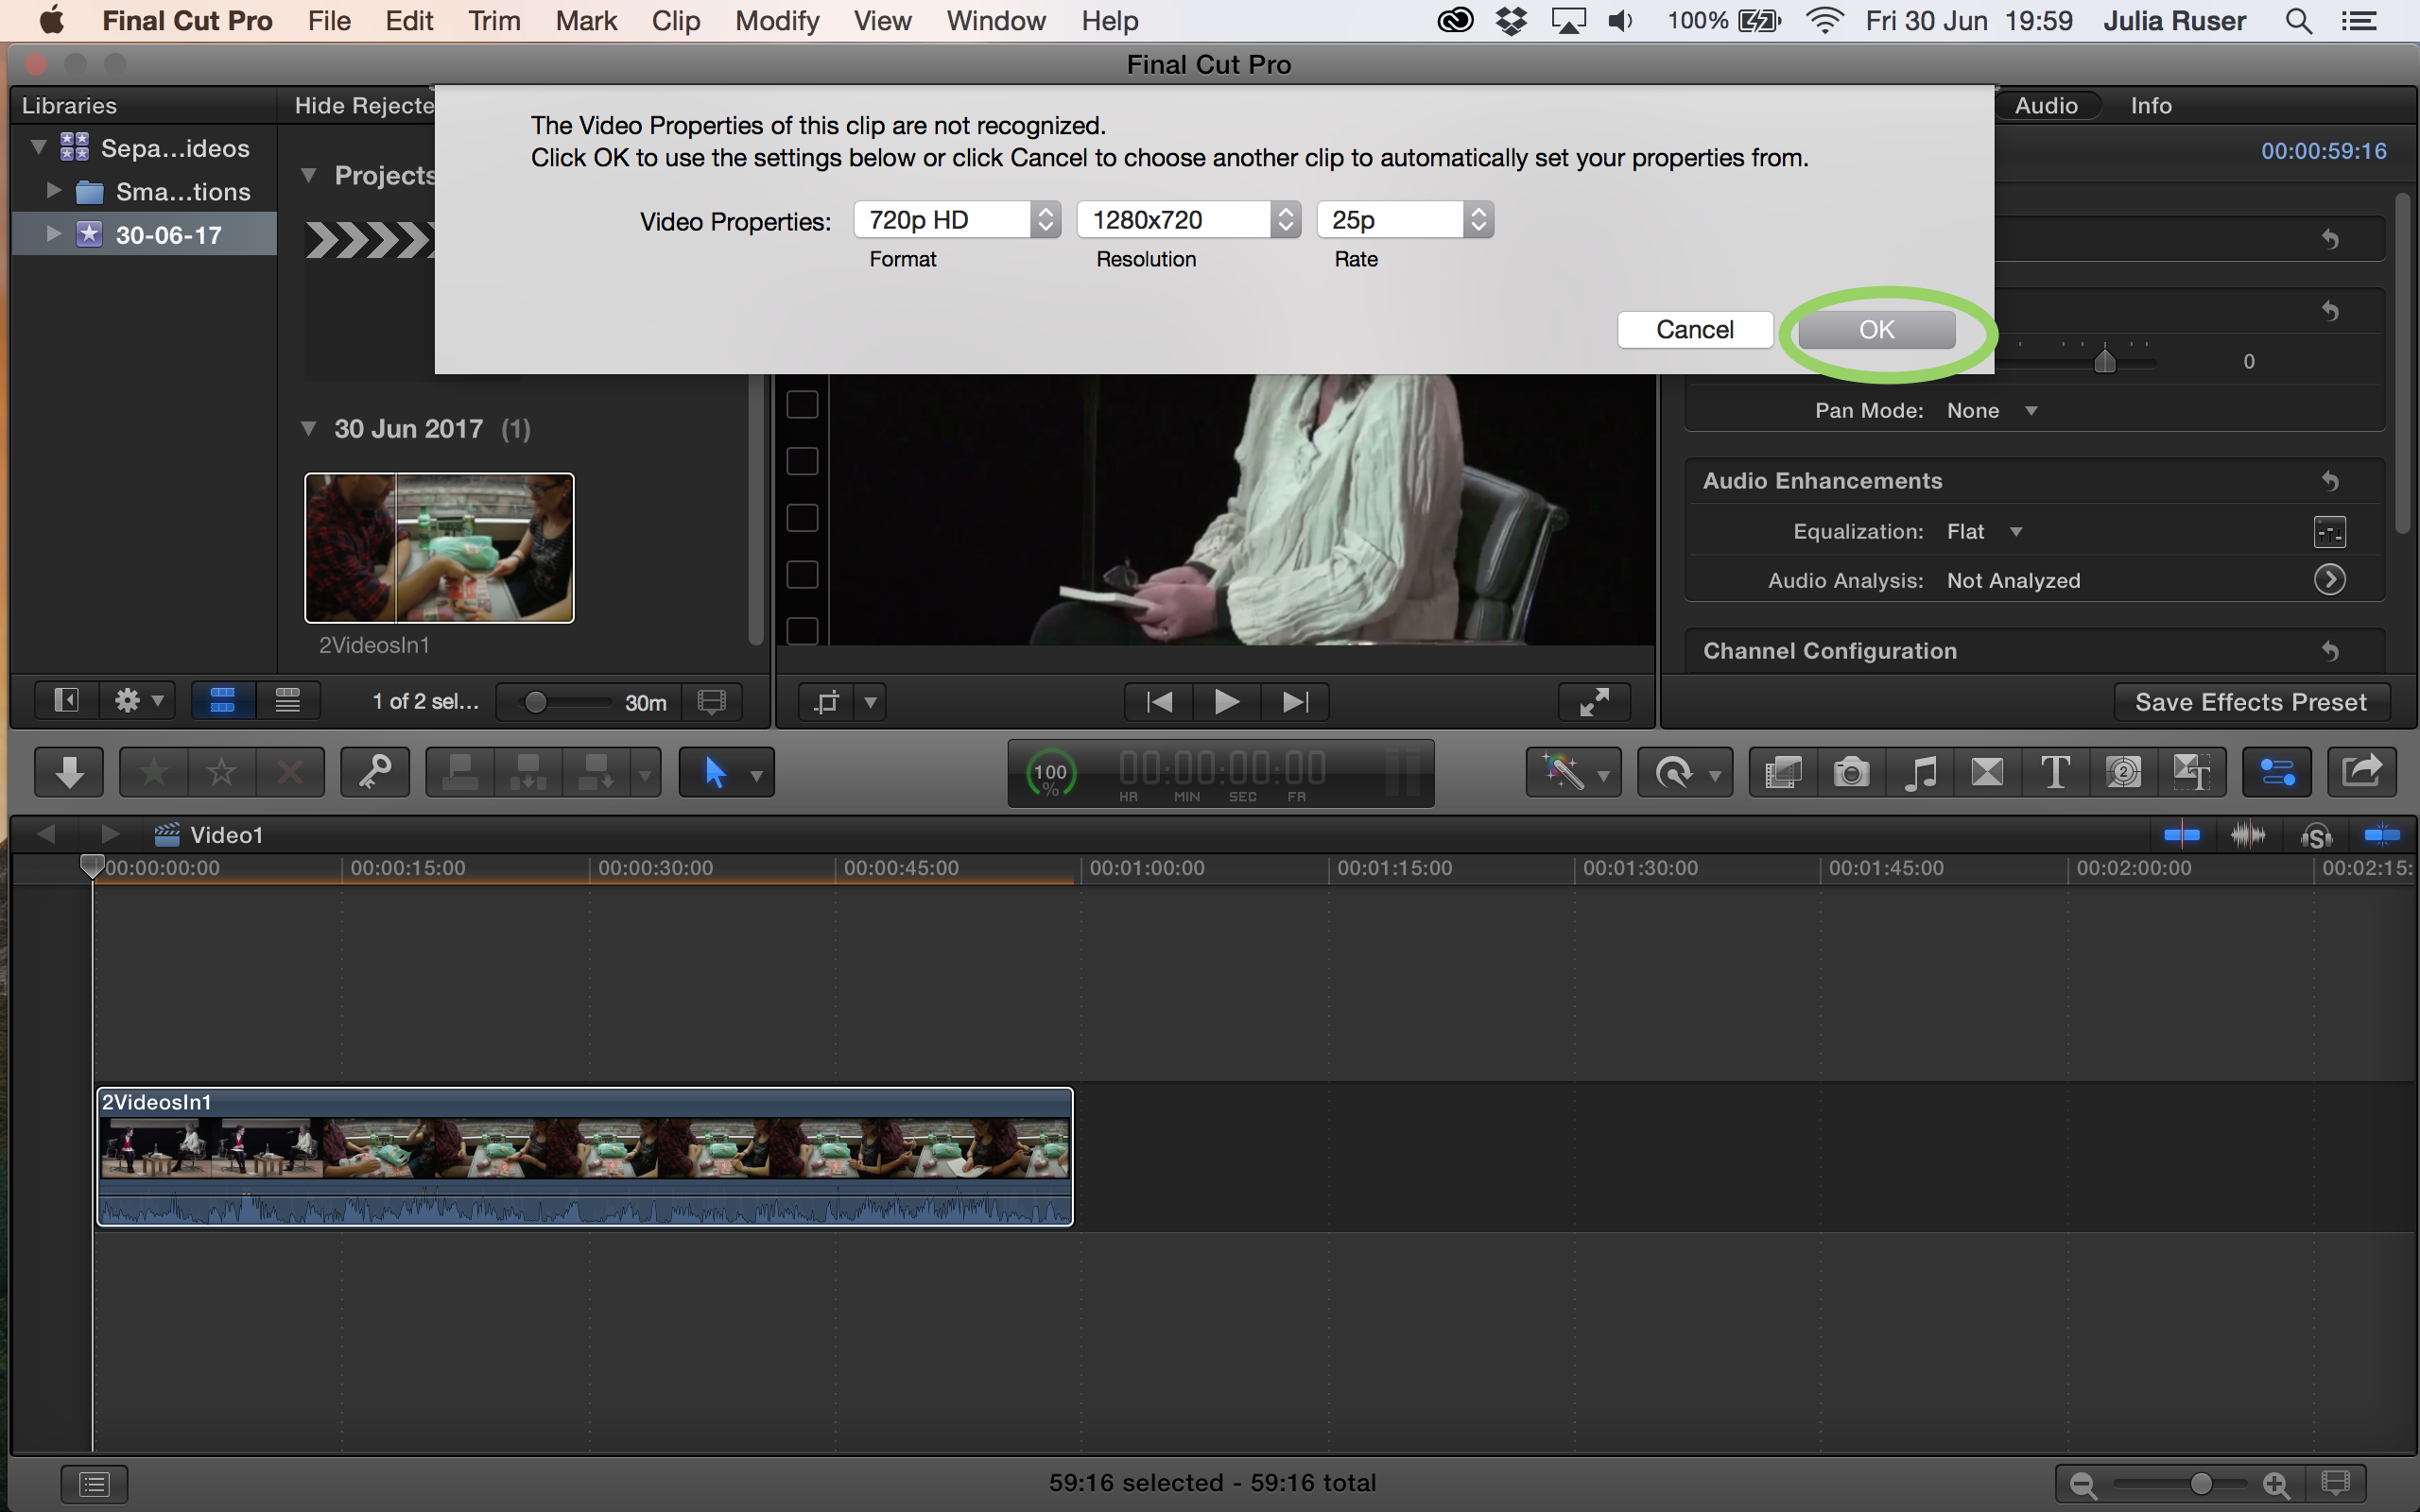
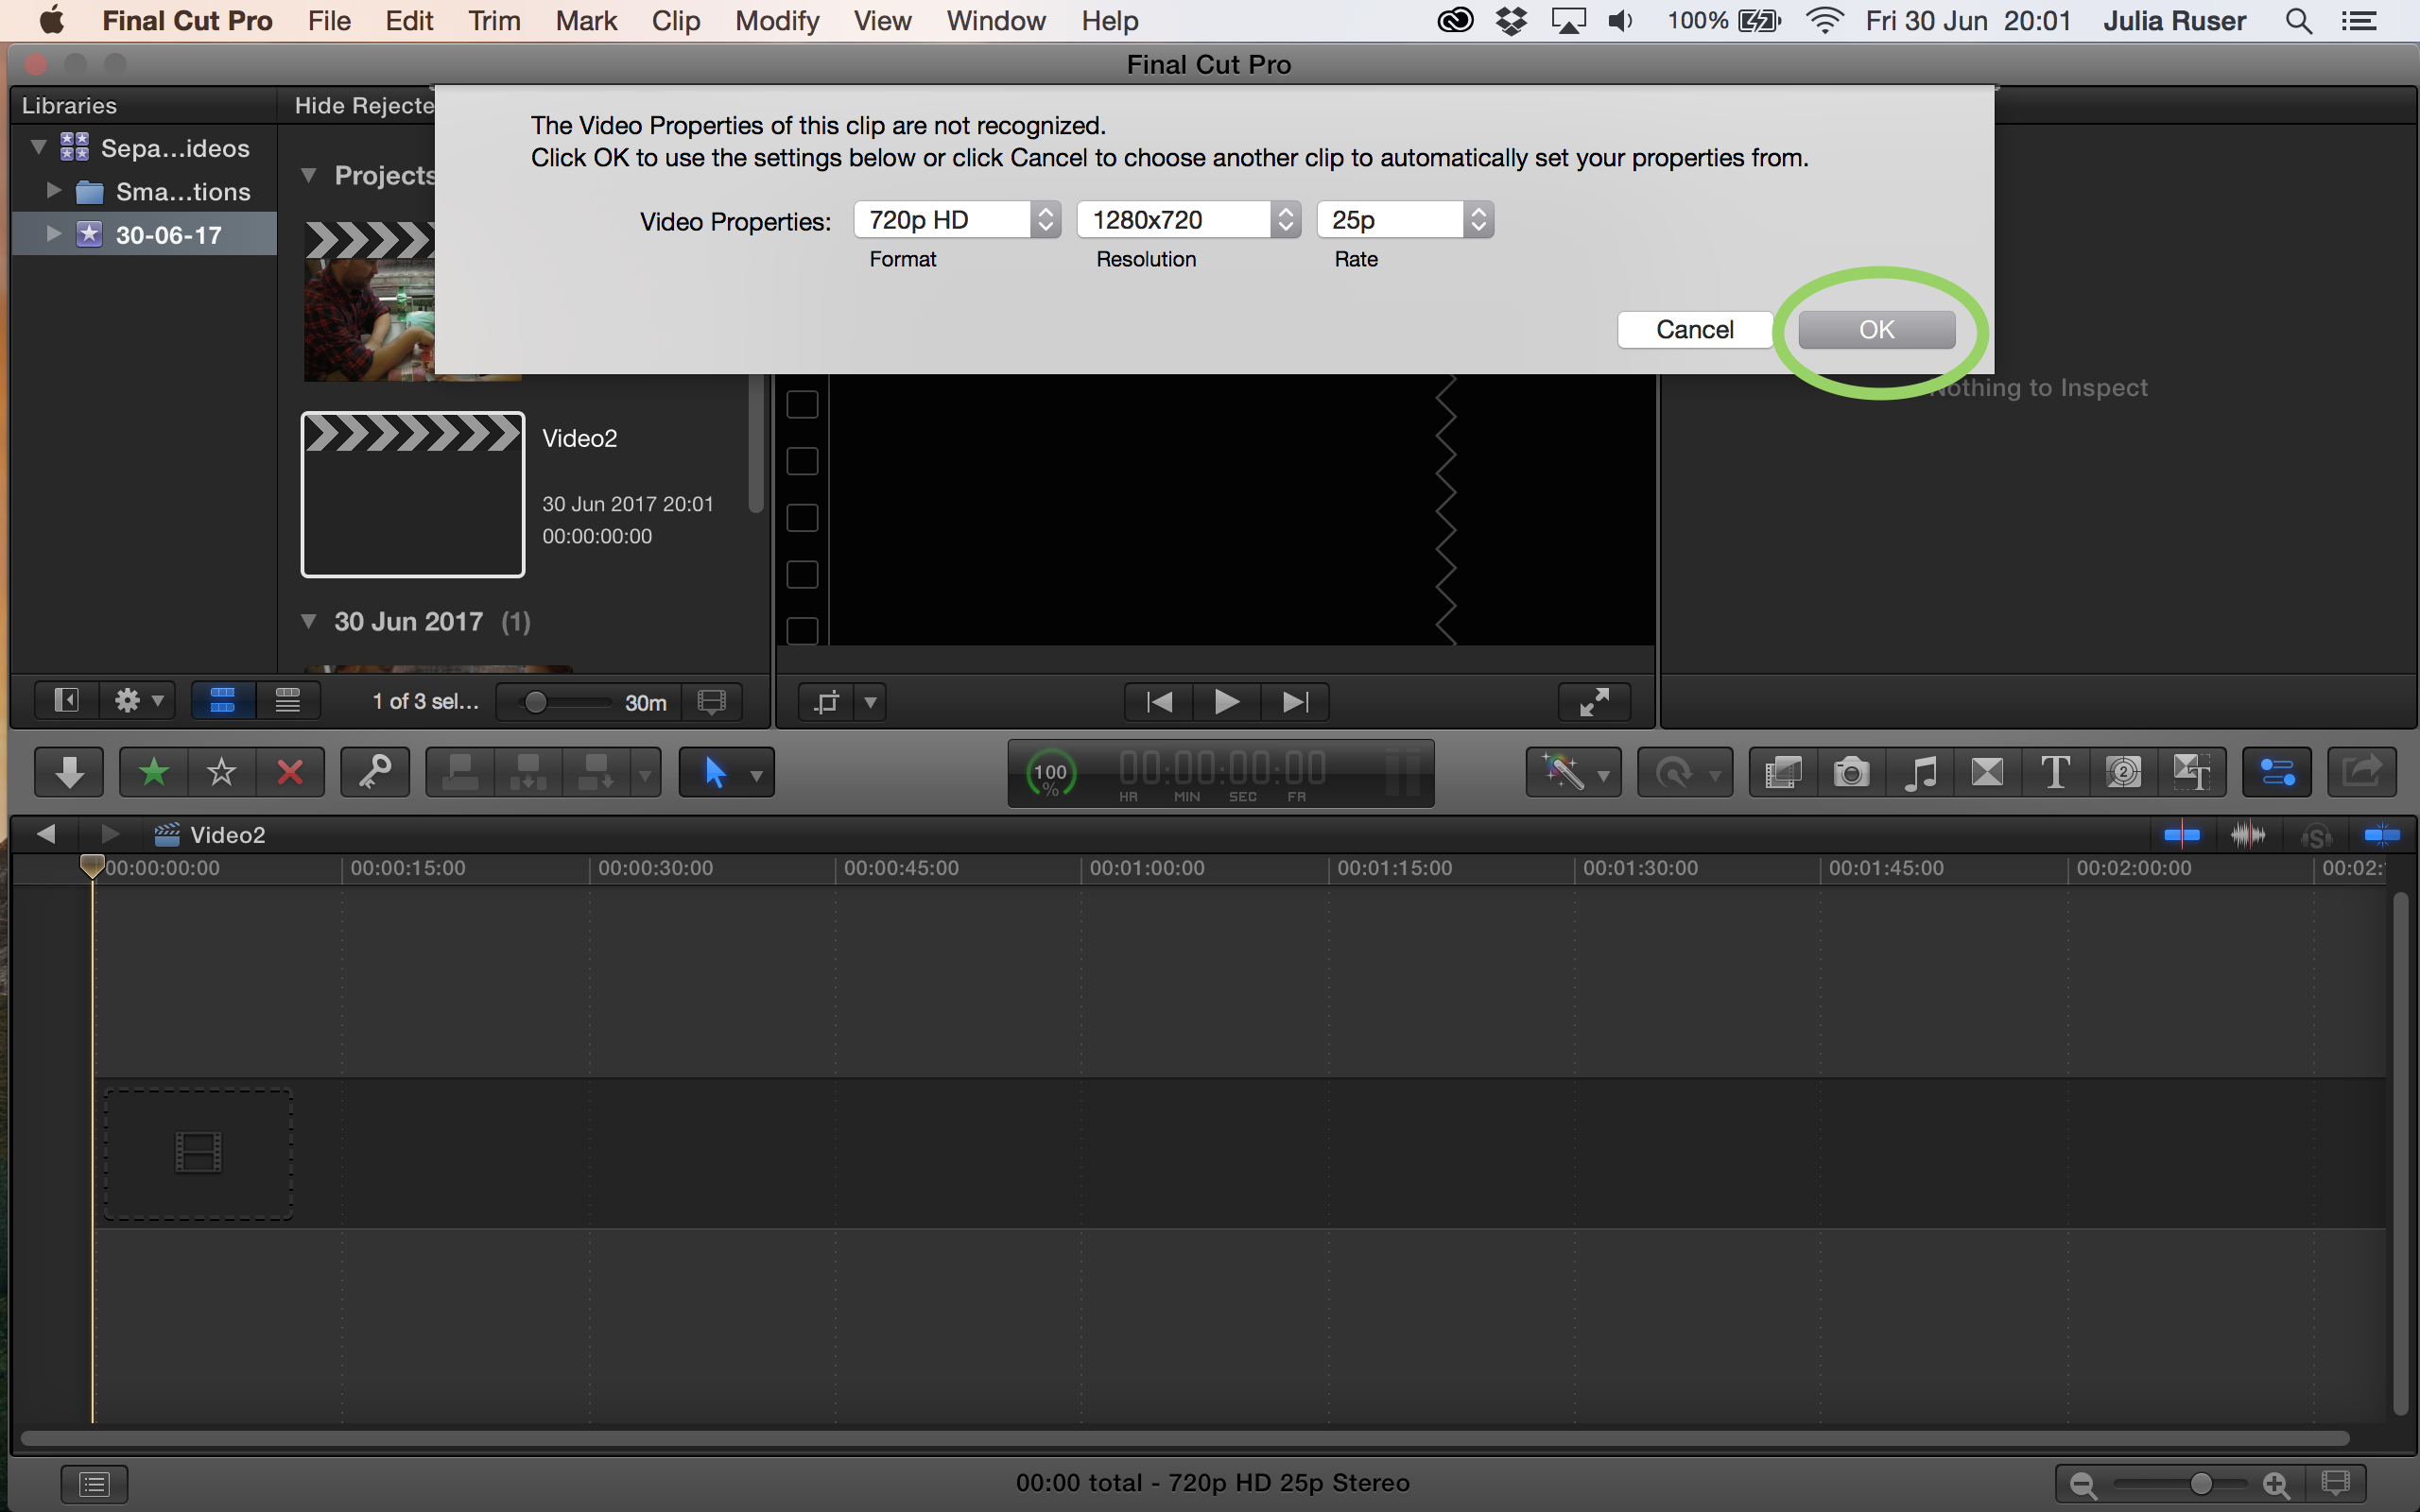
8. If this window appears, click “OK”
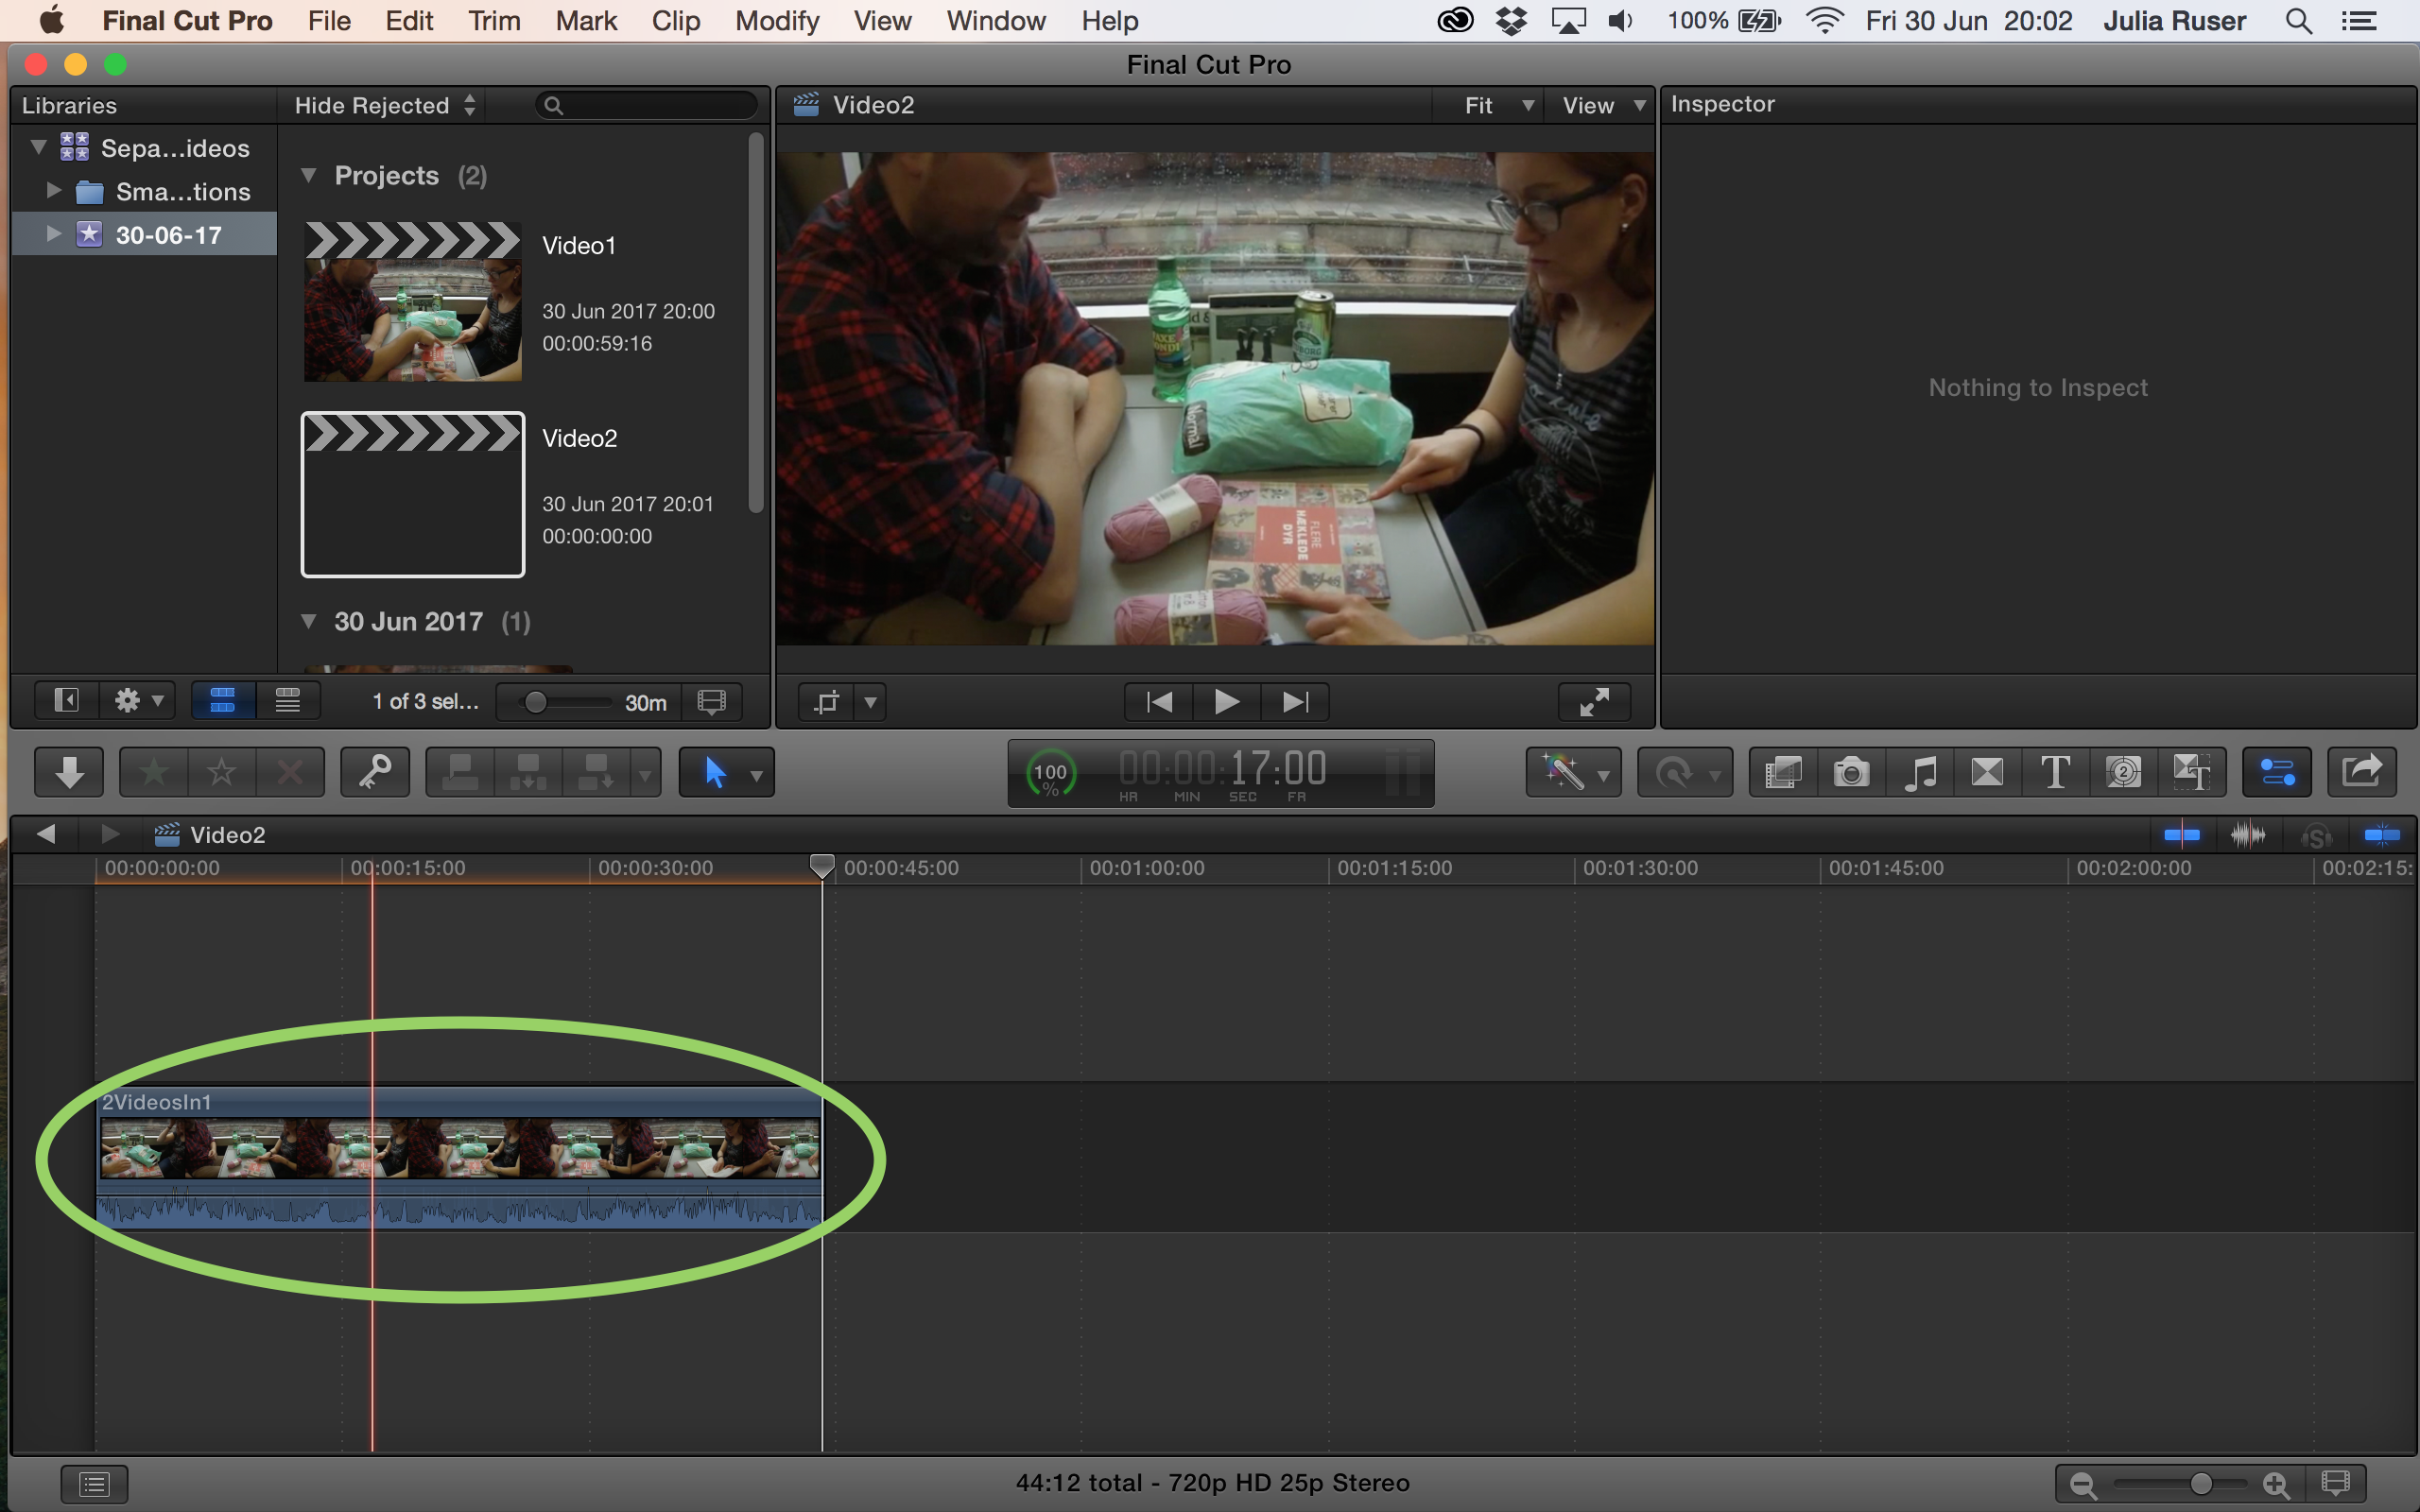
9. Click on “Tools” and click “Zoom”. Find the part of the clip where the first video ends and the second begins. Now click on that point in the clip until you can clearly see where you need to cut.


10. Go to “Tools” and click “Blade”

11. Hover the cursor over the part where the first video ends and the second begins. Once you found that point, click to cut the clip.


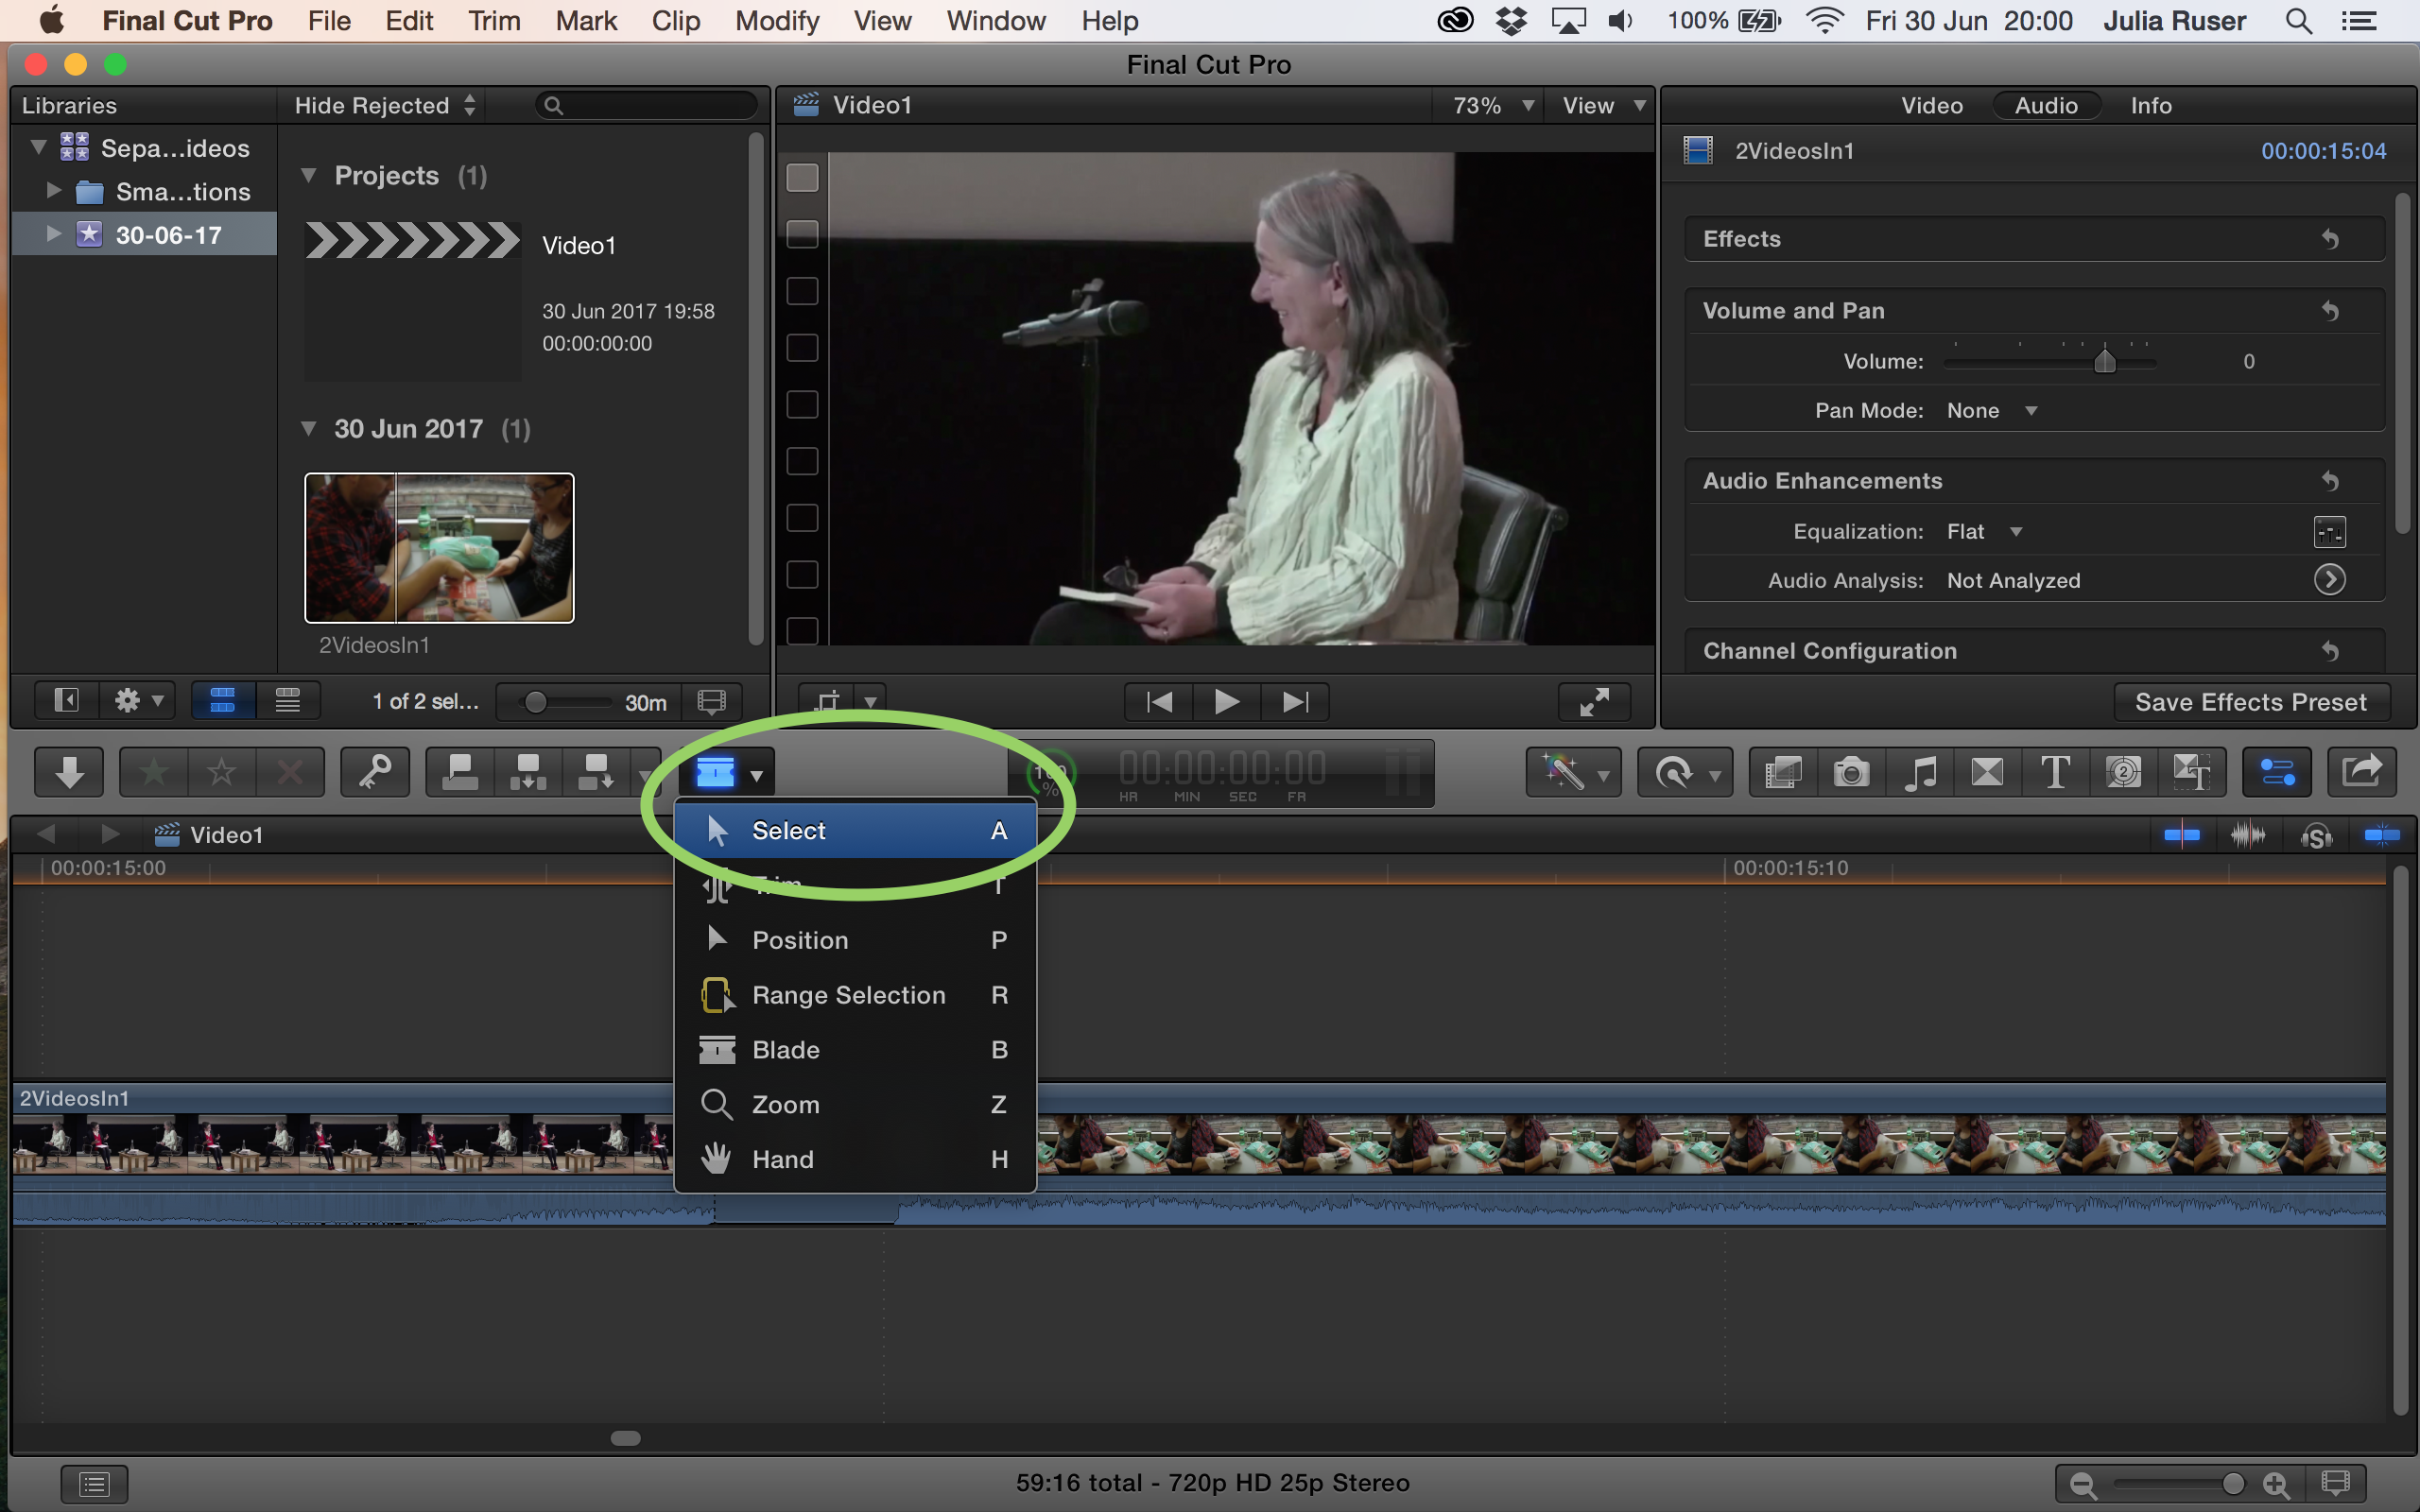
12. Go to “Tools” again and click “Select”
13. Go to the “Zoom” option in the bottom right and click on minus (or press “Shift+Z”)

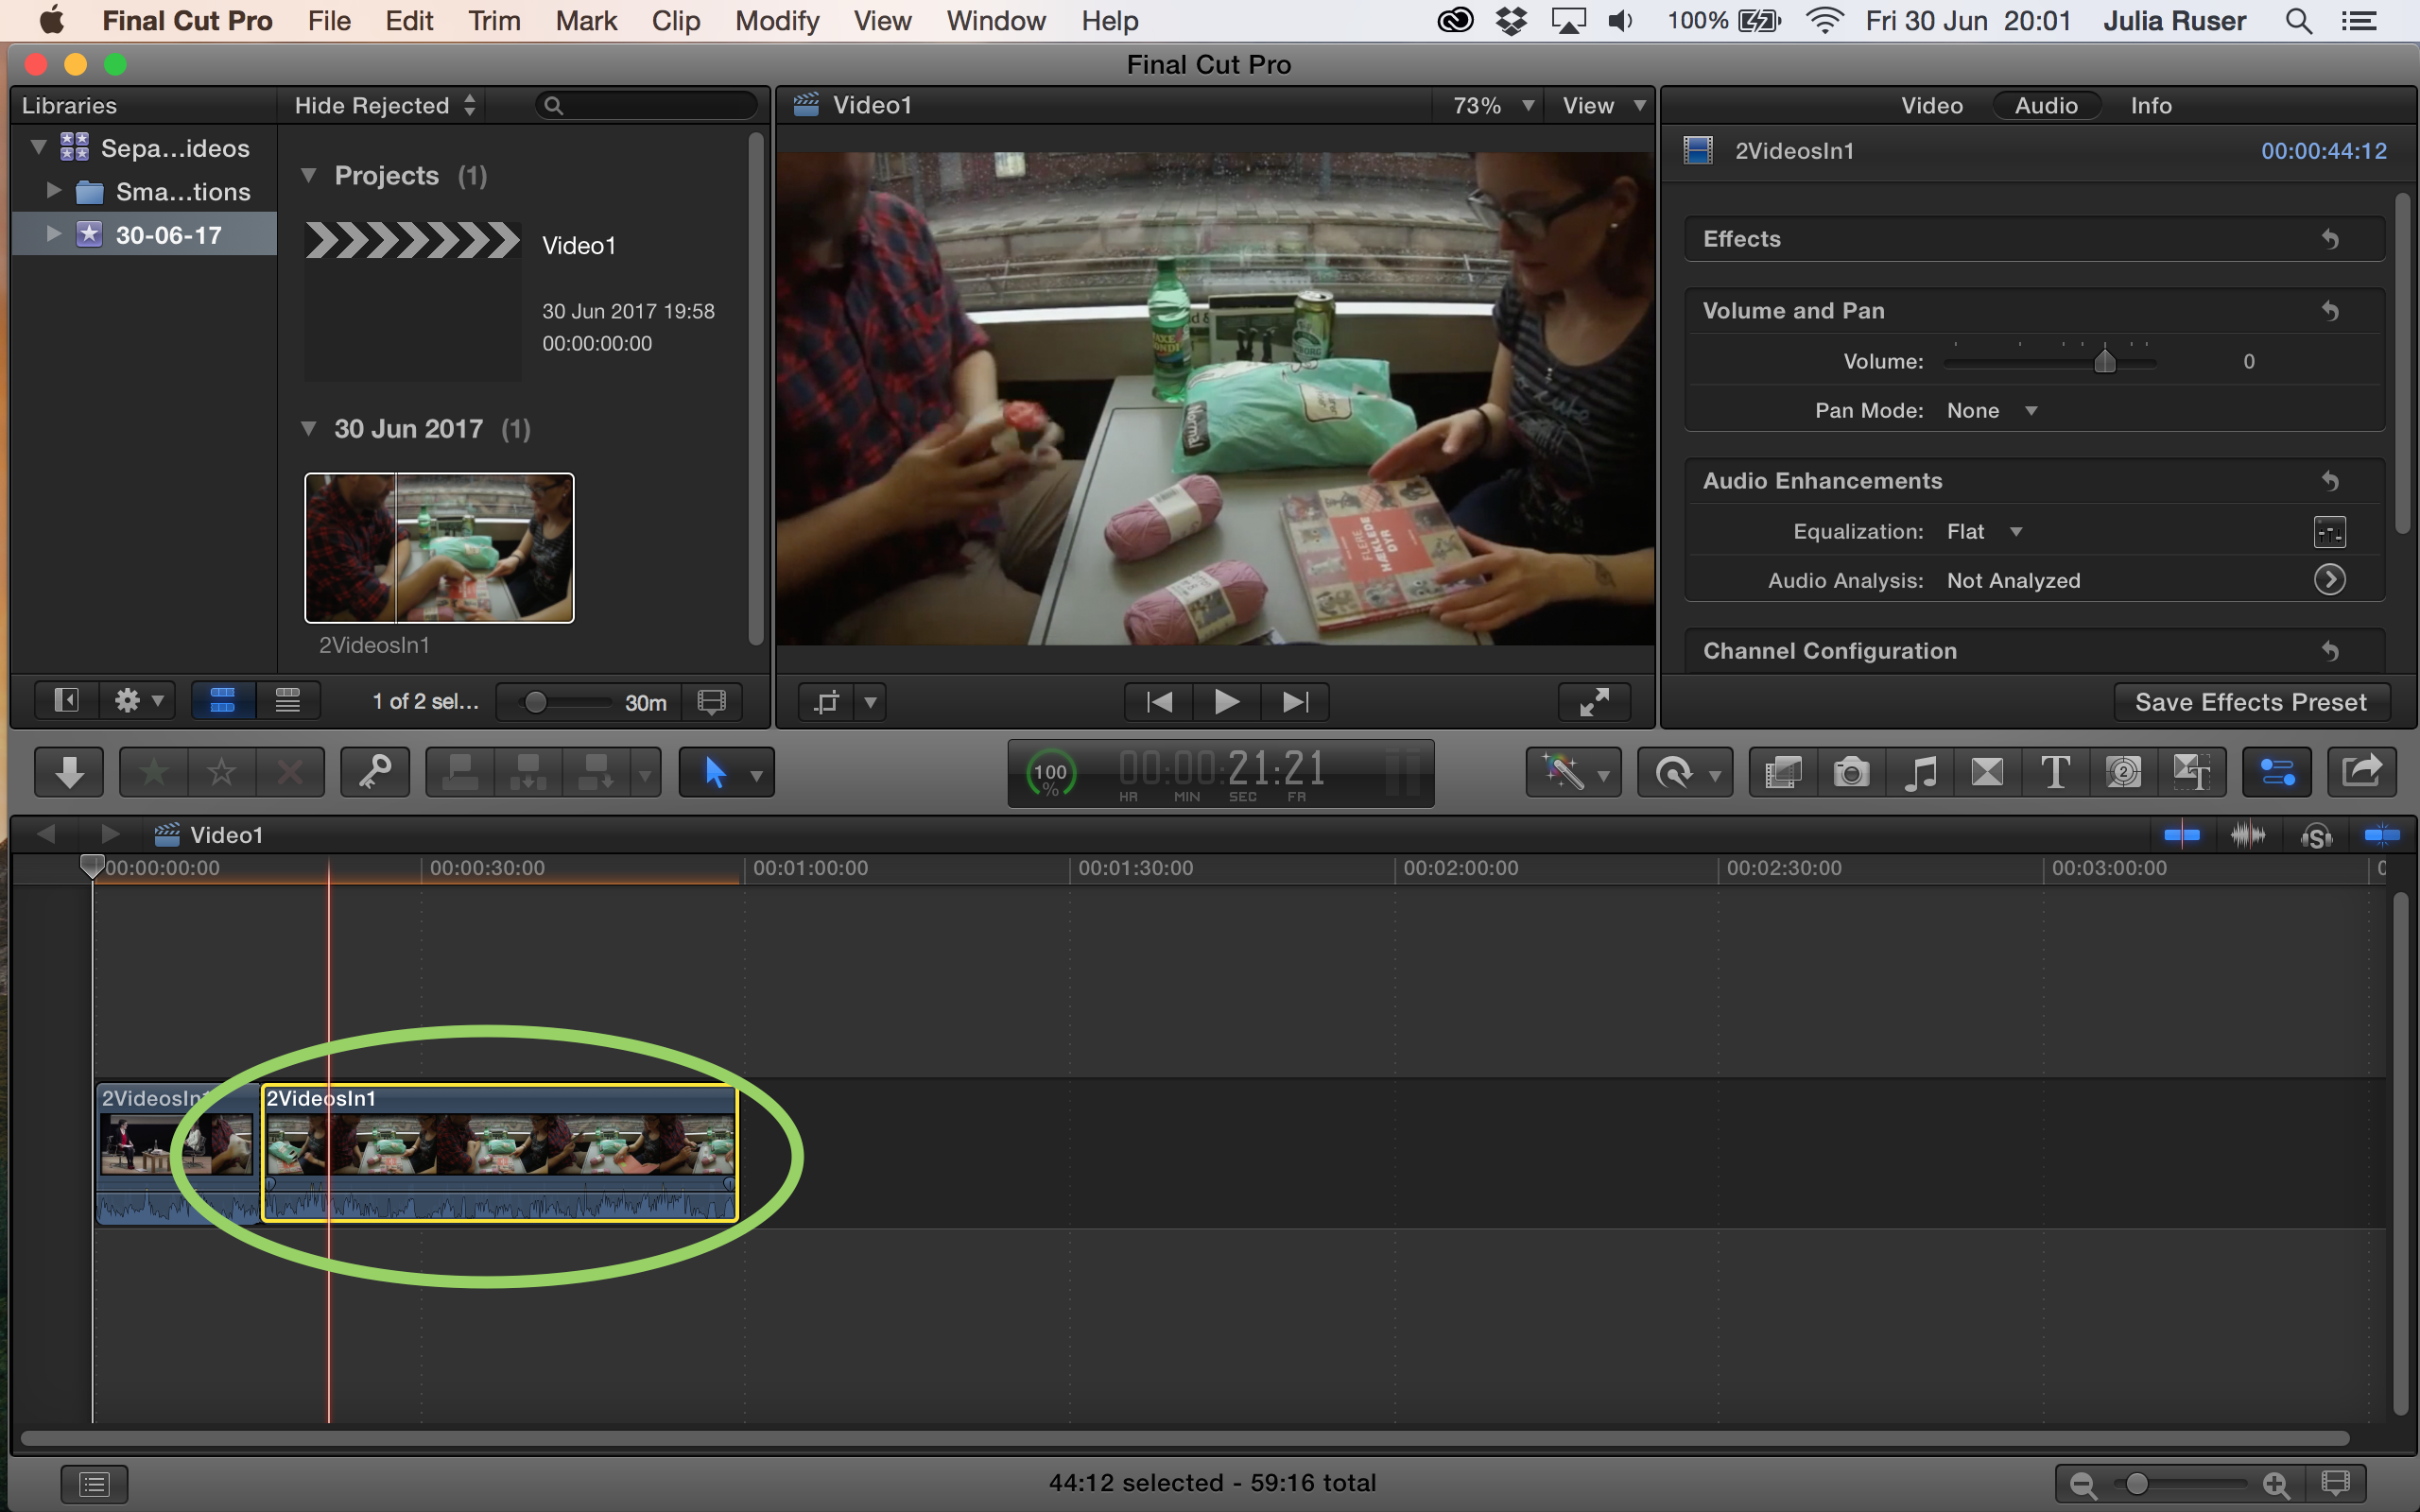
14. Select one of the clips in the timeline and press “cmd+c” to copy the clip
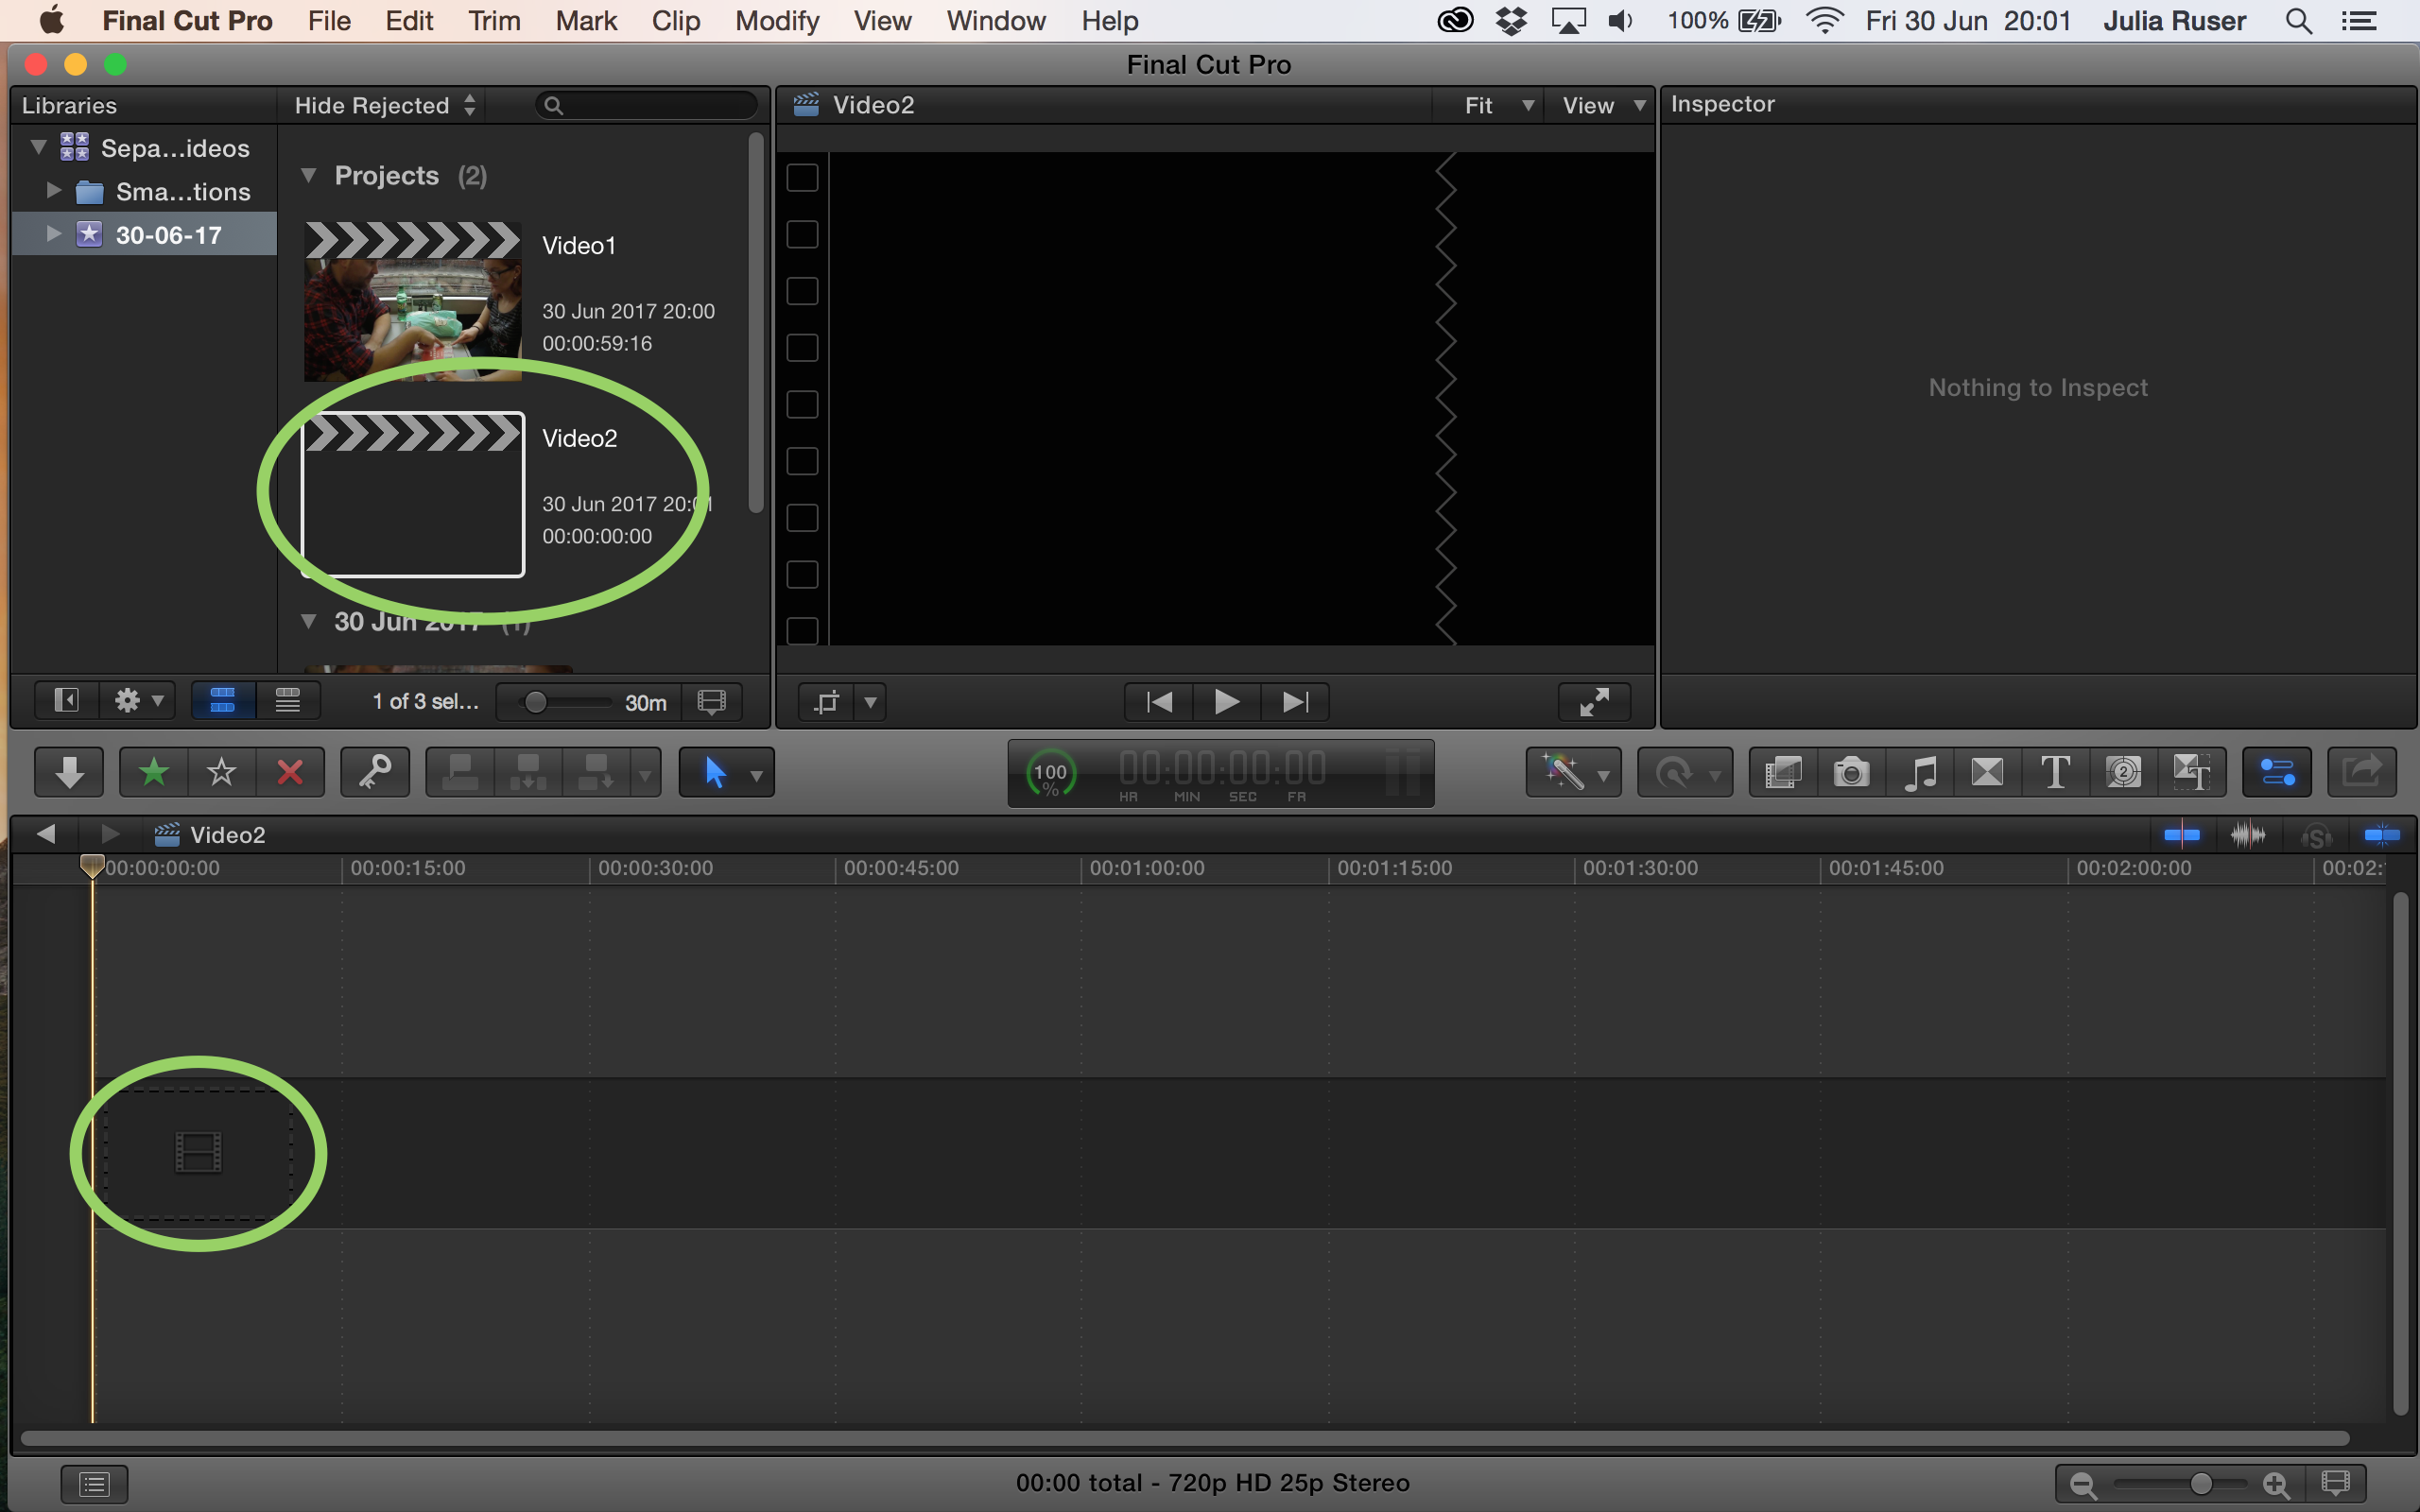
15. Ctrl click on “Event” and click “New Project”
16. Give your second project a name and click “OK”

17. Double click on the new project and click in the timeline, then press “cmd+v” to paste the clip you copied before
18. If this window pops up, click “OK”
19. Double click on the first project to open it again
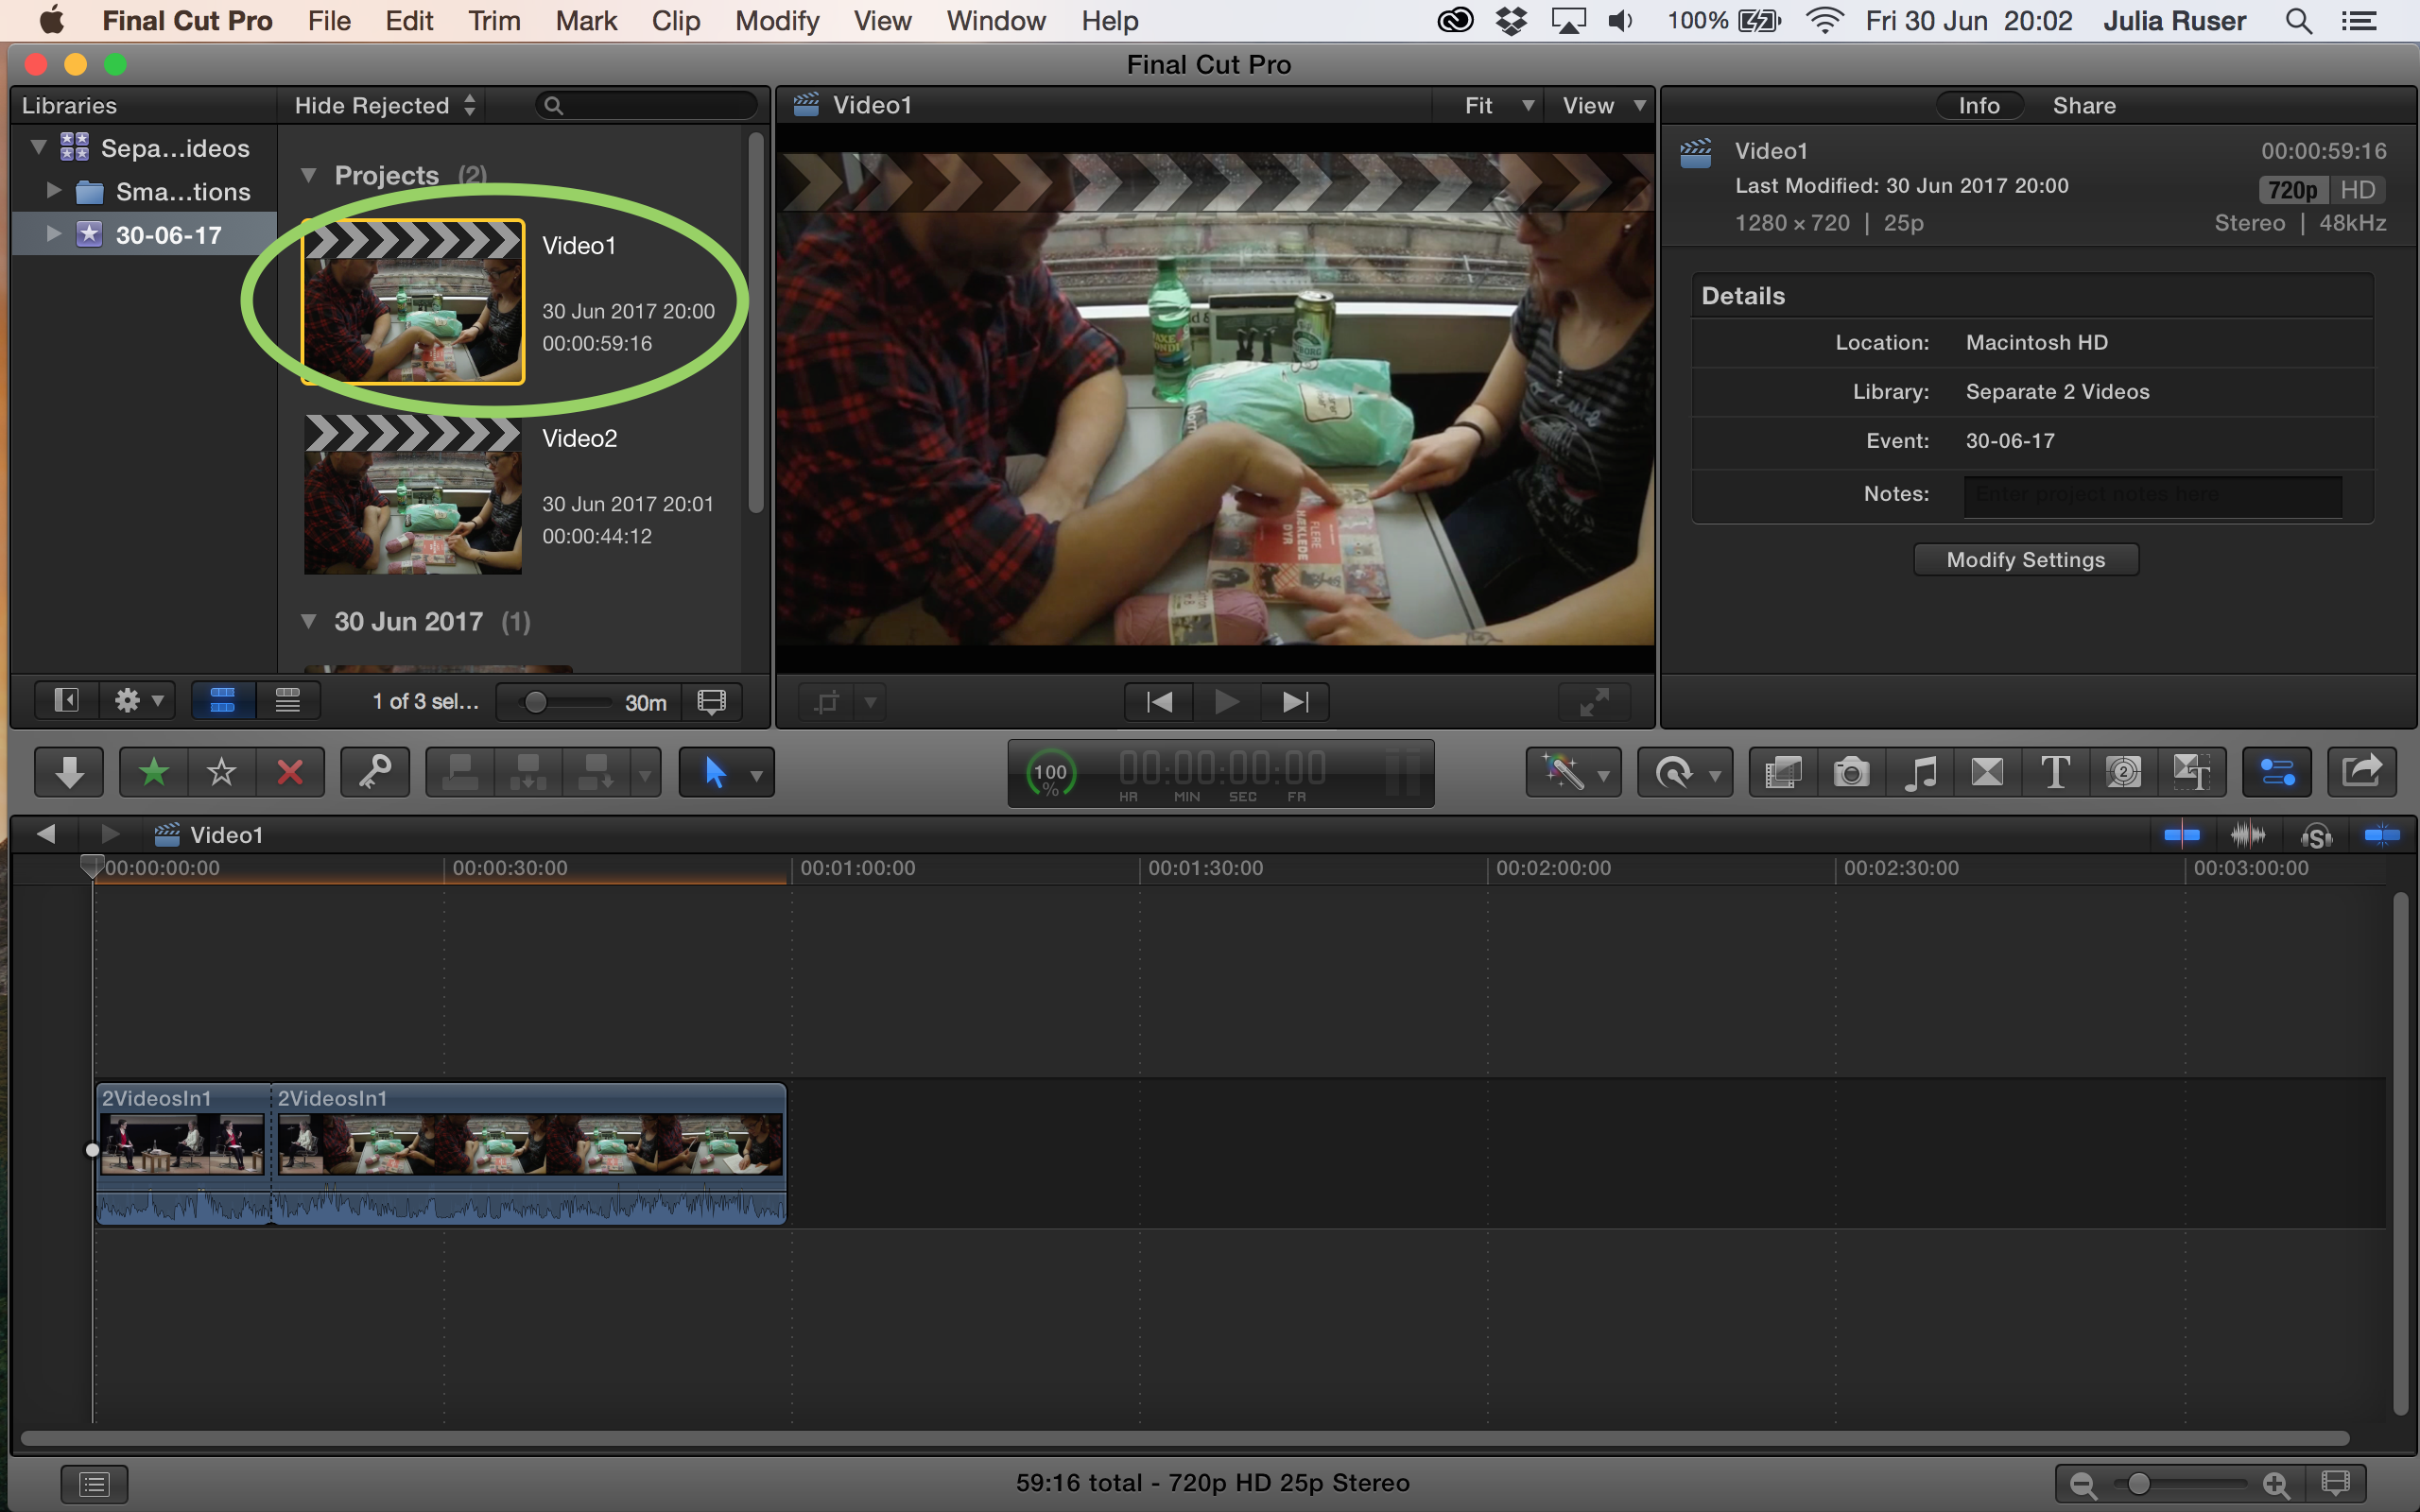
20. Click on the clip you copied before and delete it by pressing backspace (<– or delete)


21. Now each project should contain one of the two clips

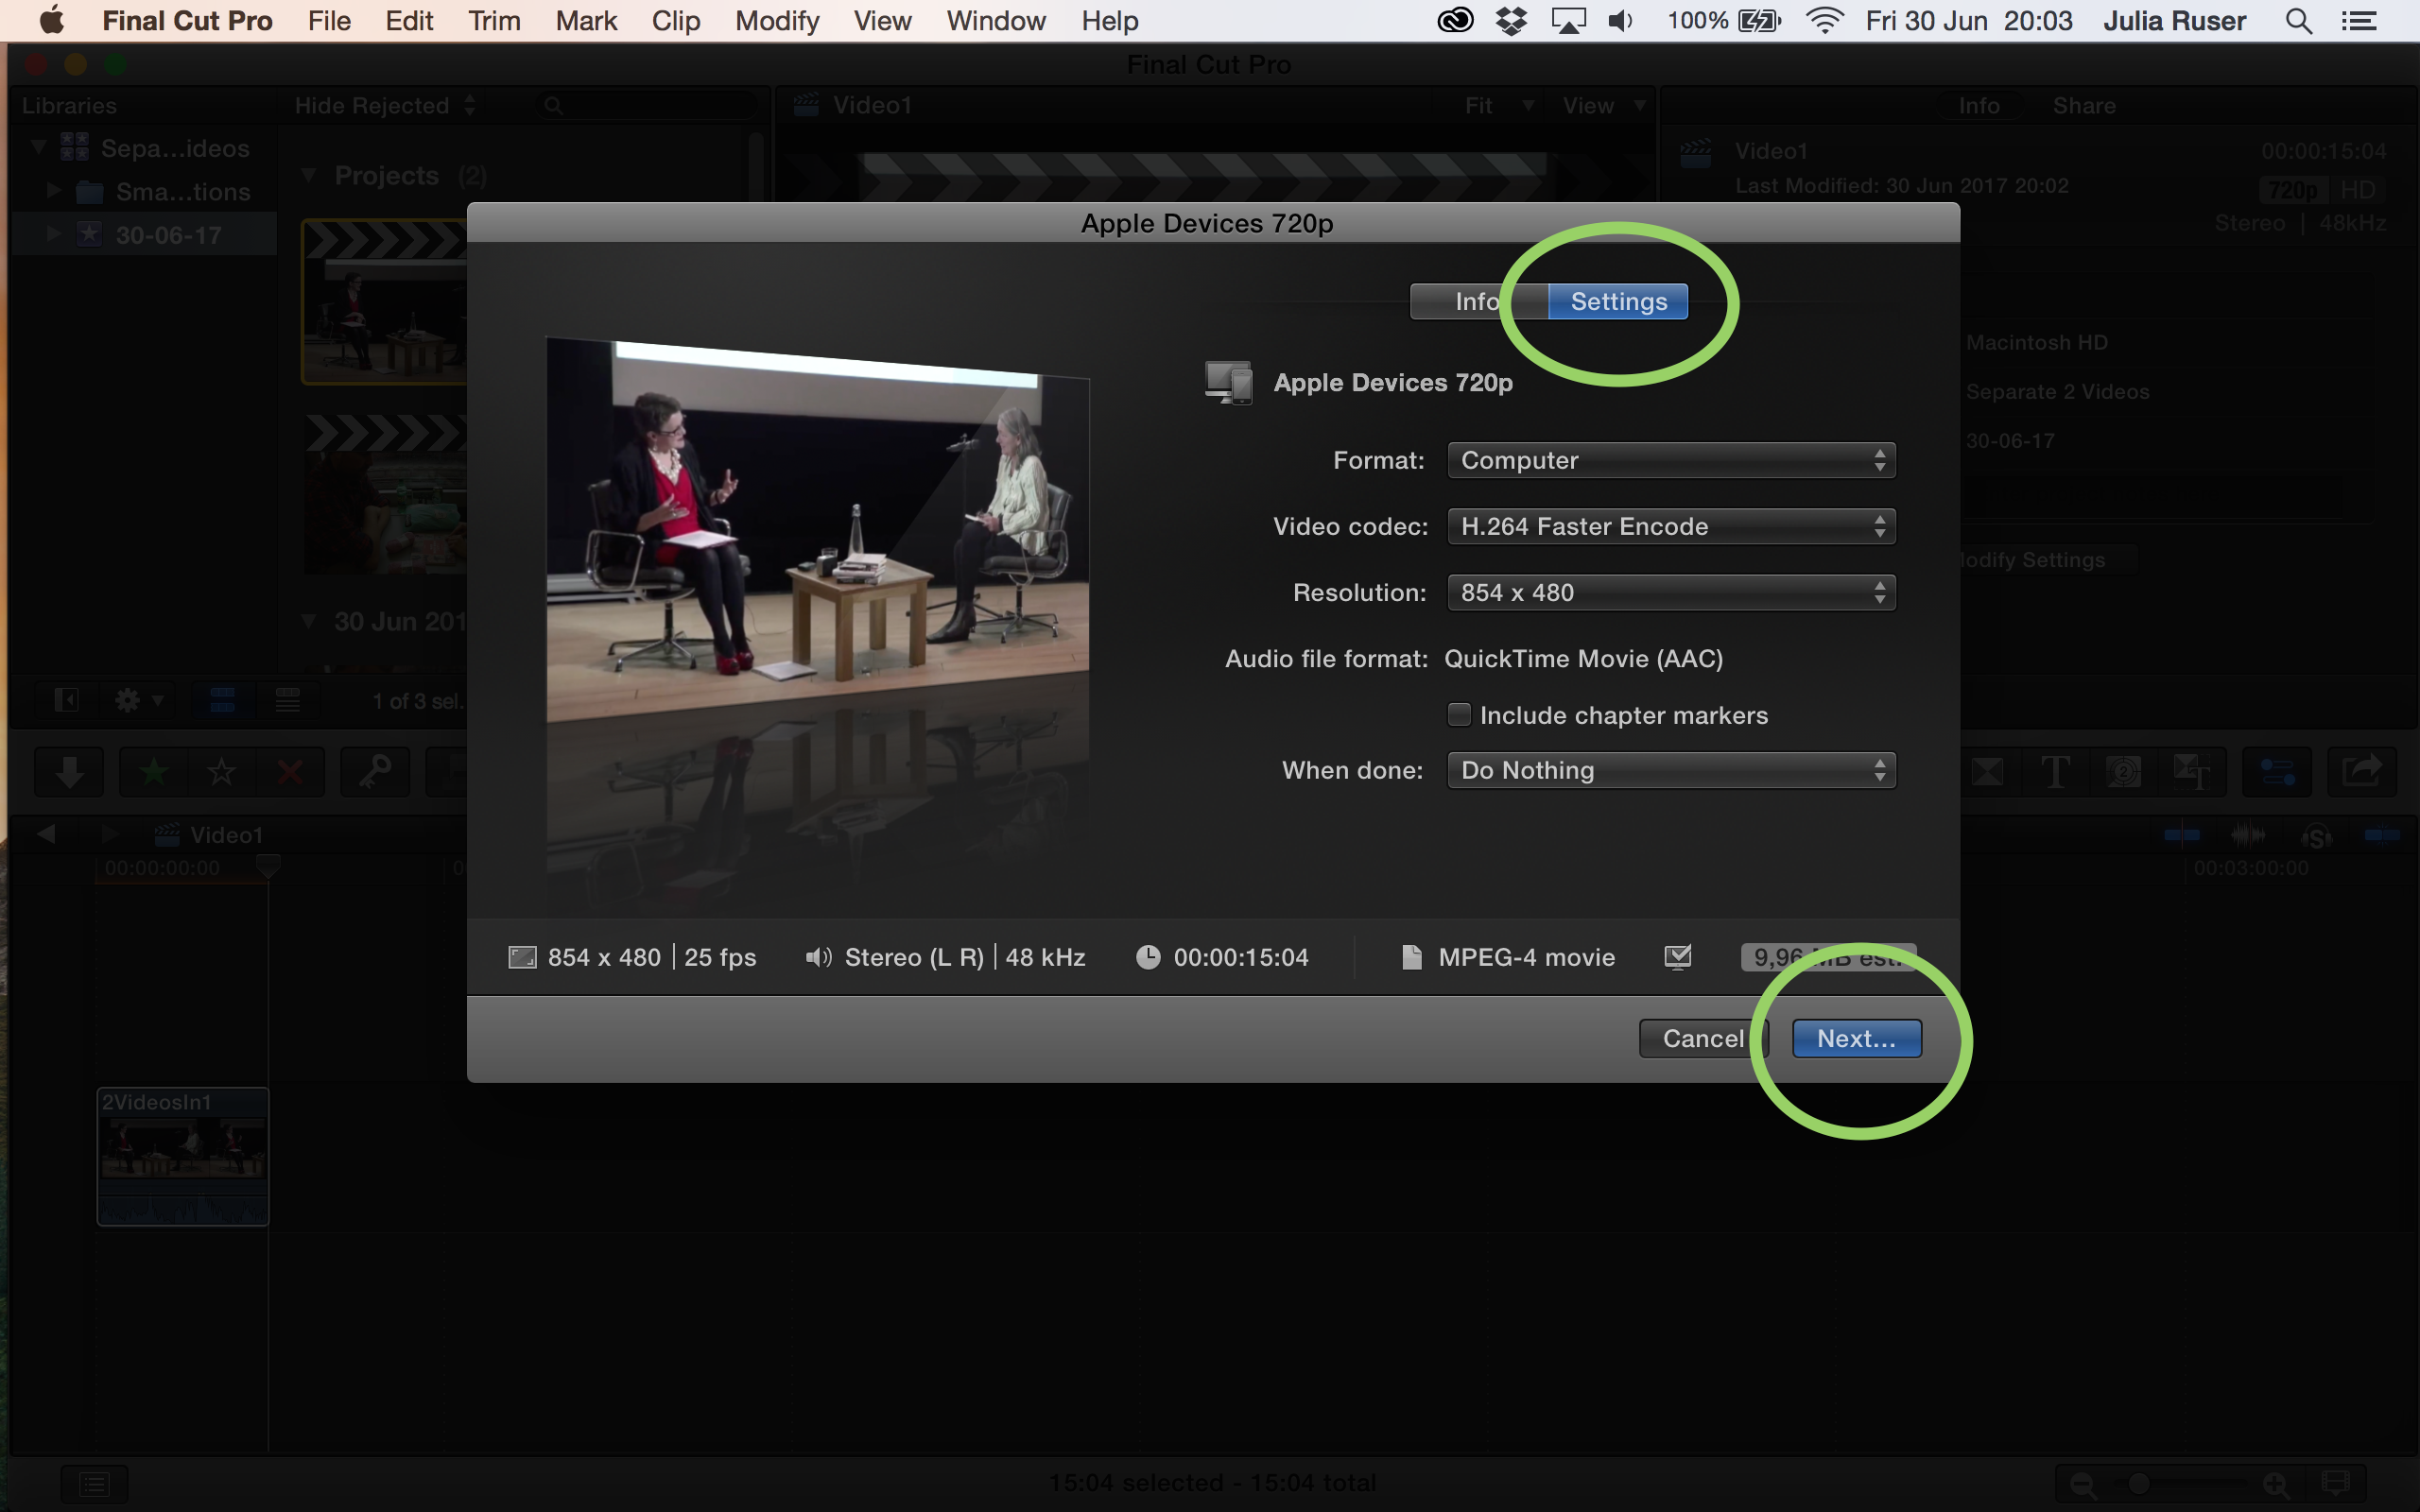
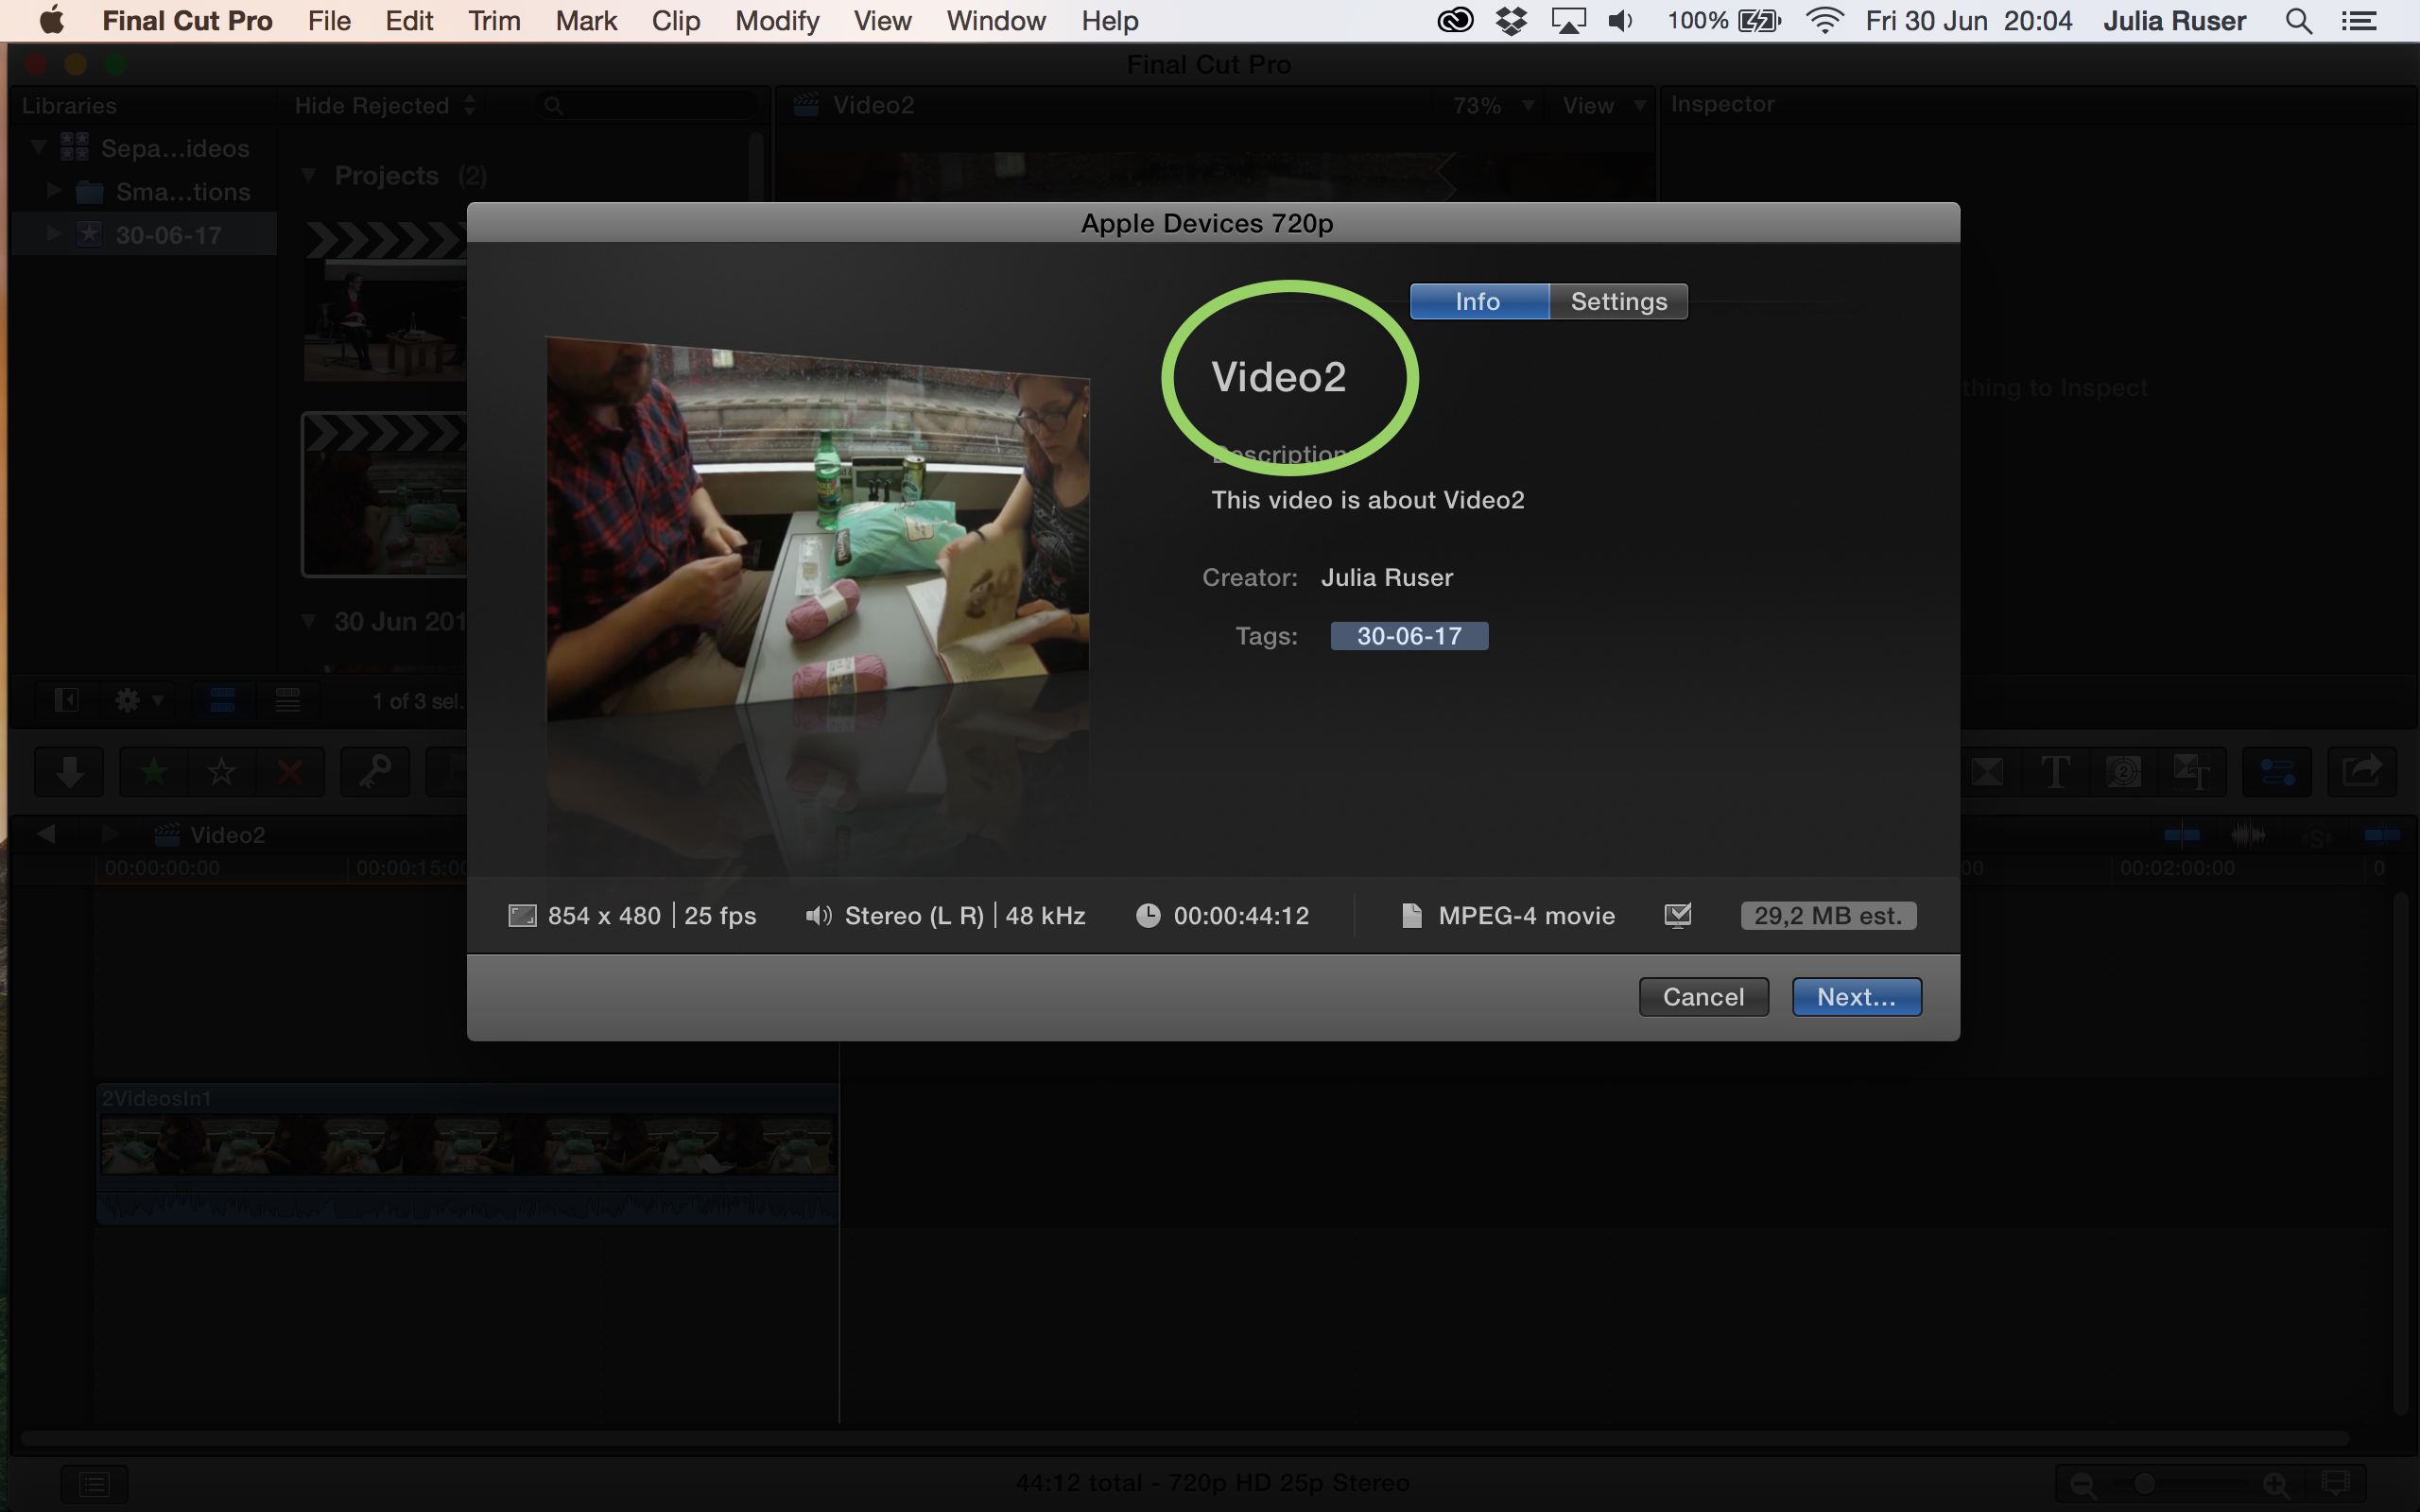
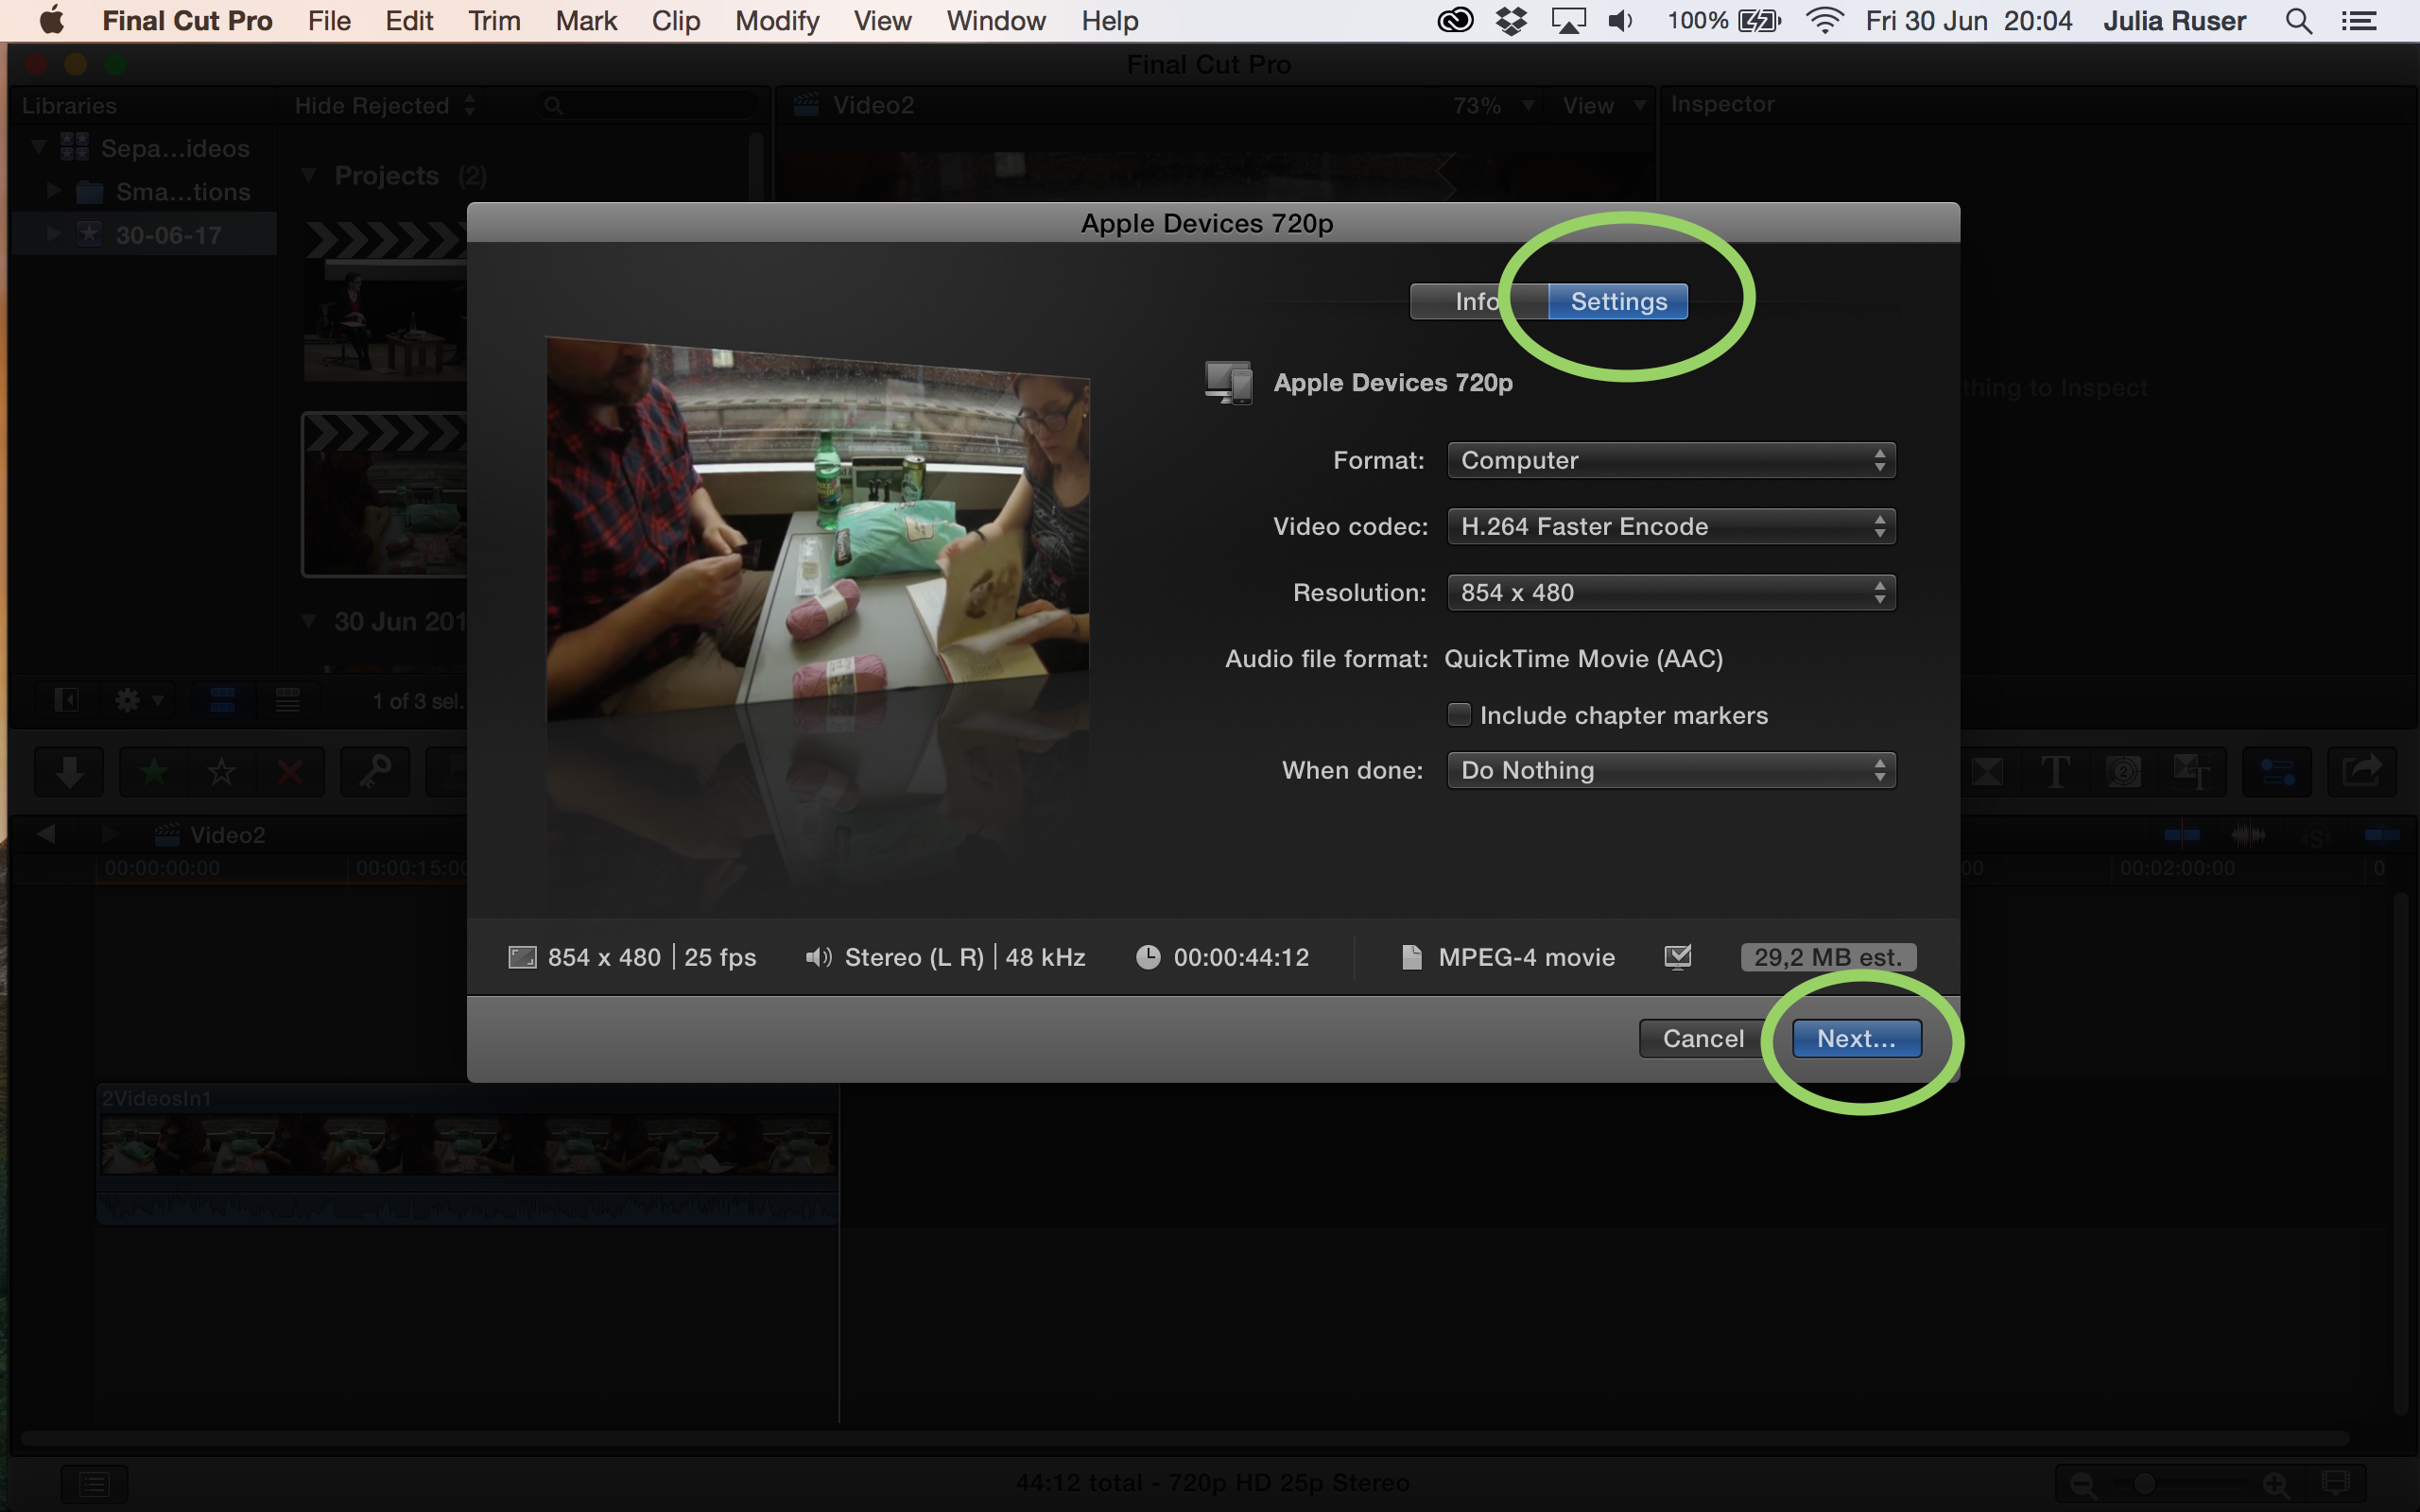
22. Click on the “Share” button and click “Apple Devices 720p”

23. Change the name of the file if necessary and change the settings if necessary, then click “Next” (In the last option under “Settings” select “Do Nothing”, DO NOT select “Add to library”)

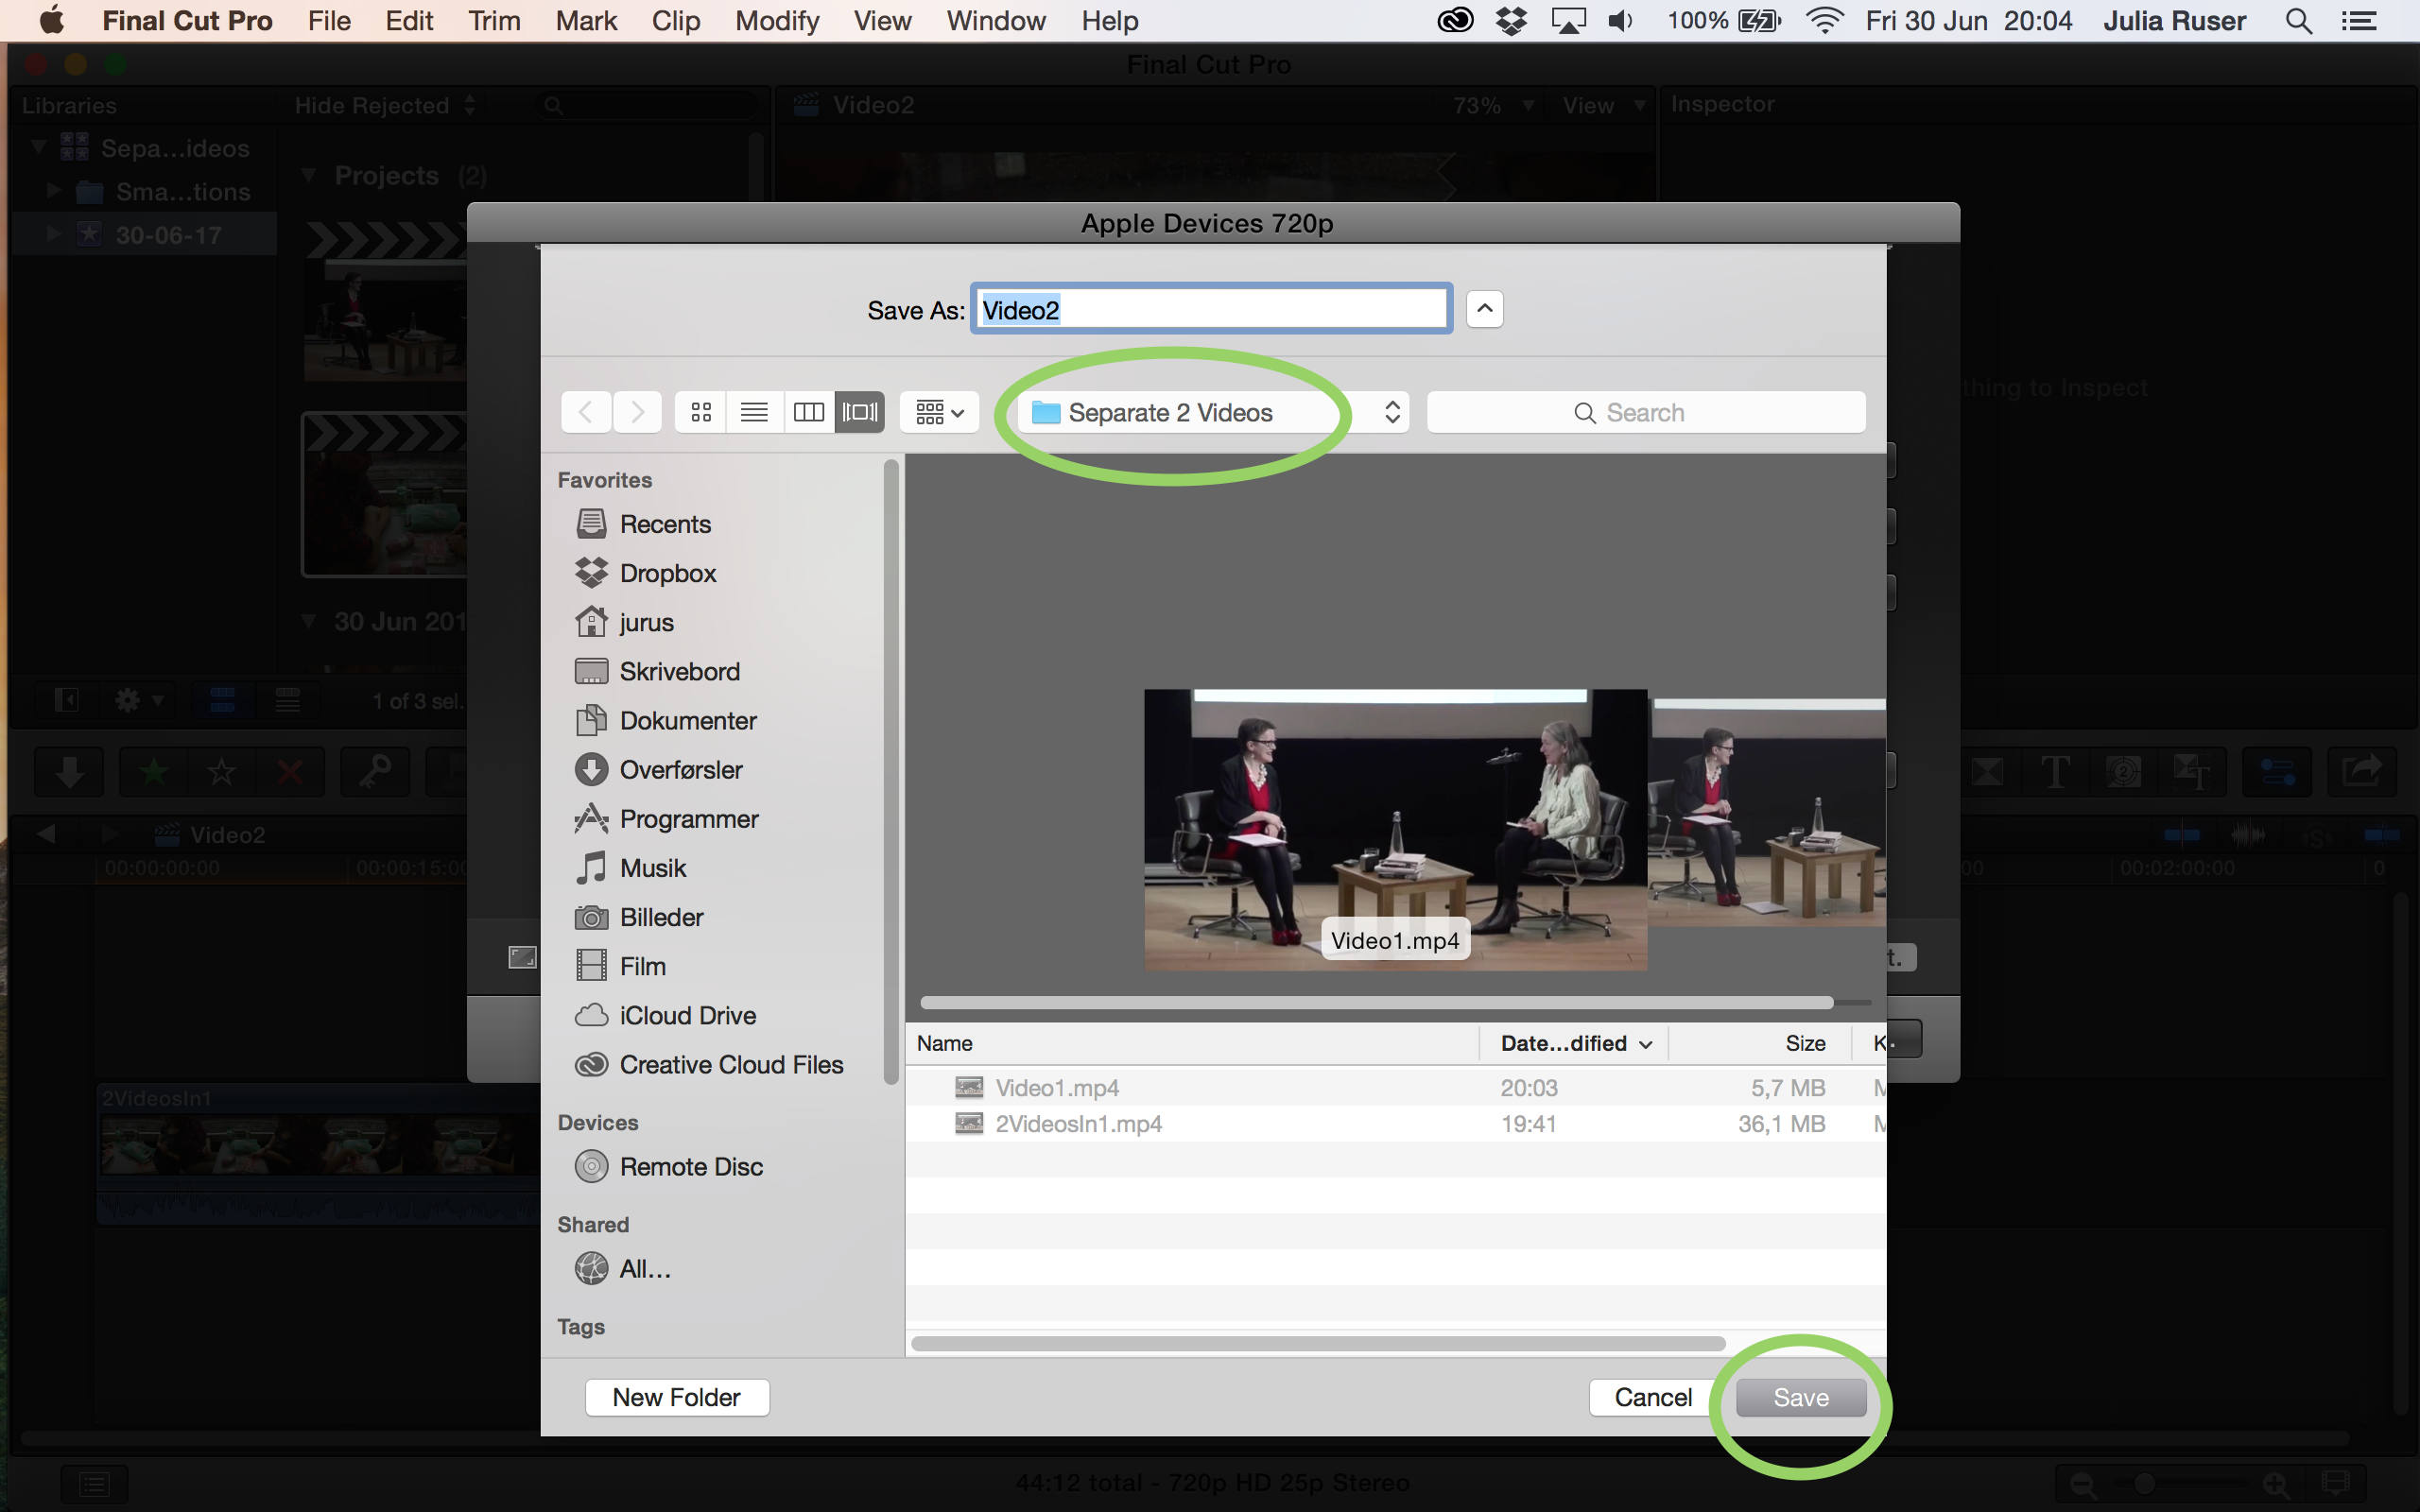
24. Set the destination, click “Save”

25. Now double click the other project, and again: Go to “Share”, click “Apple Devices 720p”, change name, click “Next”, set destination and click “Save”

Done.
