This tutorial shows you a way to change the ratio of your images for use on websites. You can download Seashore here: http://seashore.sourceforge.net/The_Seashore_Project/Download.html

This is the final result of this tutorial.
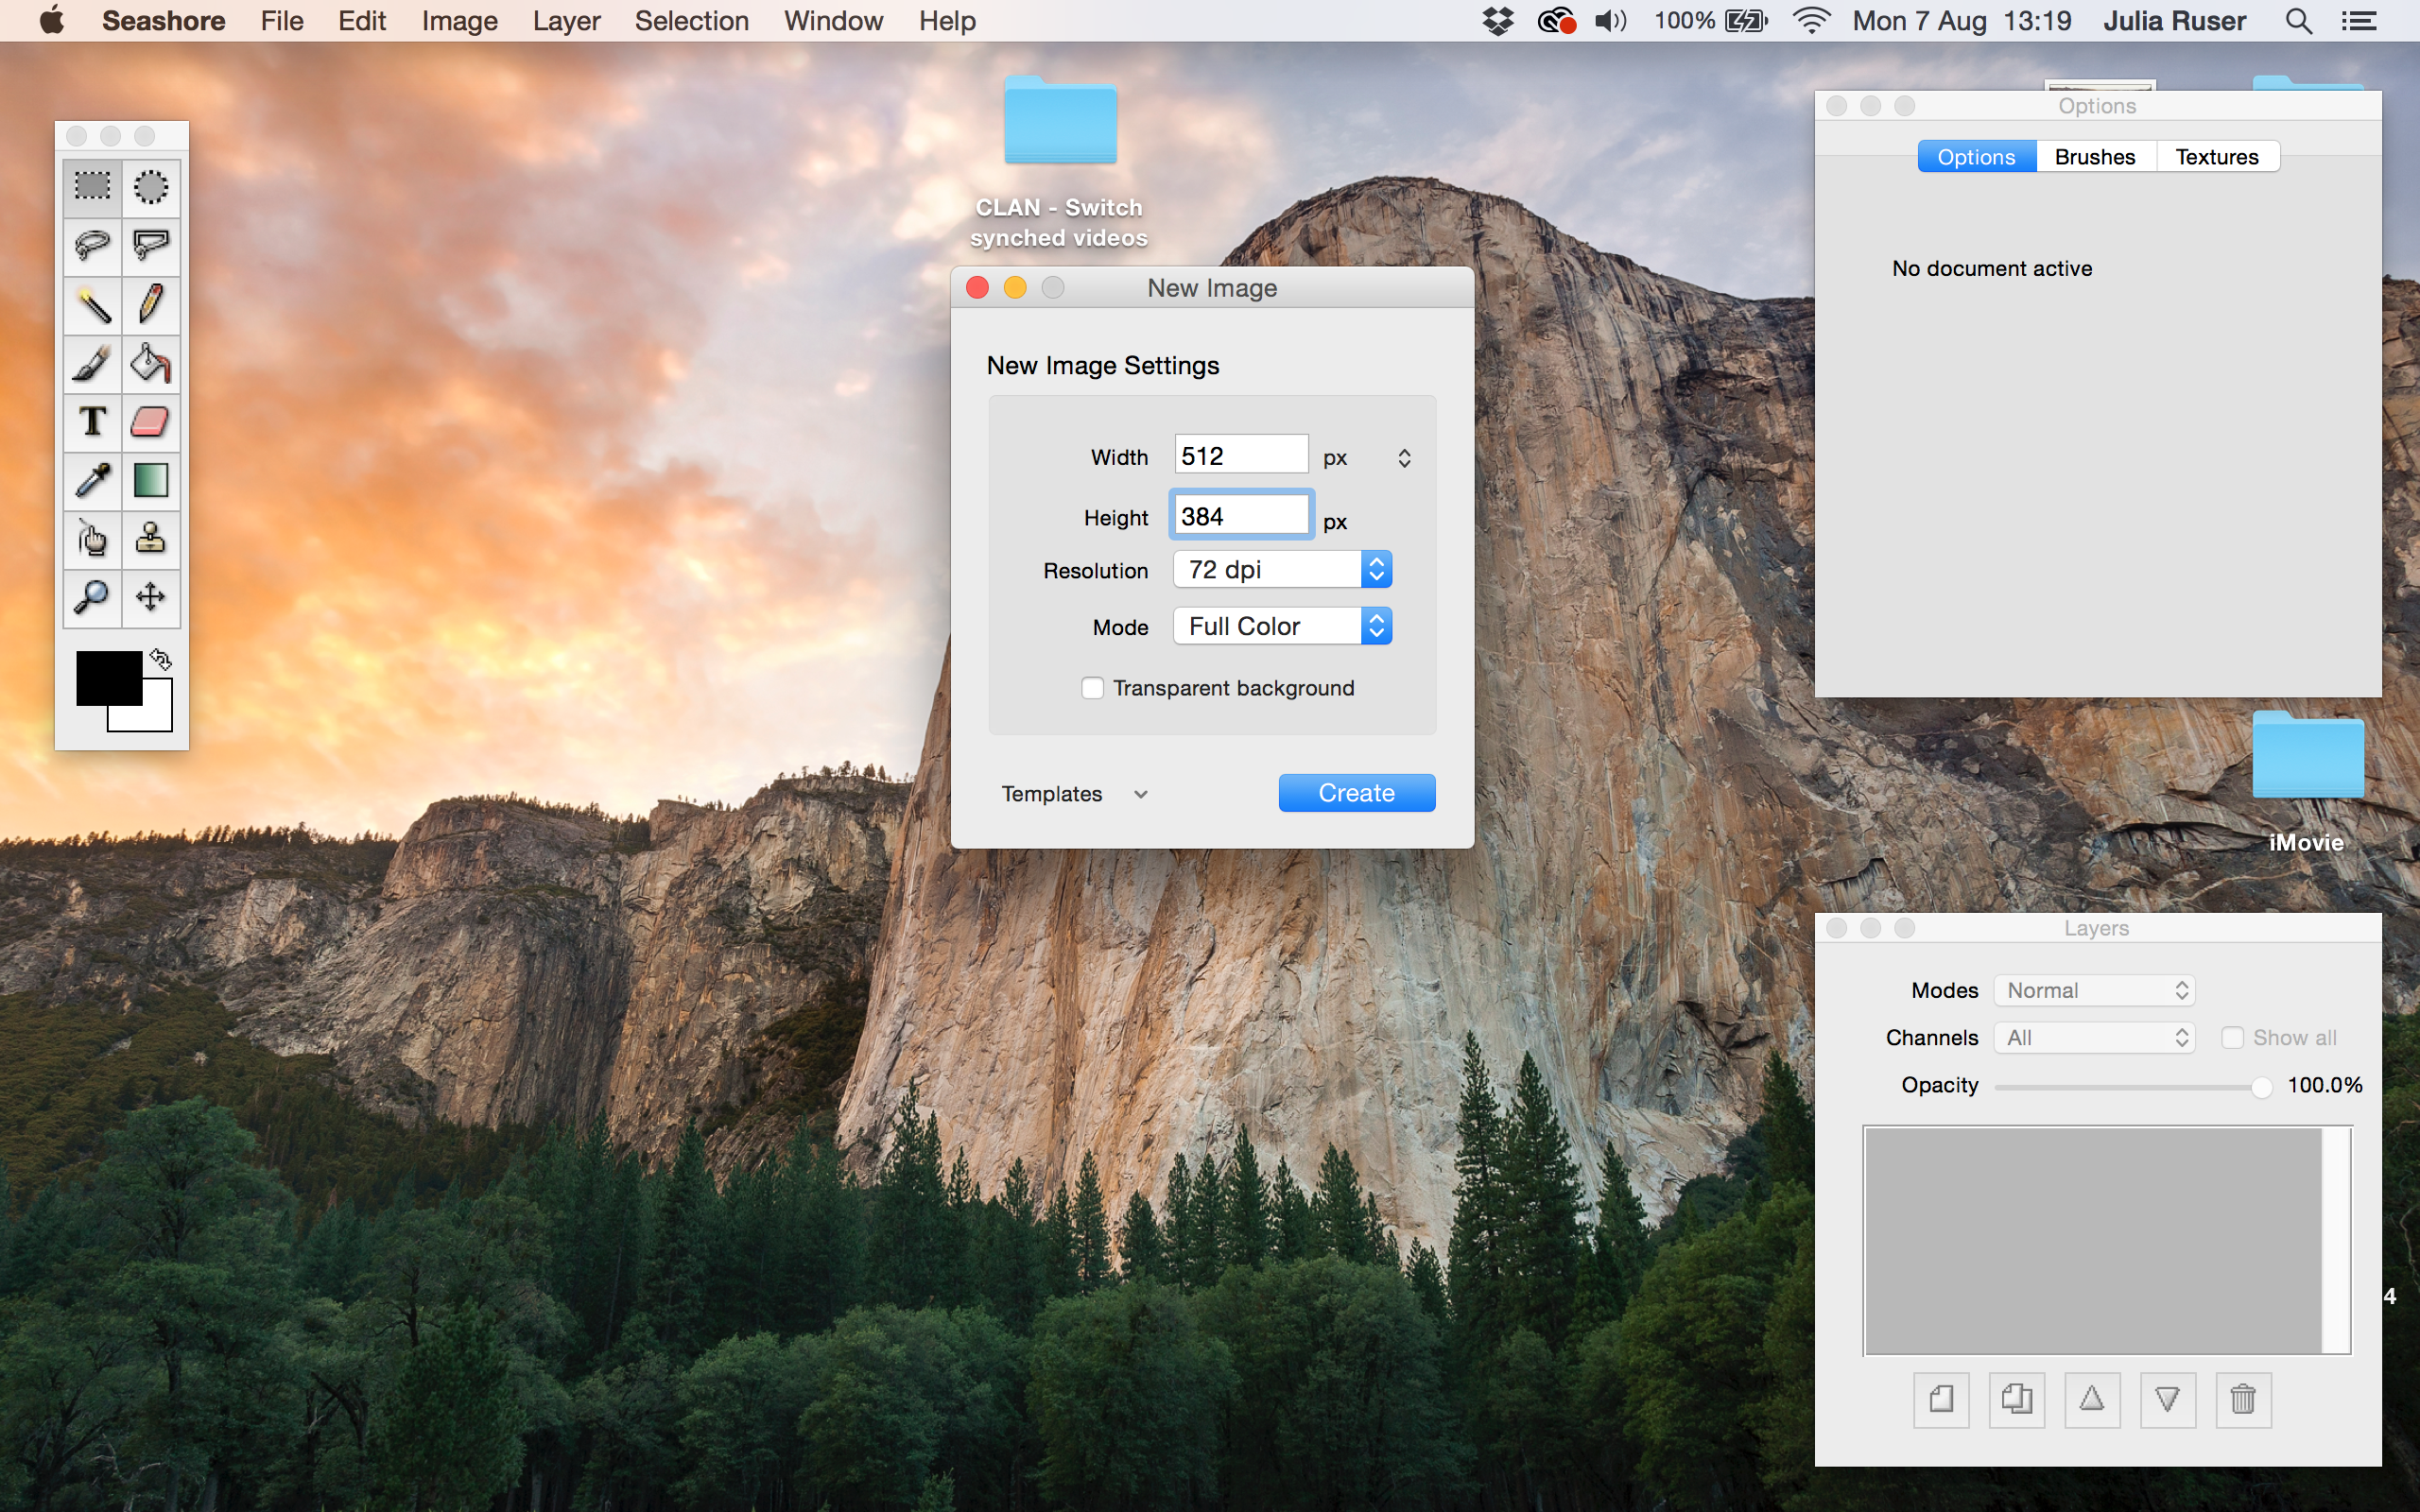
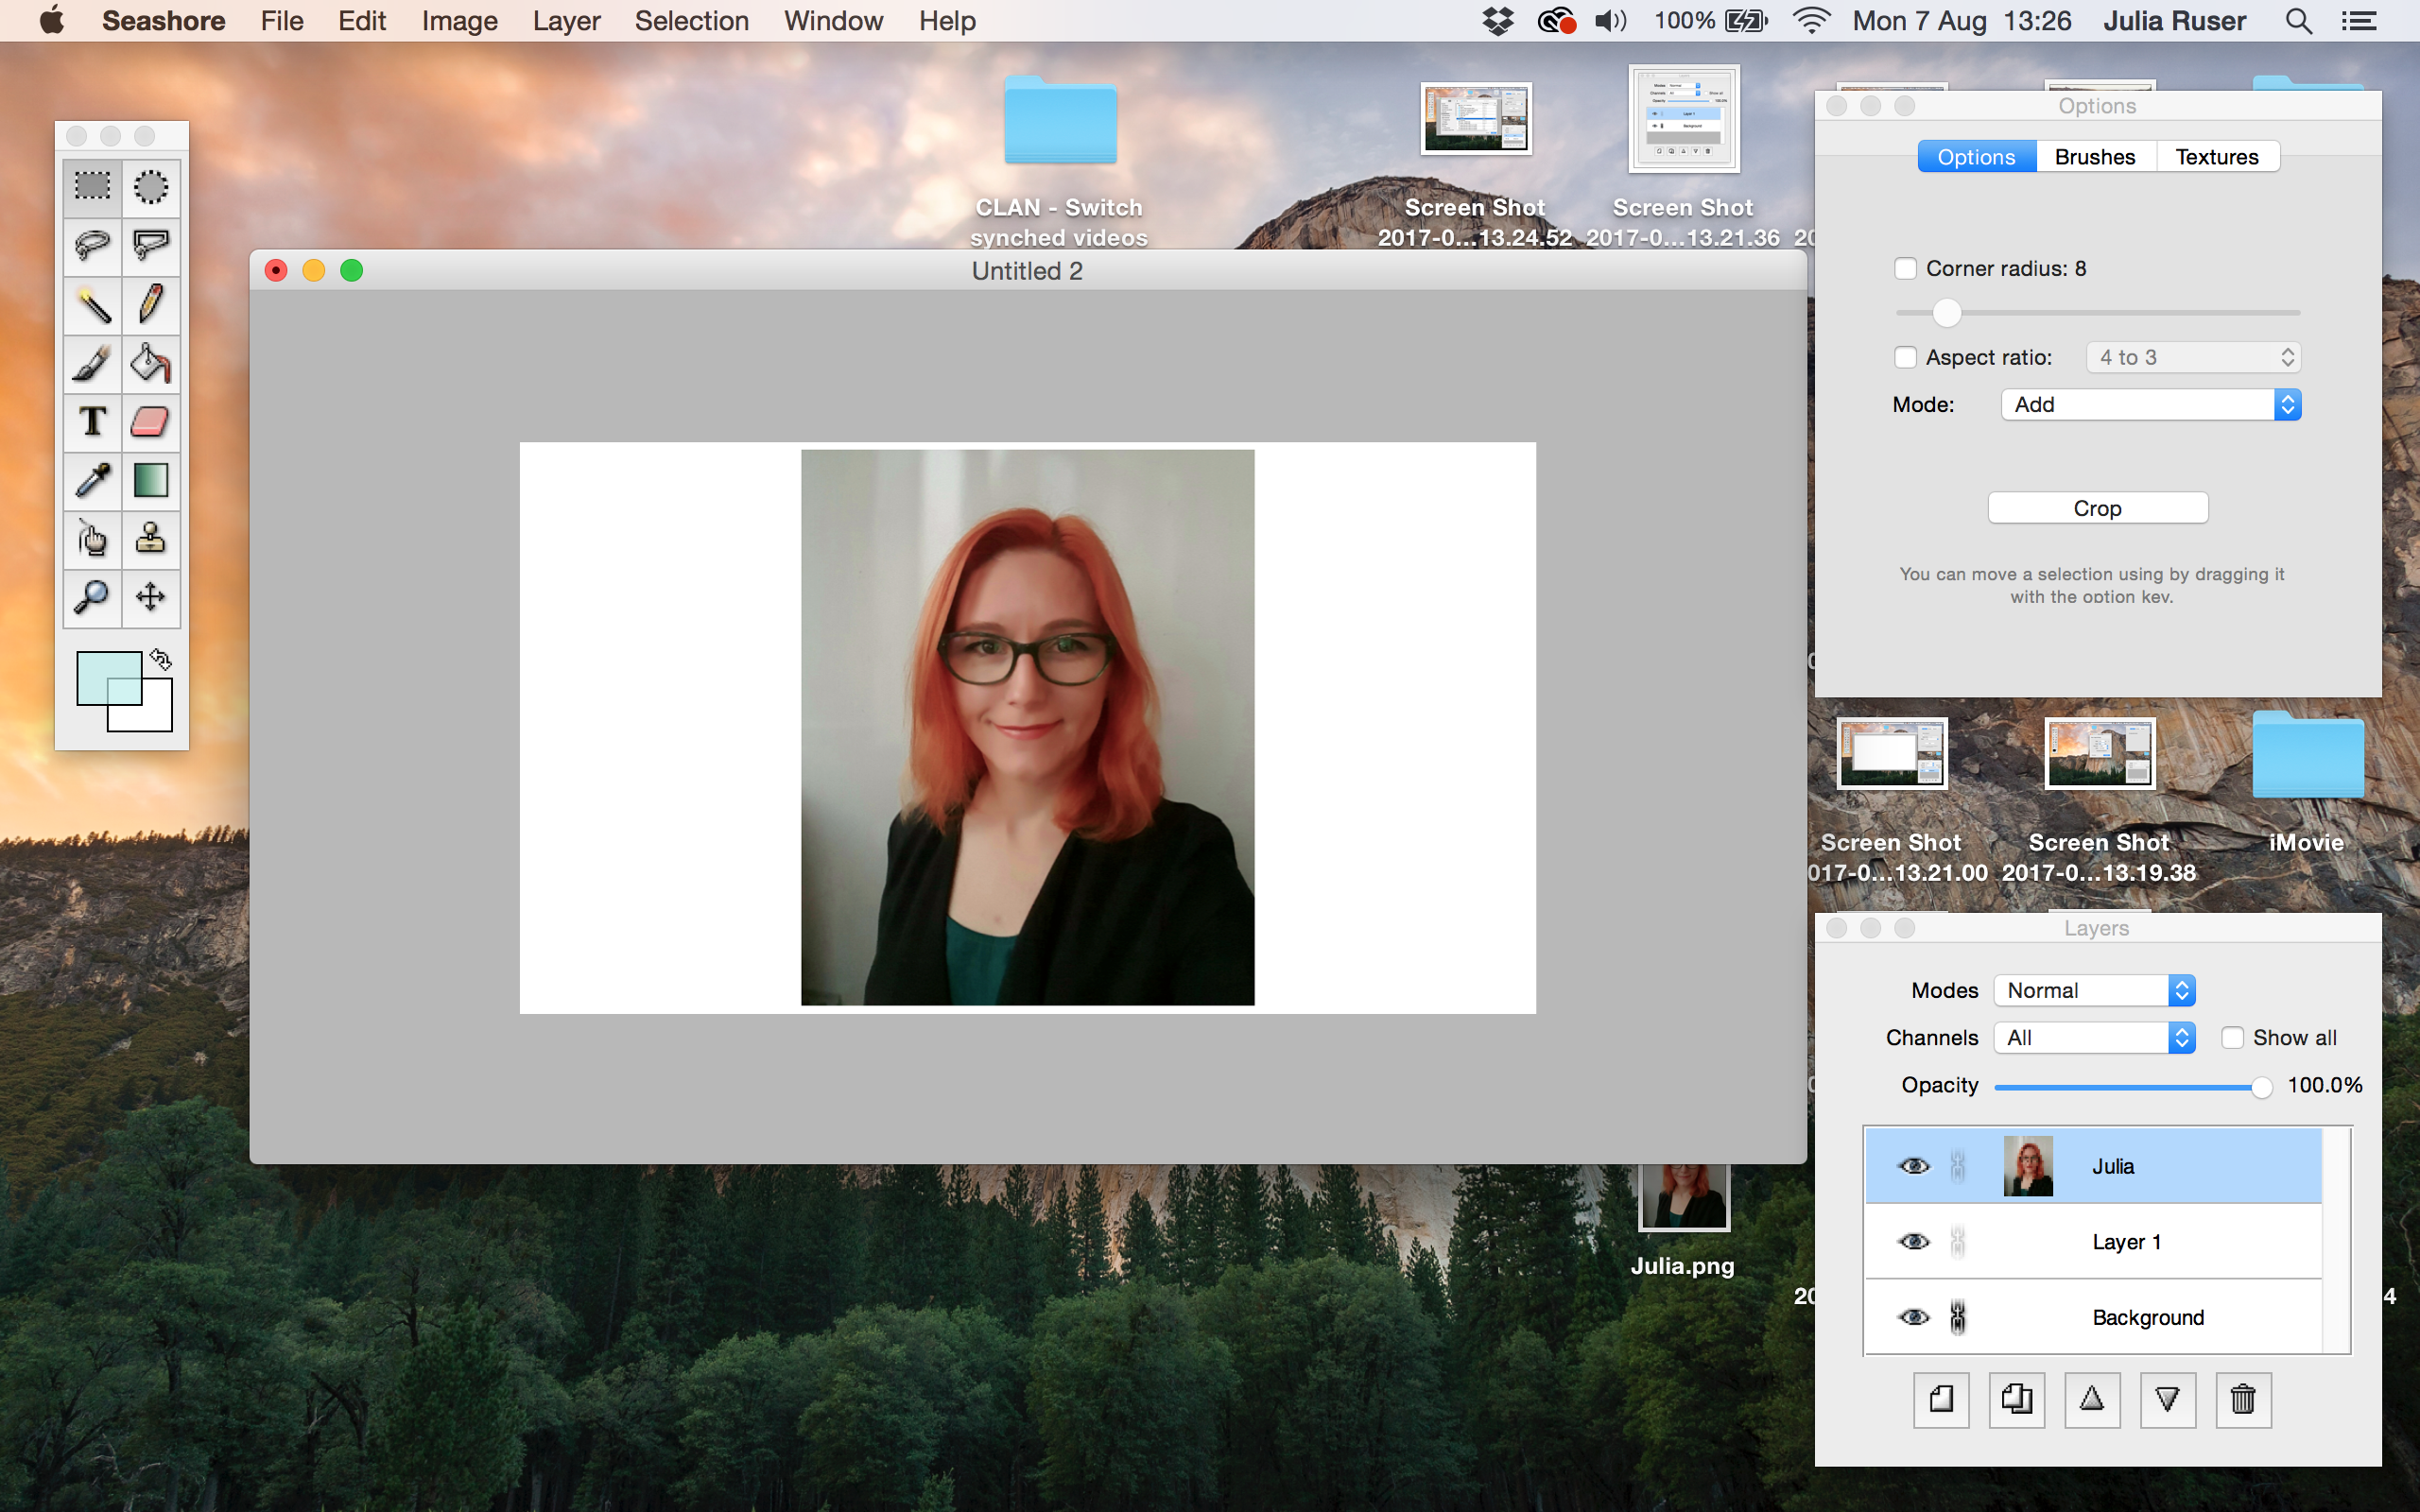
1. Open Seashore
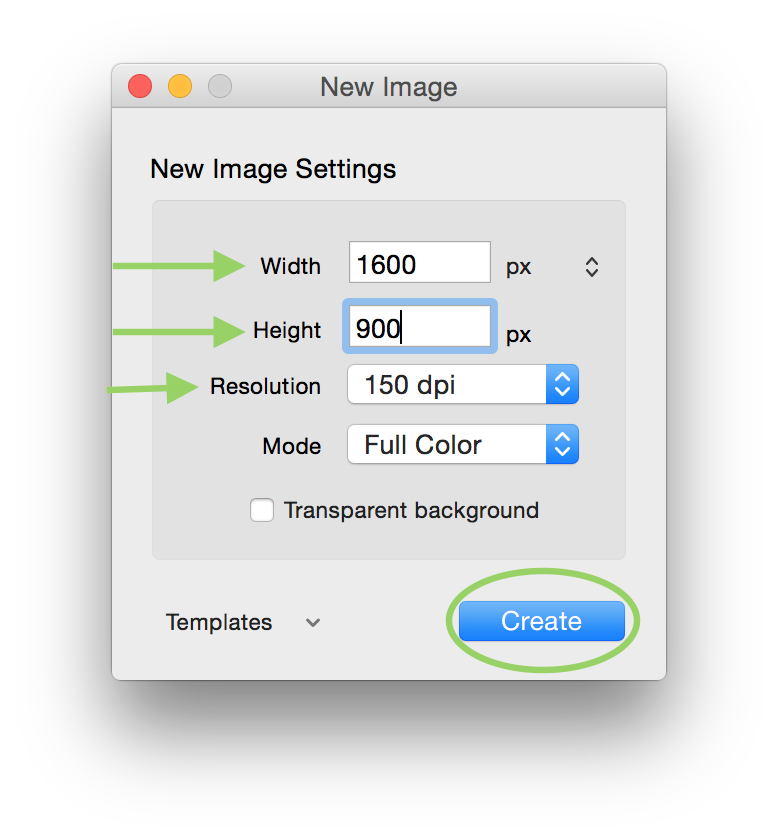
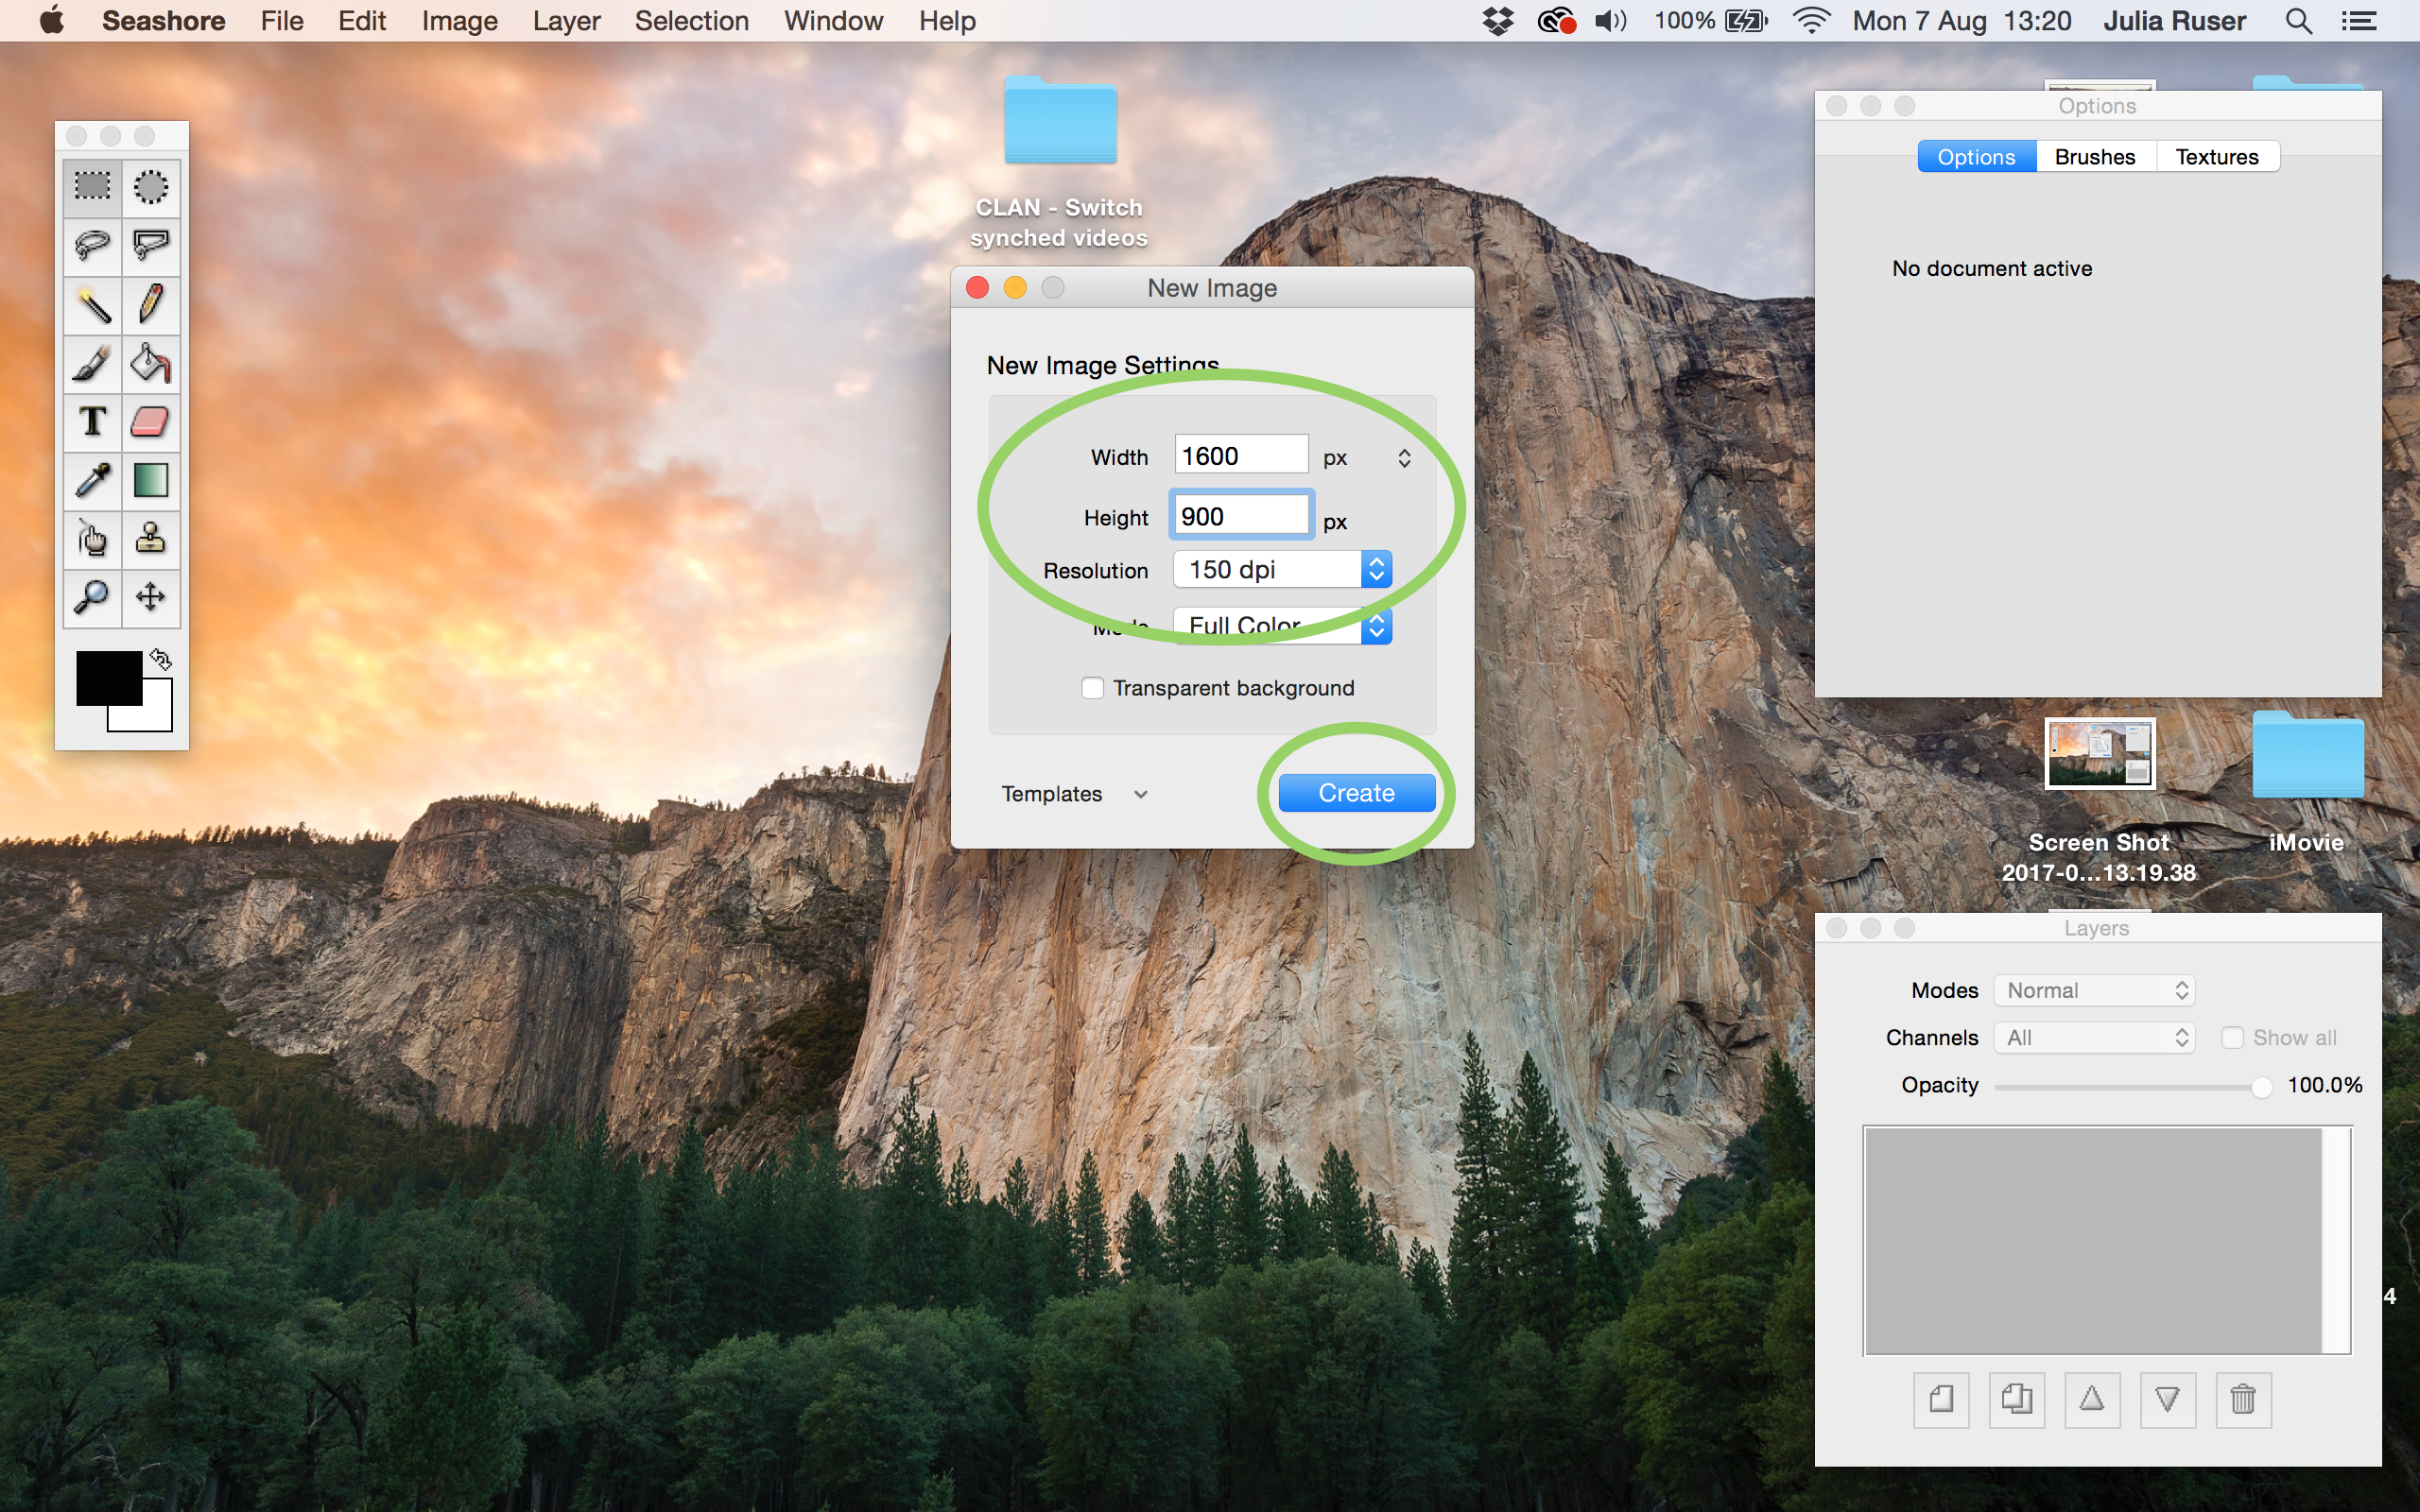
2. Set the height and width (ratio) of your image. In this case Width=1600 and Height=900. Set the resolution. In this case 150dpi. Click “Create”.
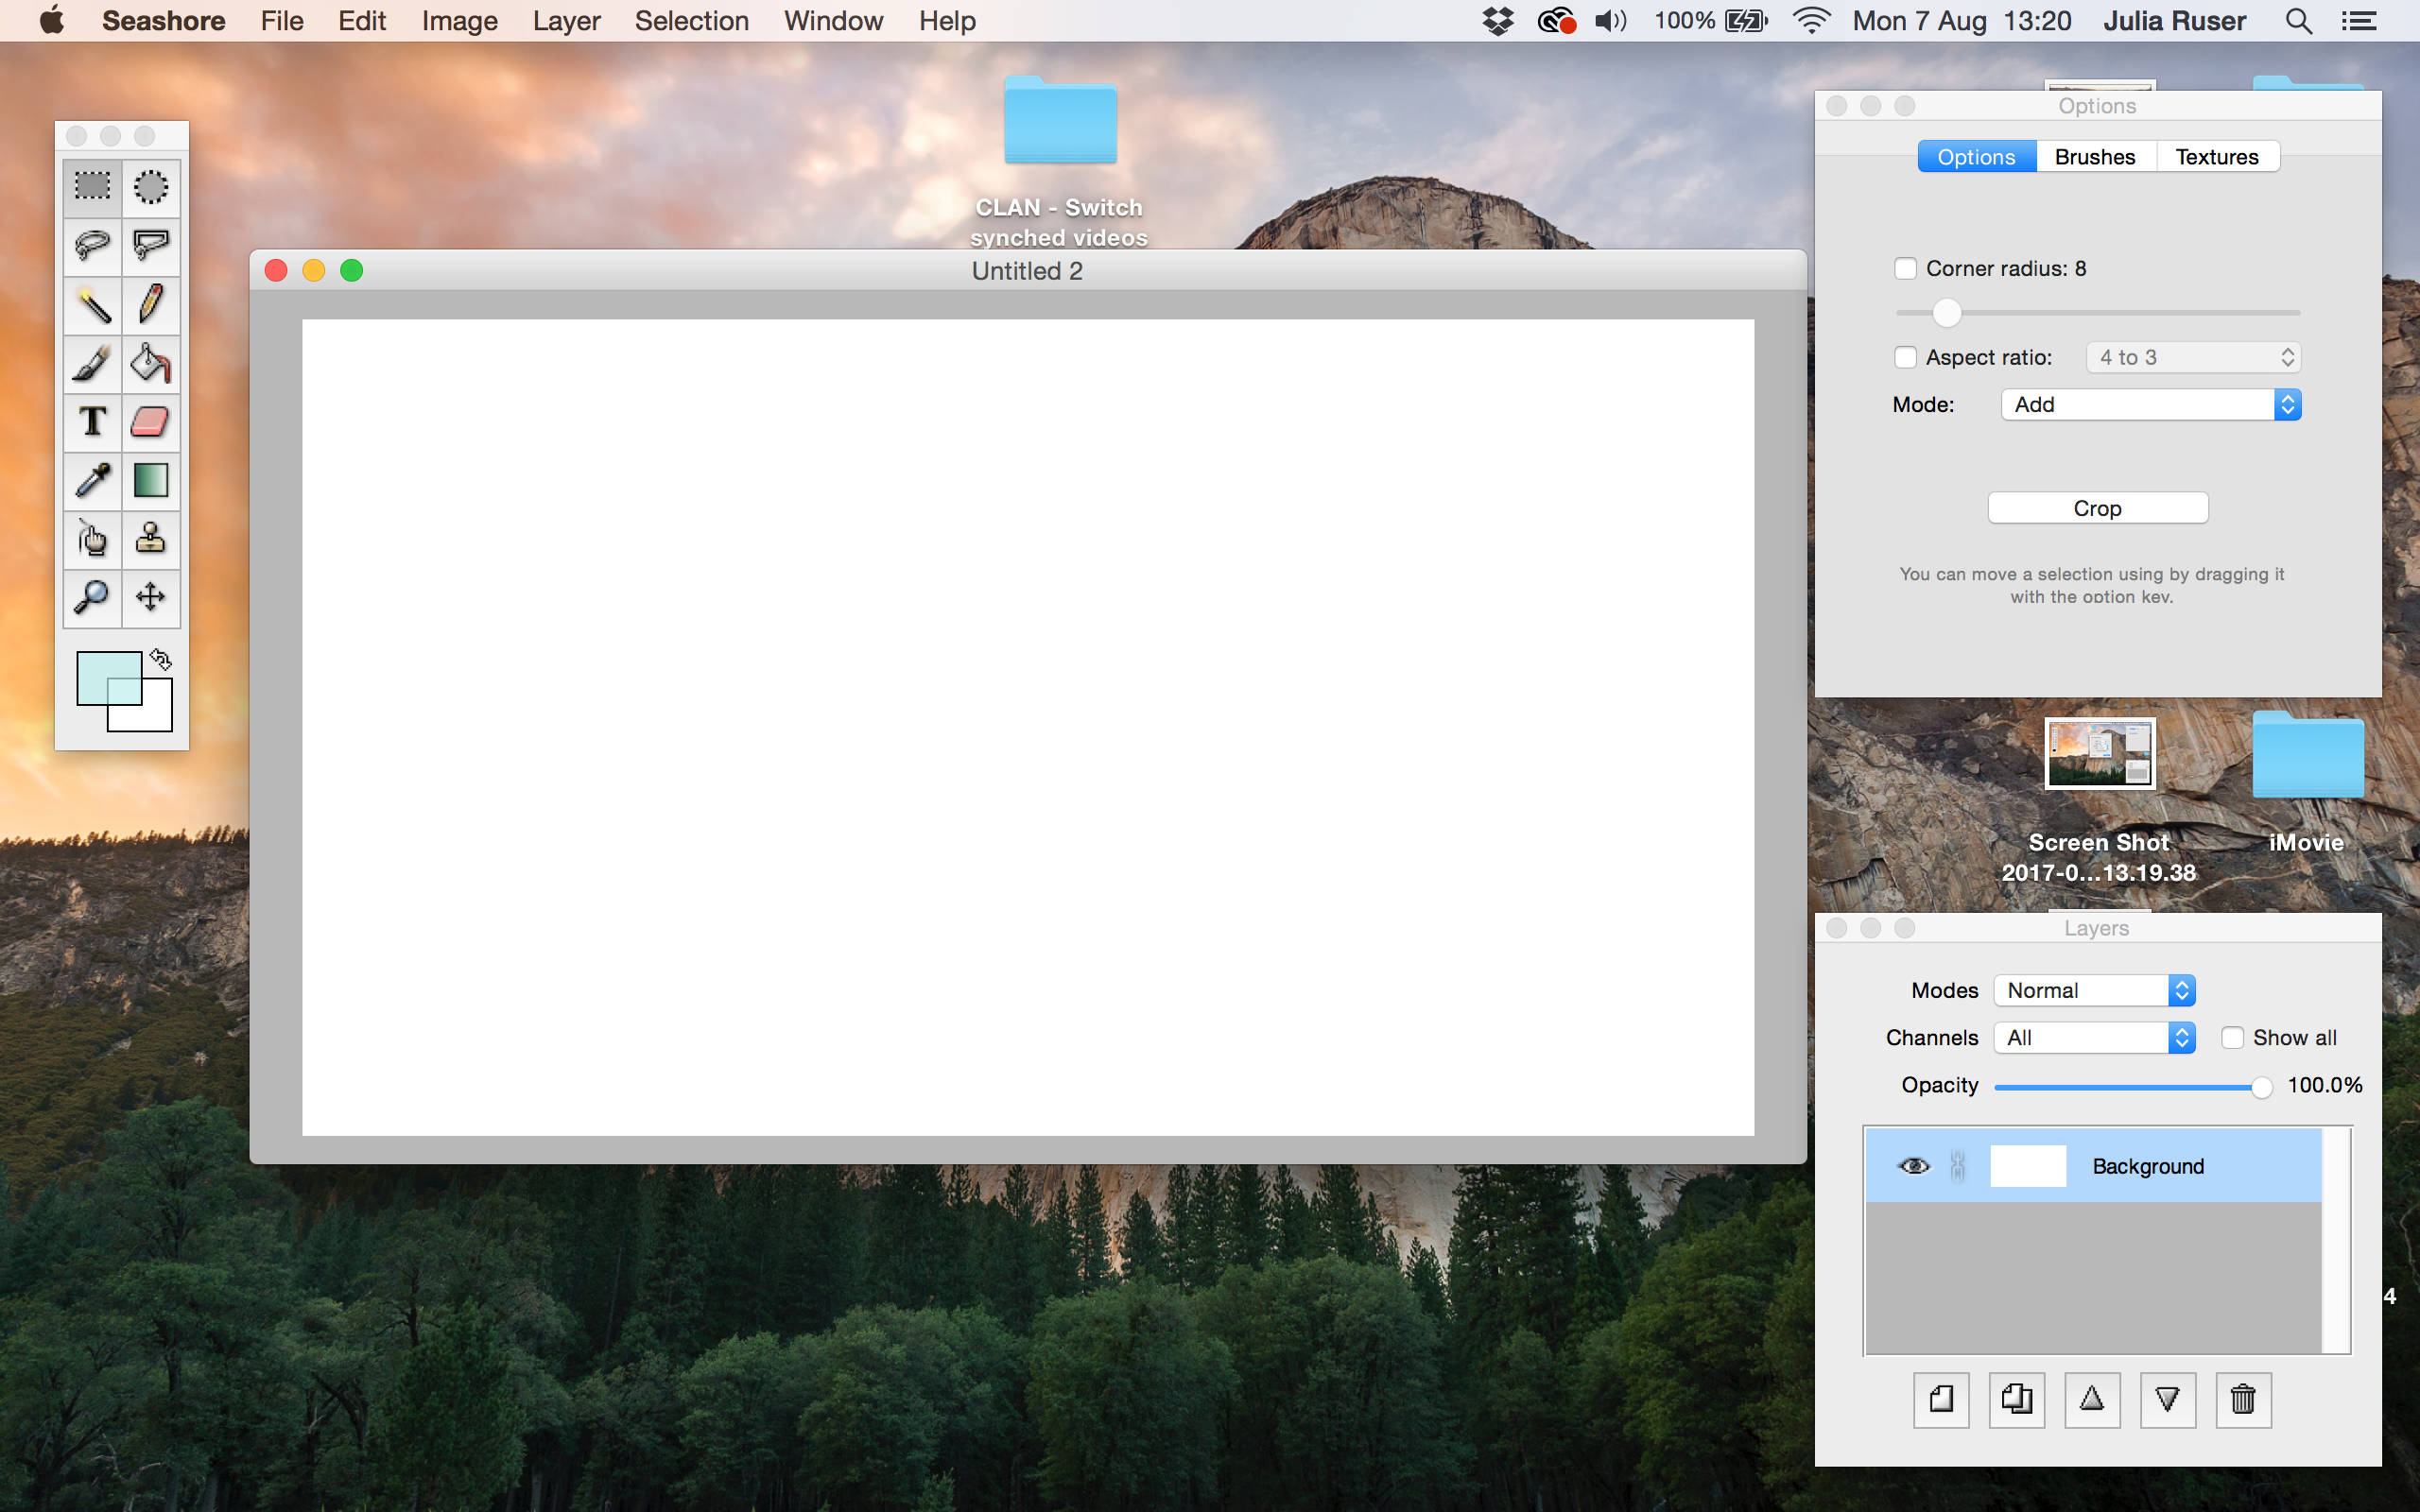
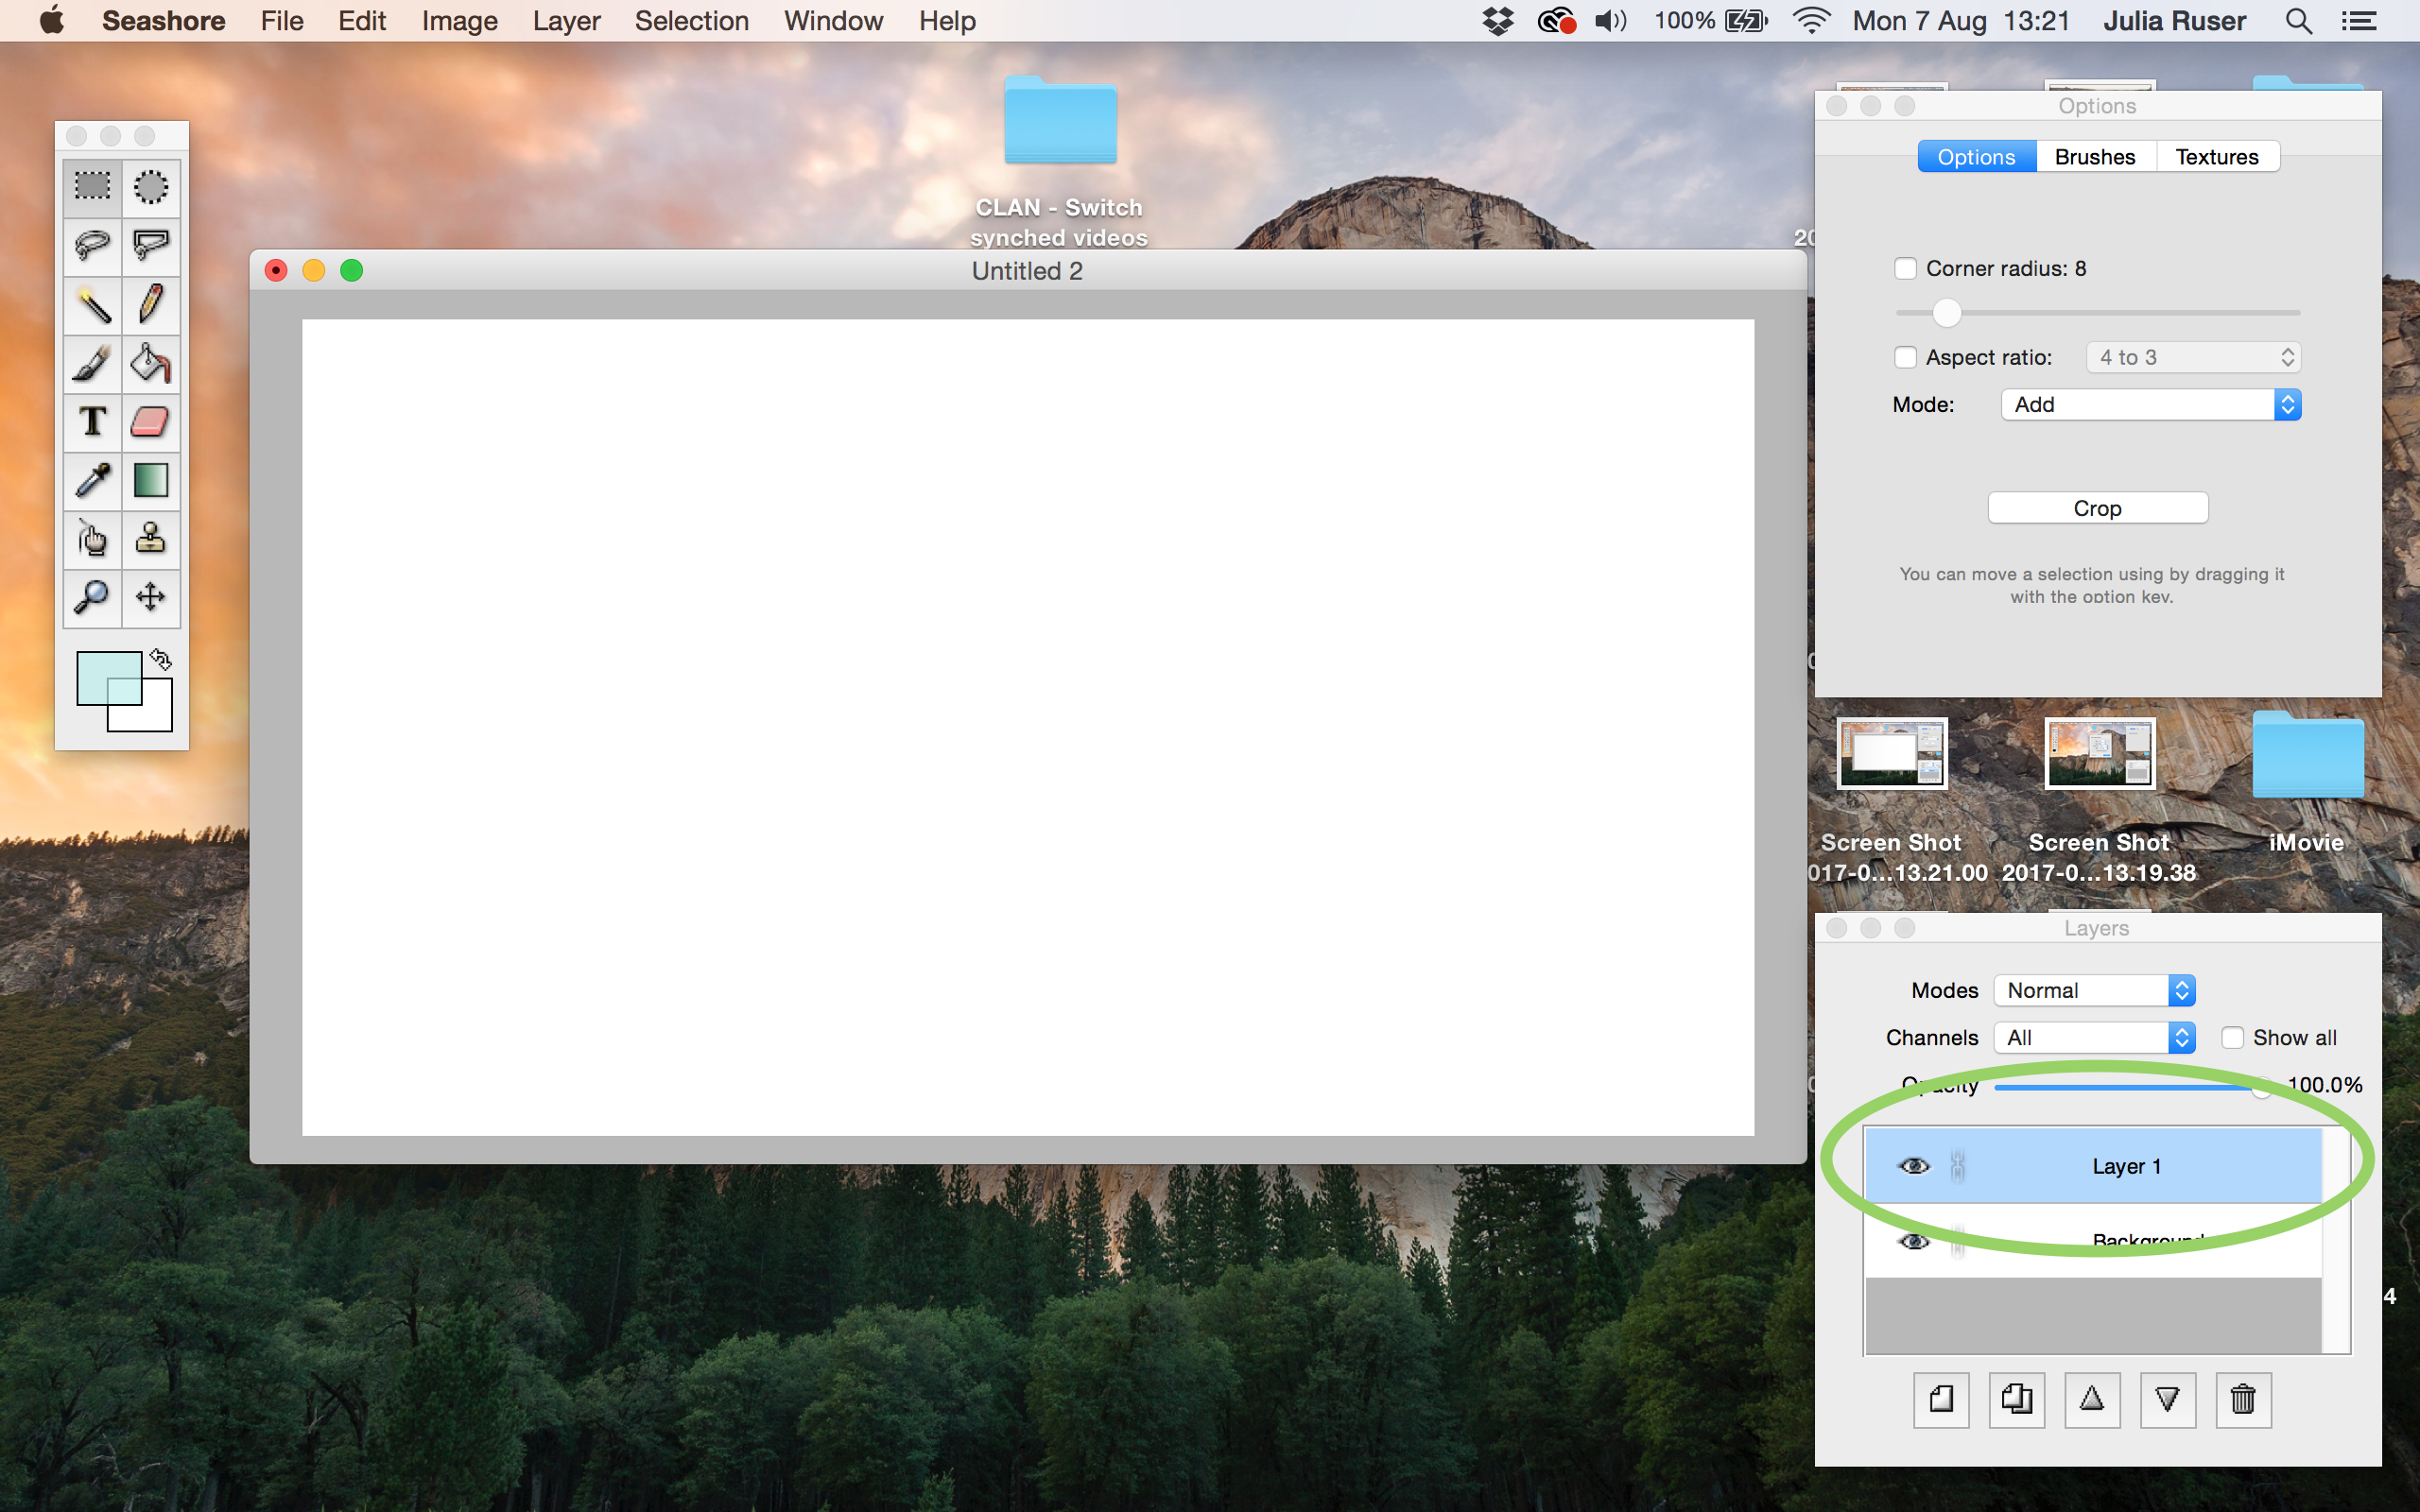
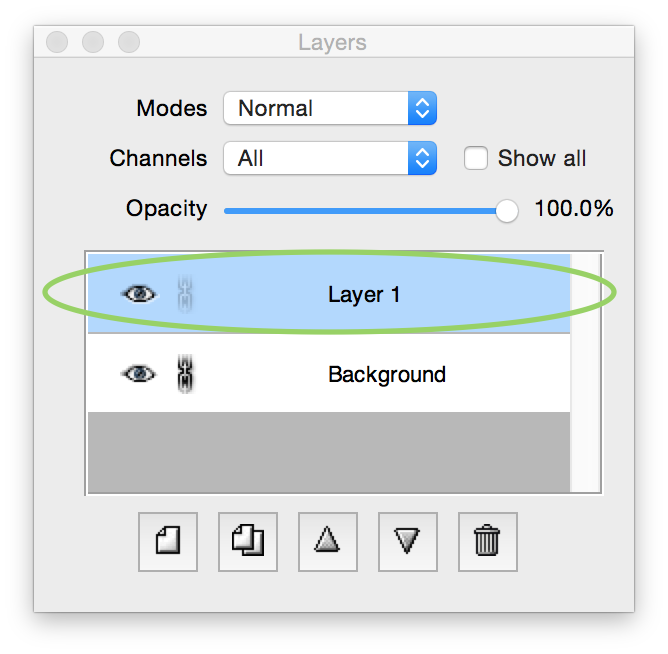
3. Go to the window in the bottom right and click the bottom left button to create a new layer.


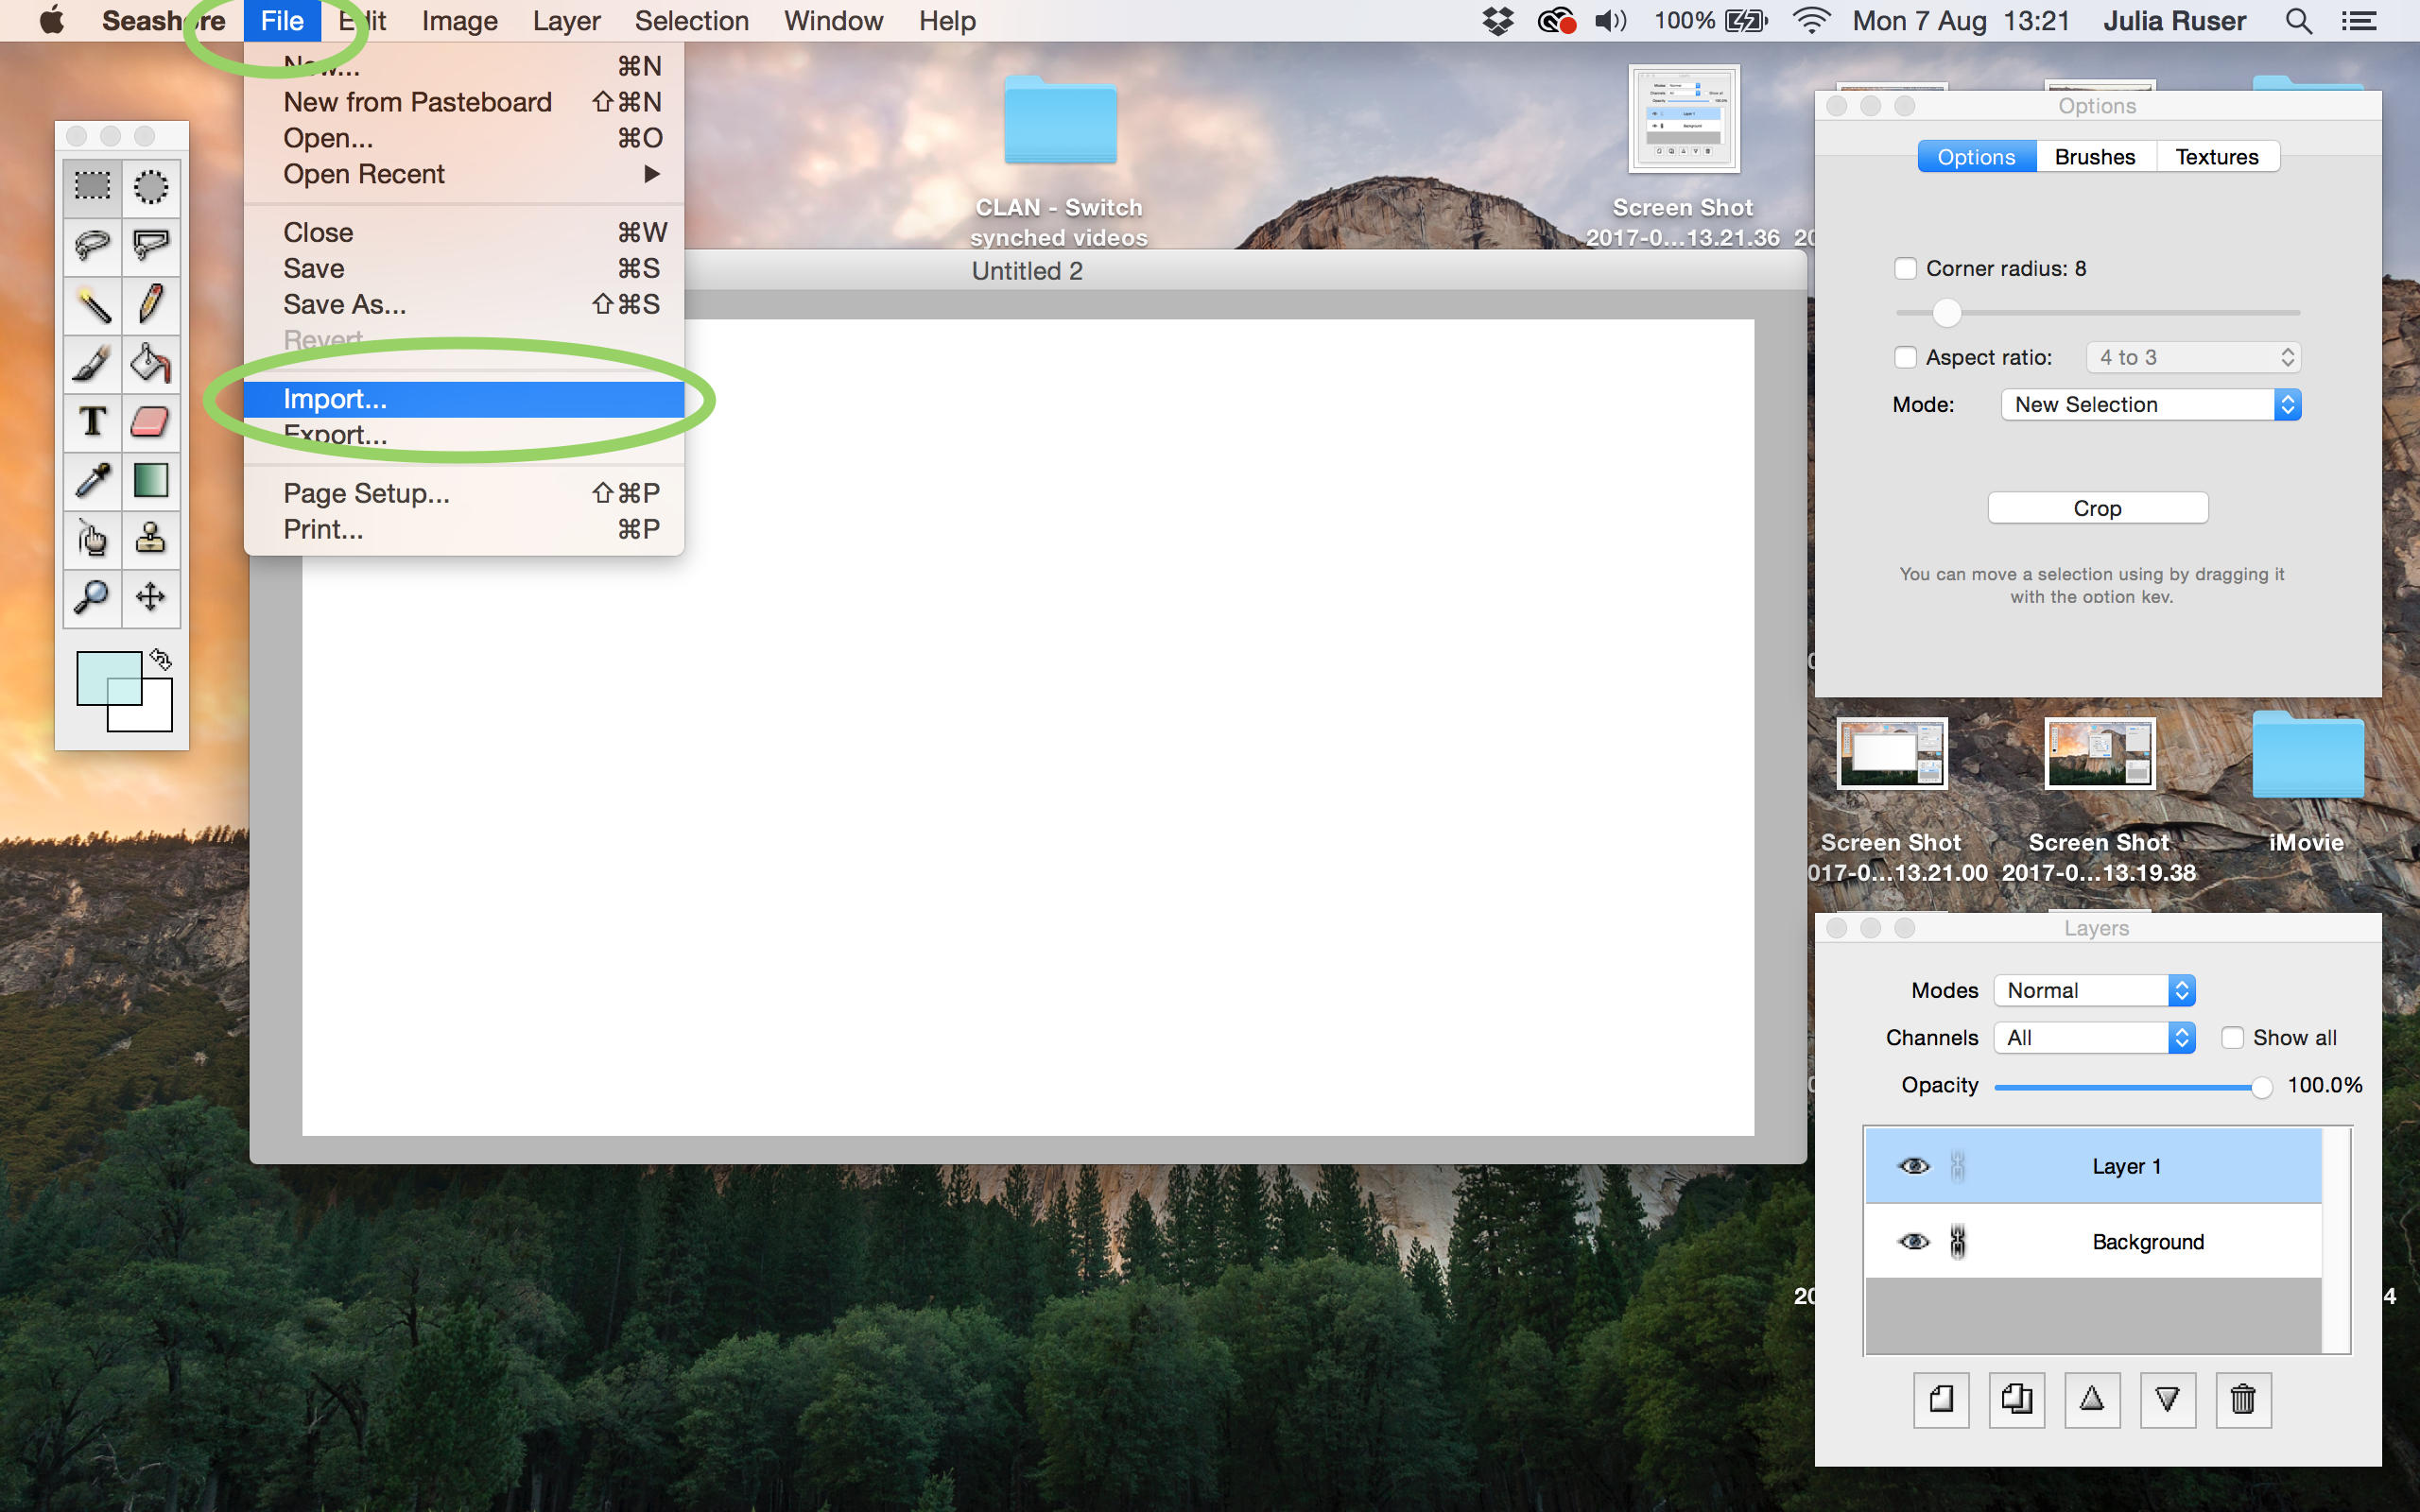
4. Go to “File” and “Import”
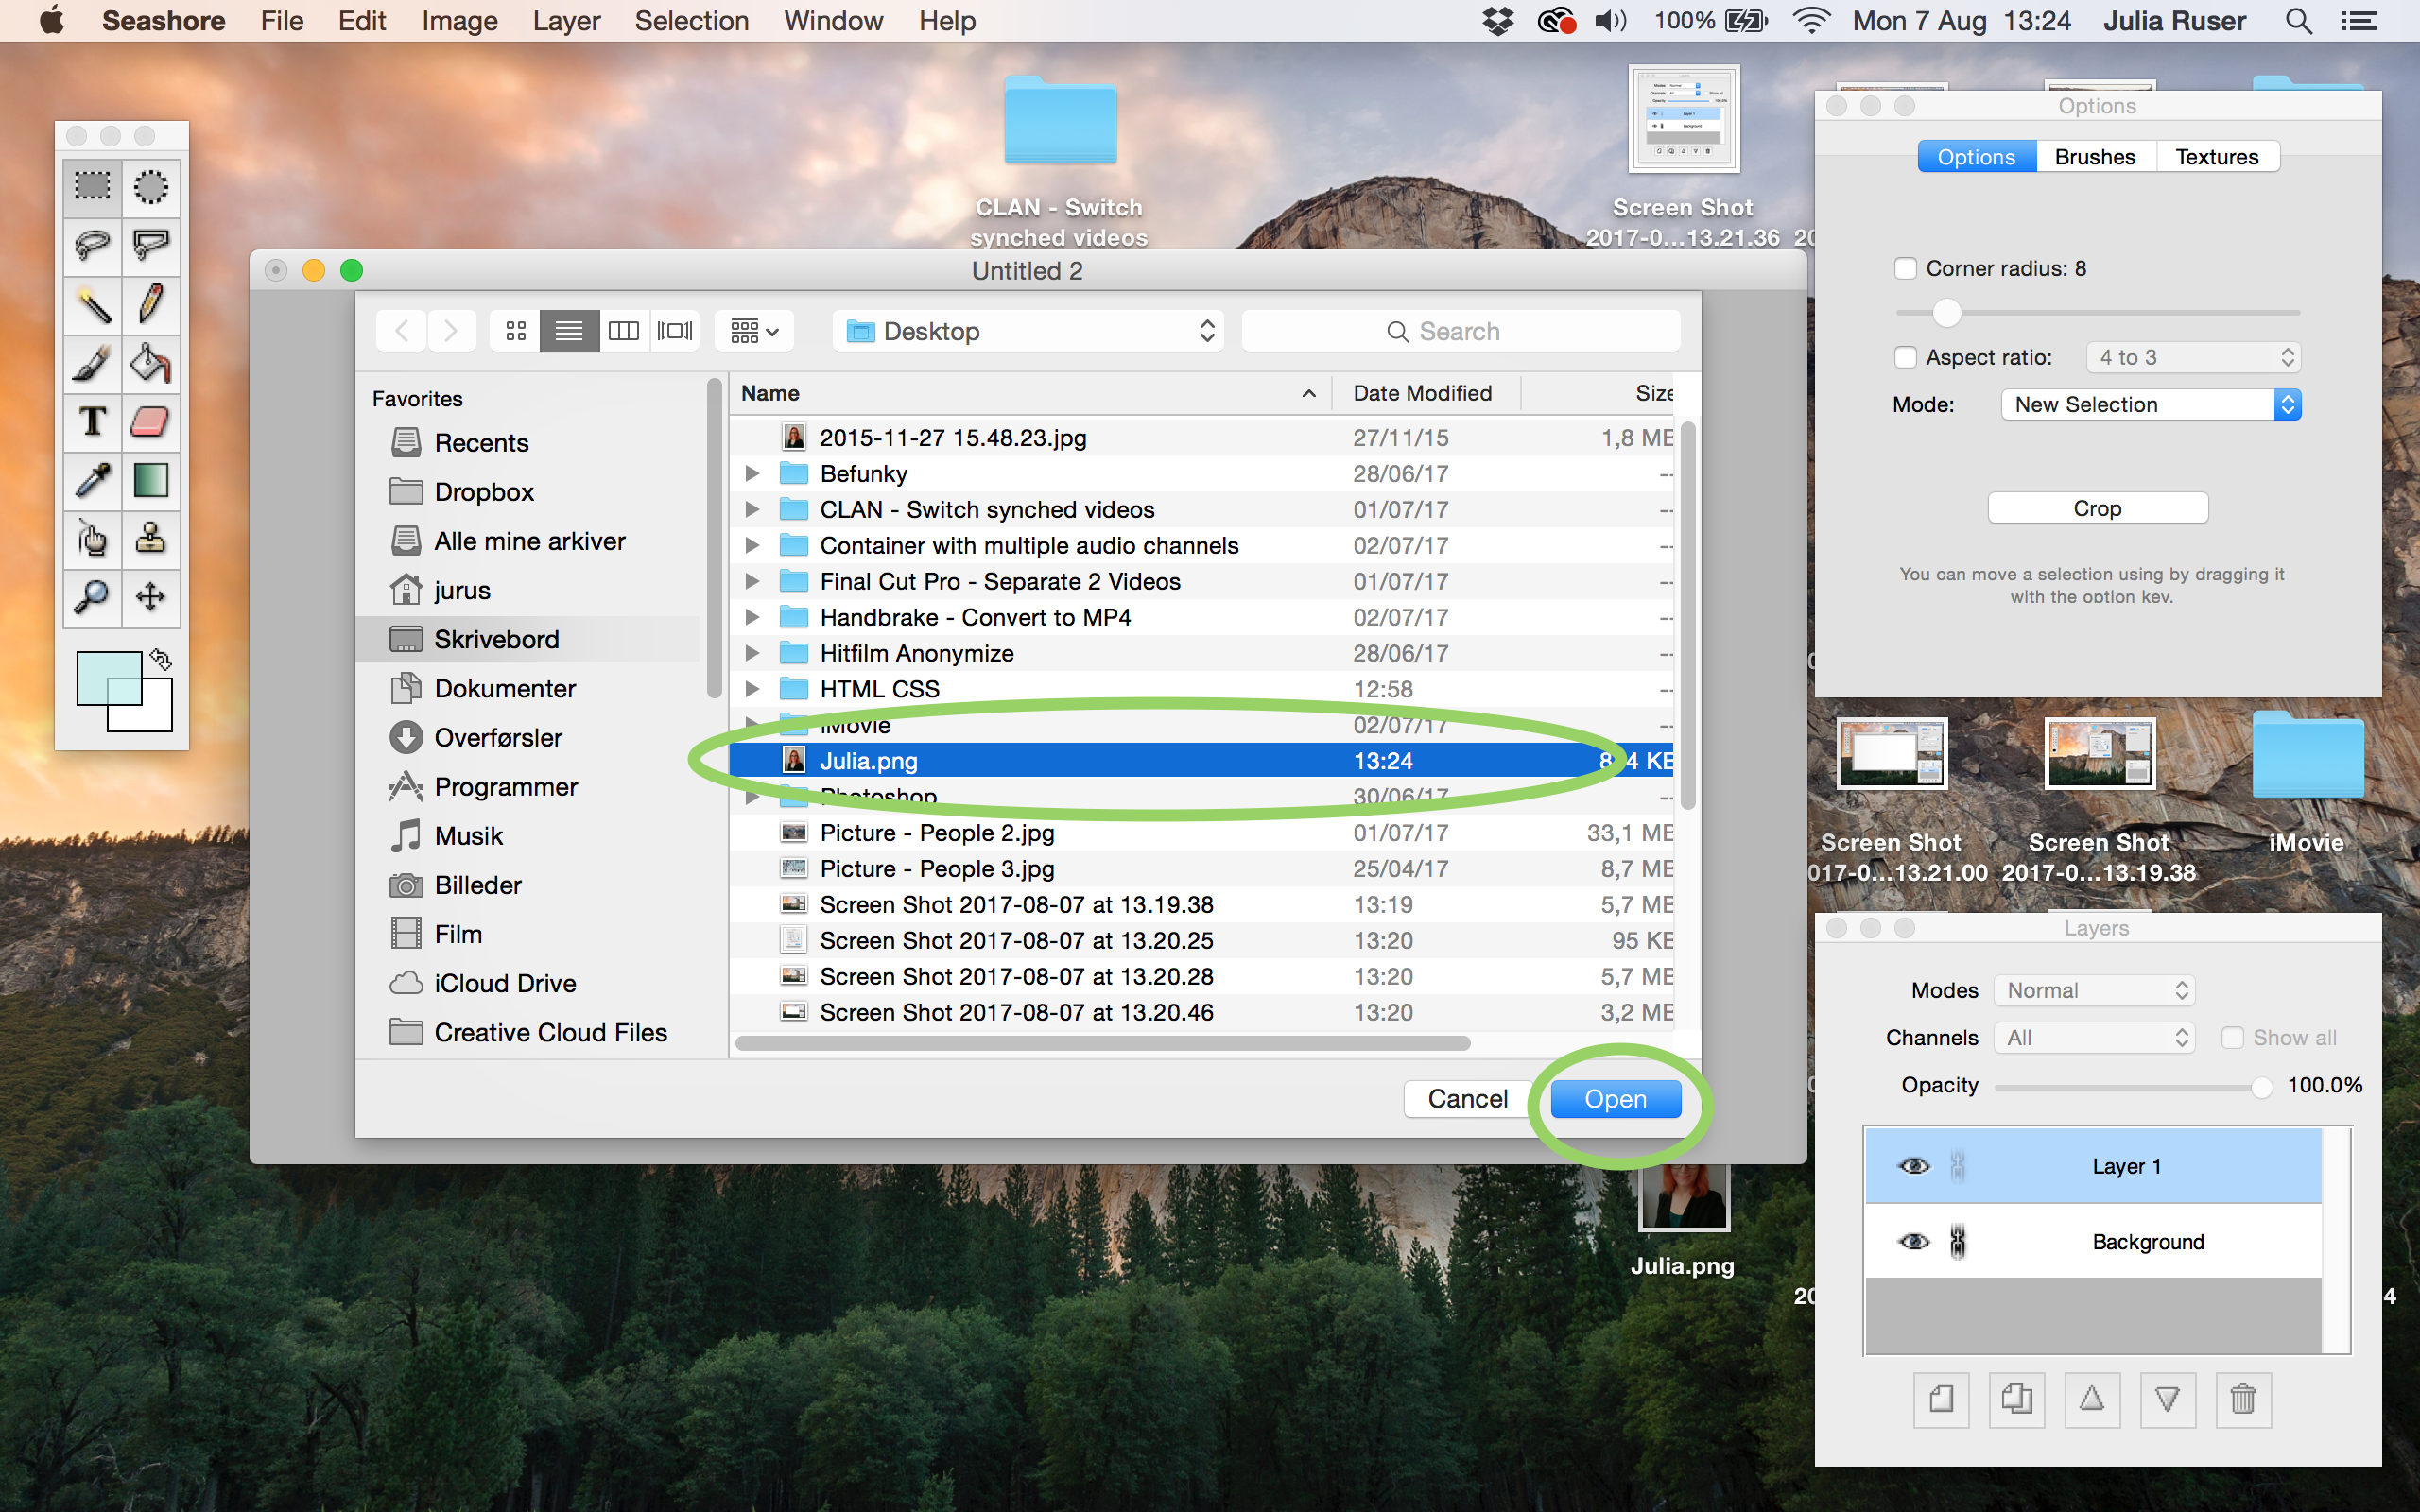
5. Select the image you want to edit and click “Open”
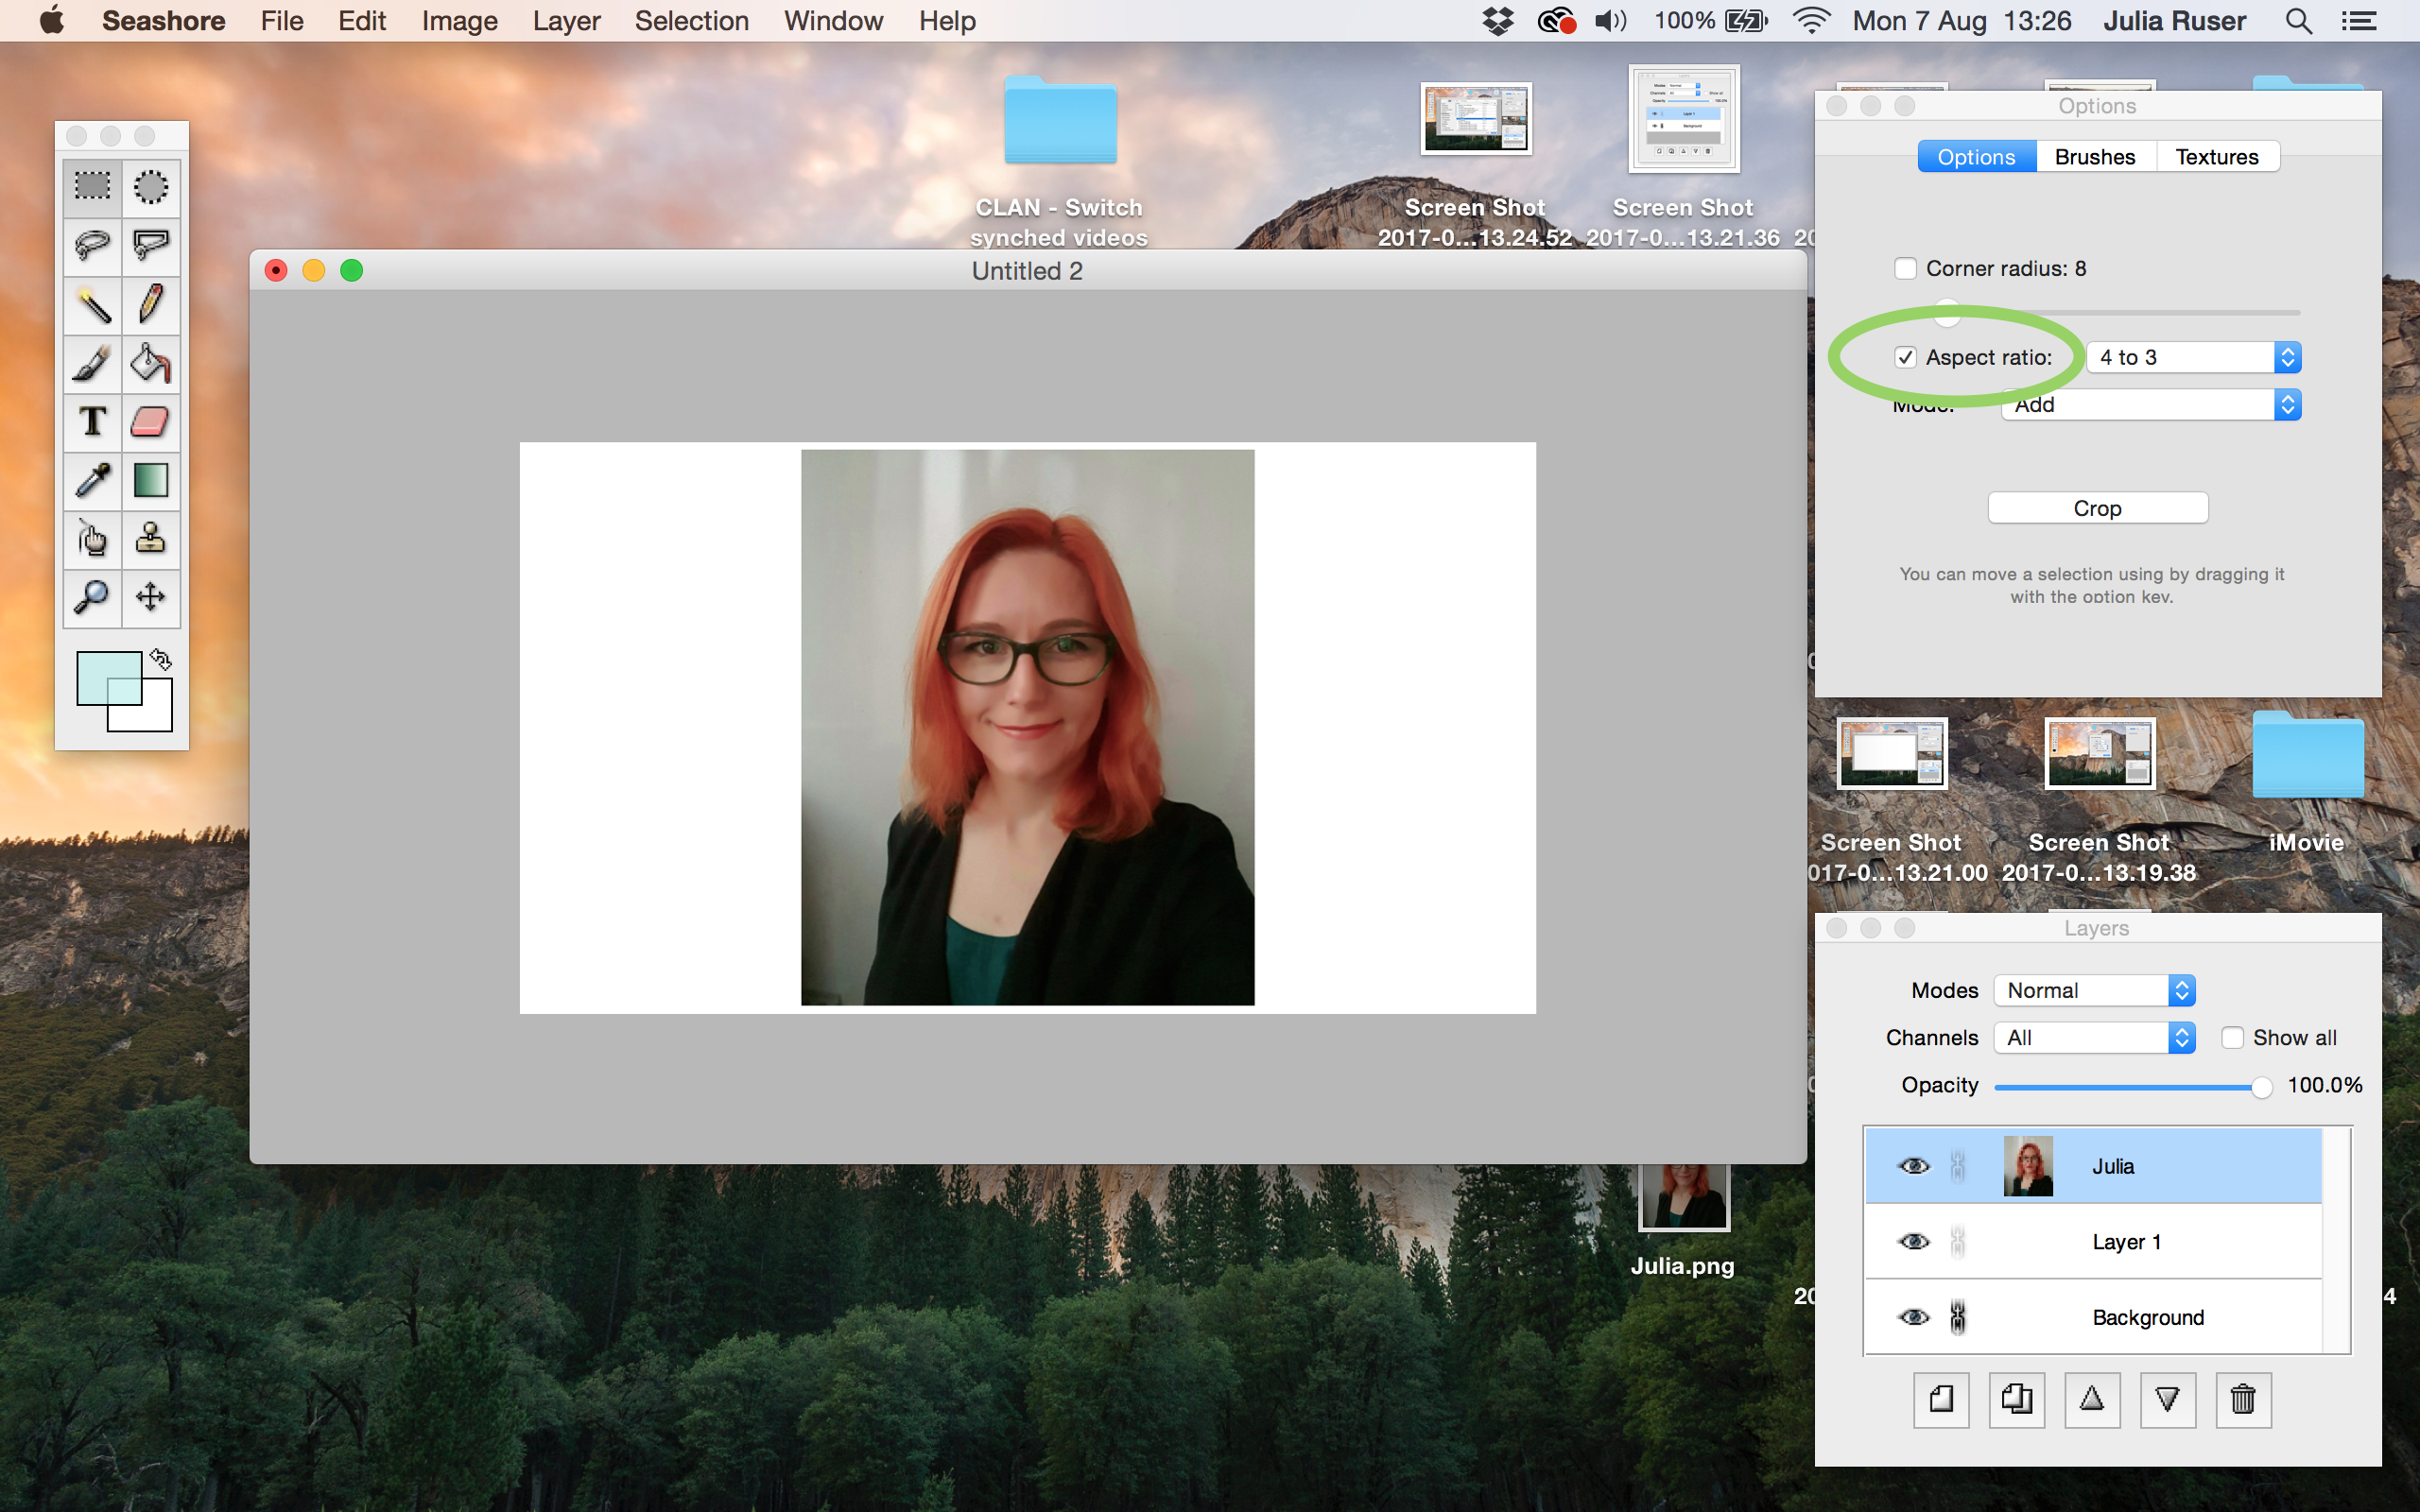
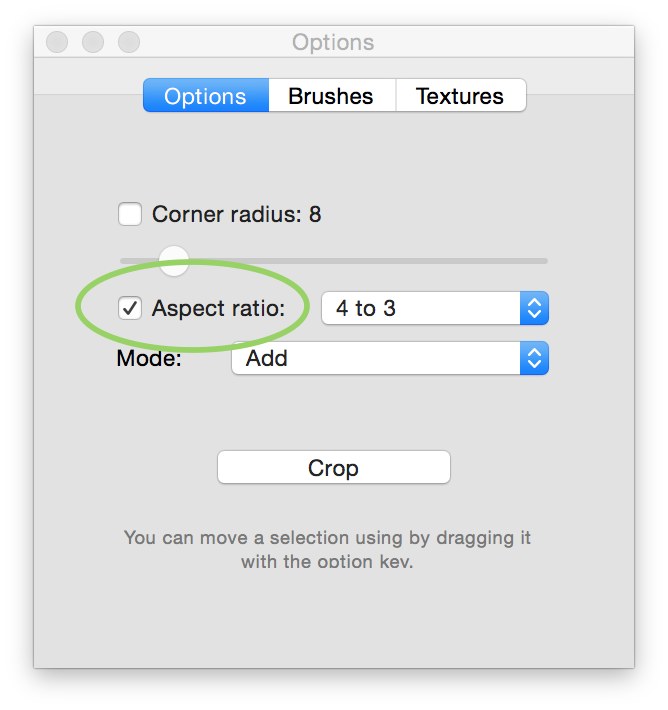
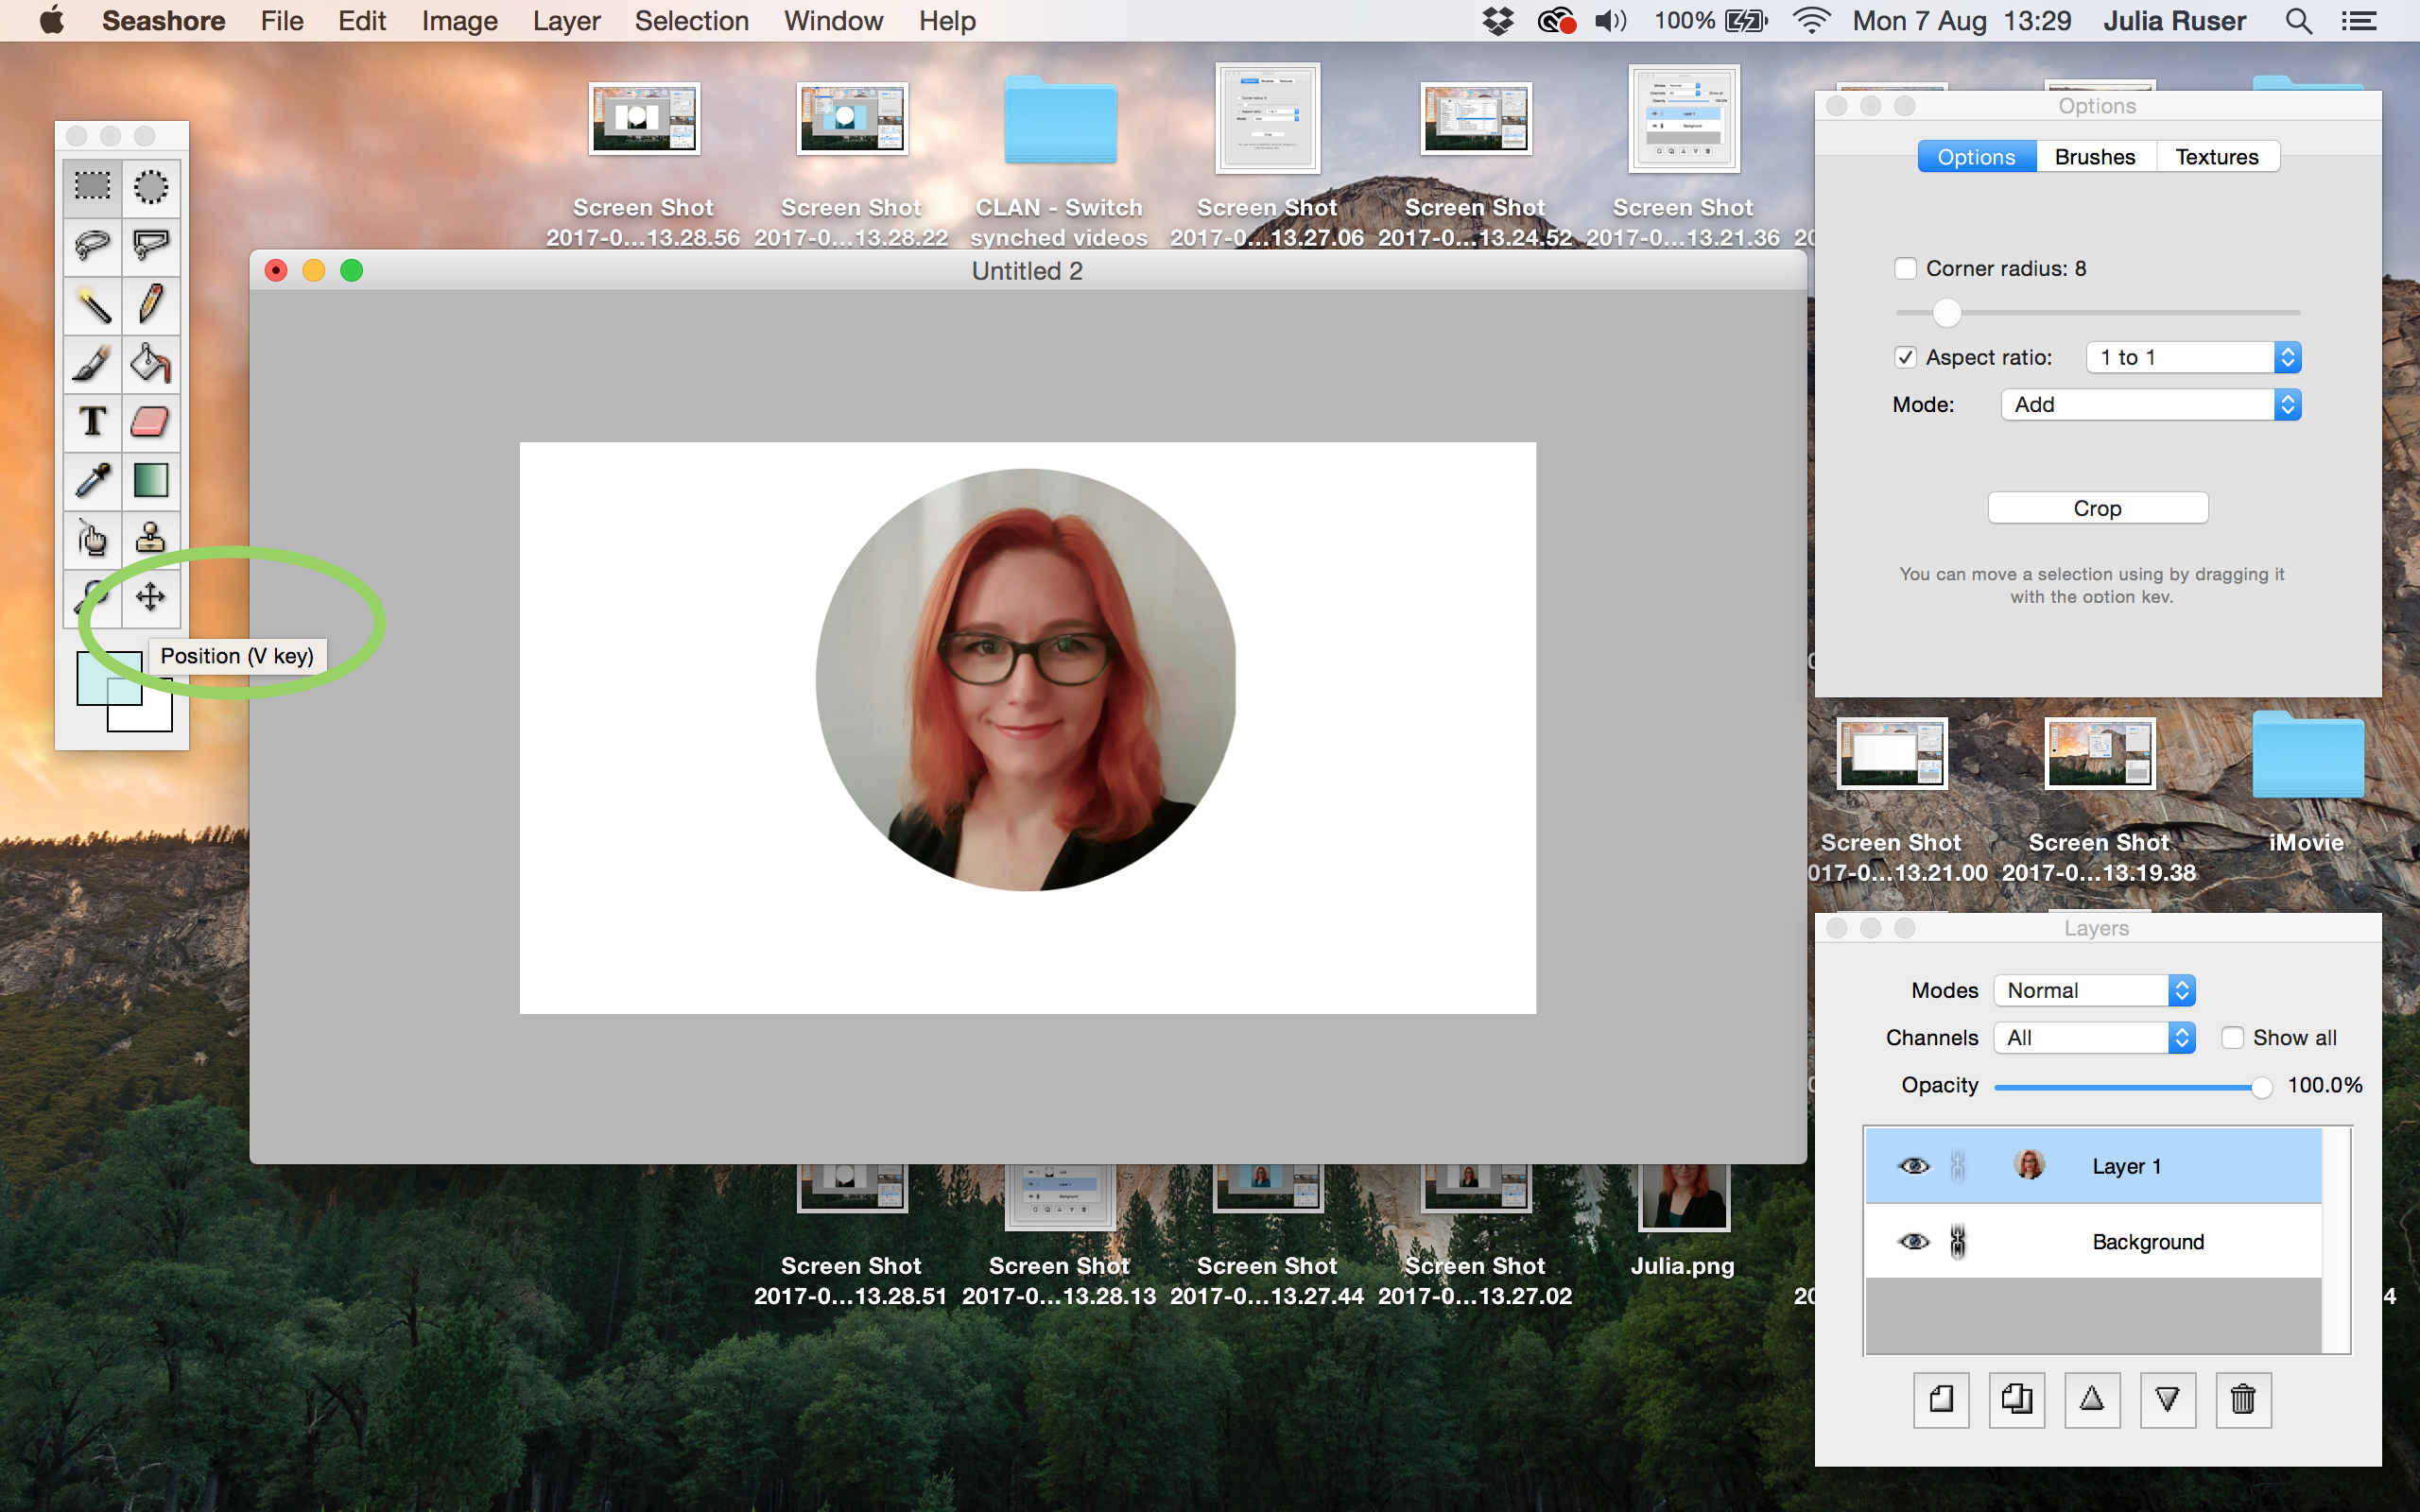
6. Go to the top right window. Select “Aspect ratio”
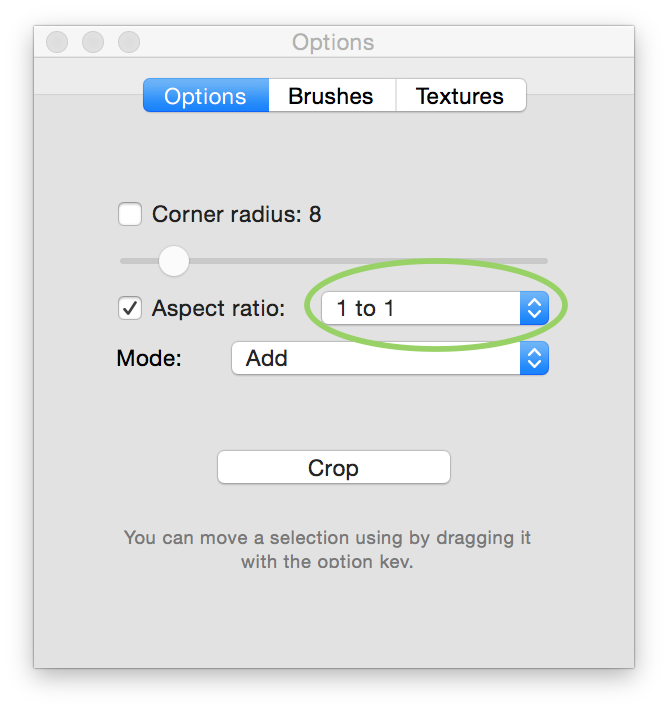
7. Still in the top right window: Change the aspect ratio to “1 to 1” (It has to be 1 to 1 so the circle selection you do next will be a perfect circle)

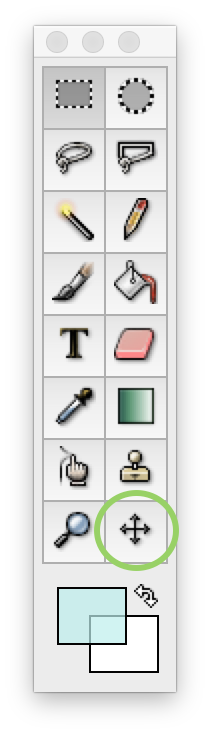
8. Go to the left window: Click the circle selection tool

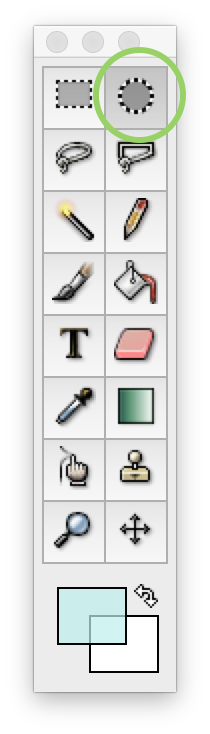
9. Select part of the image. You can adjust the selection by clicking and dragging inside the selection
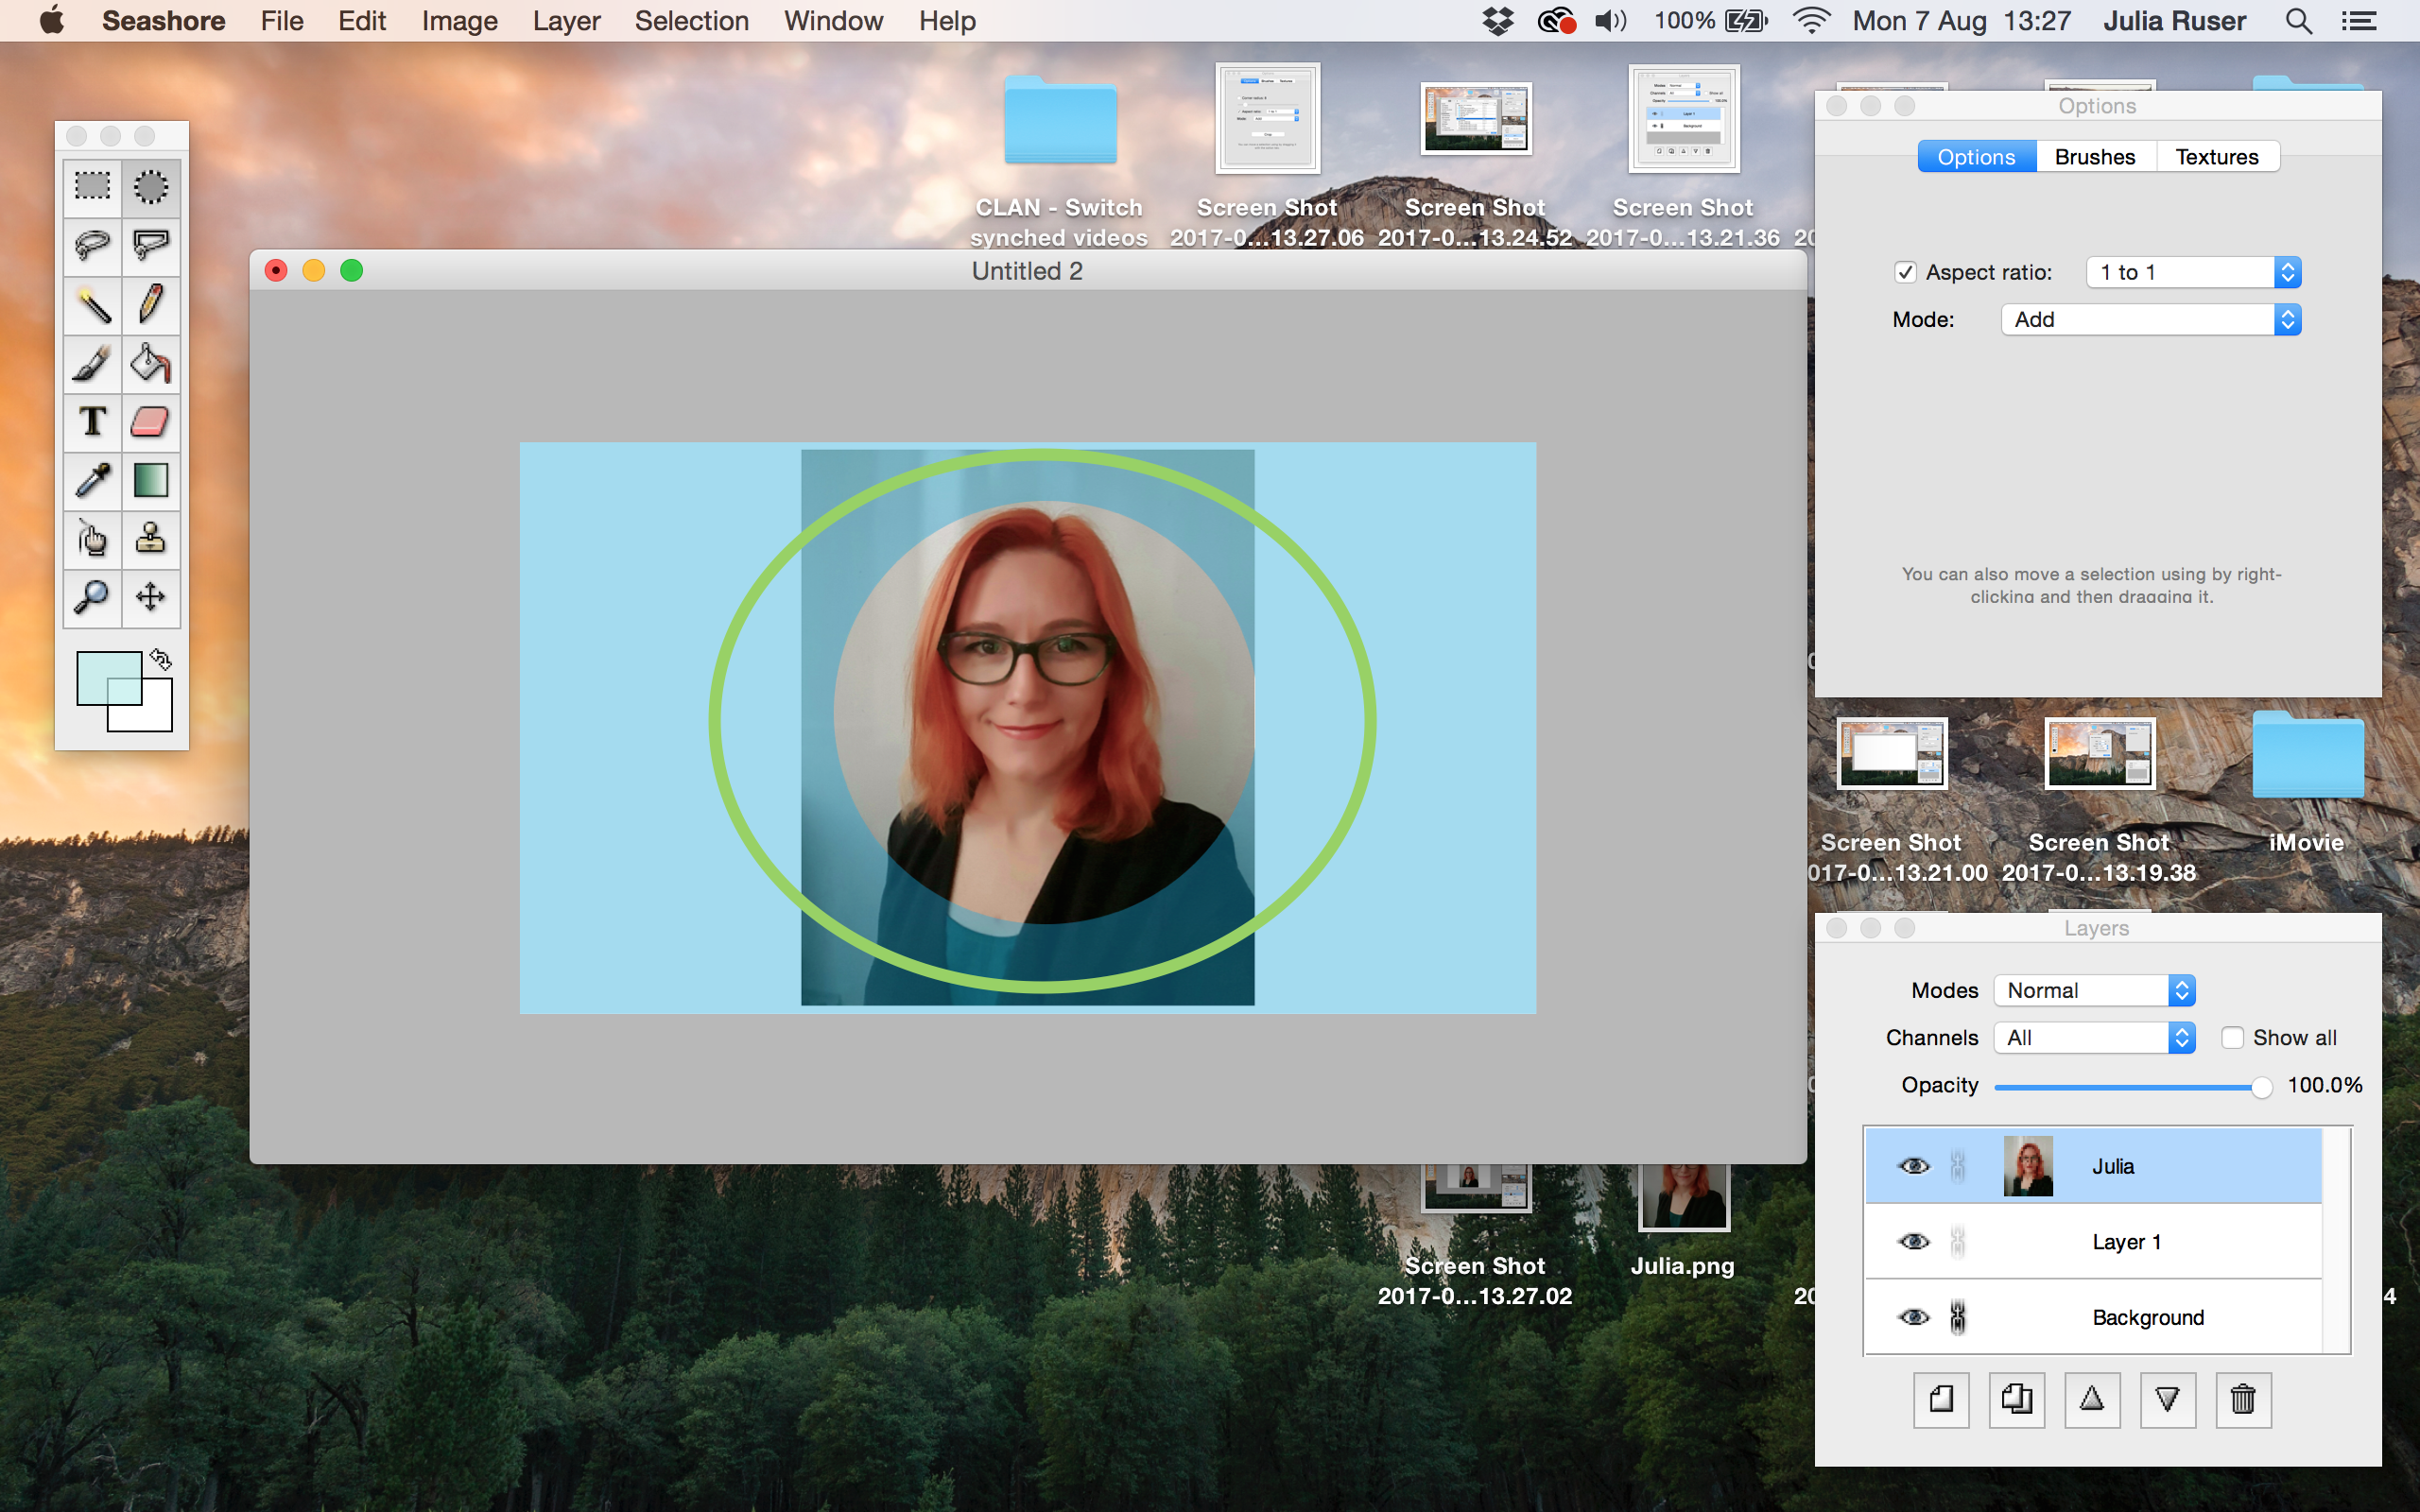

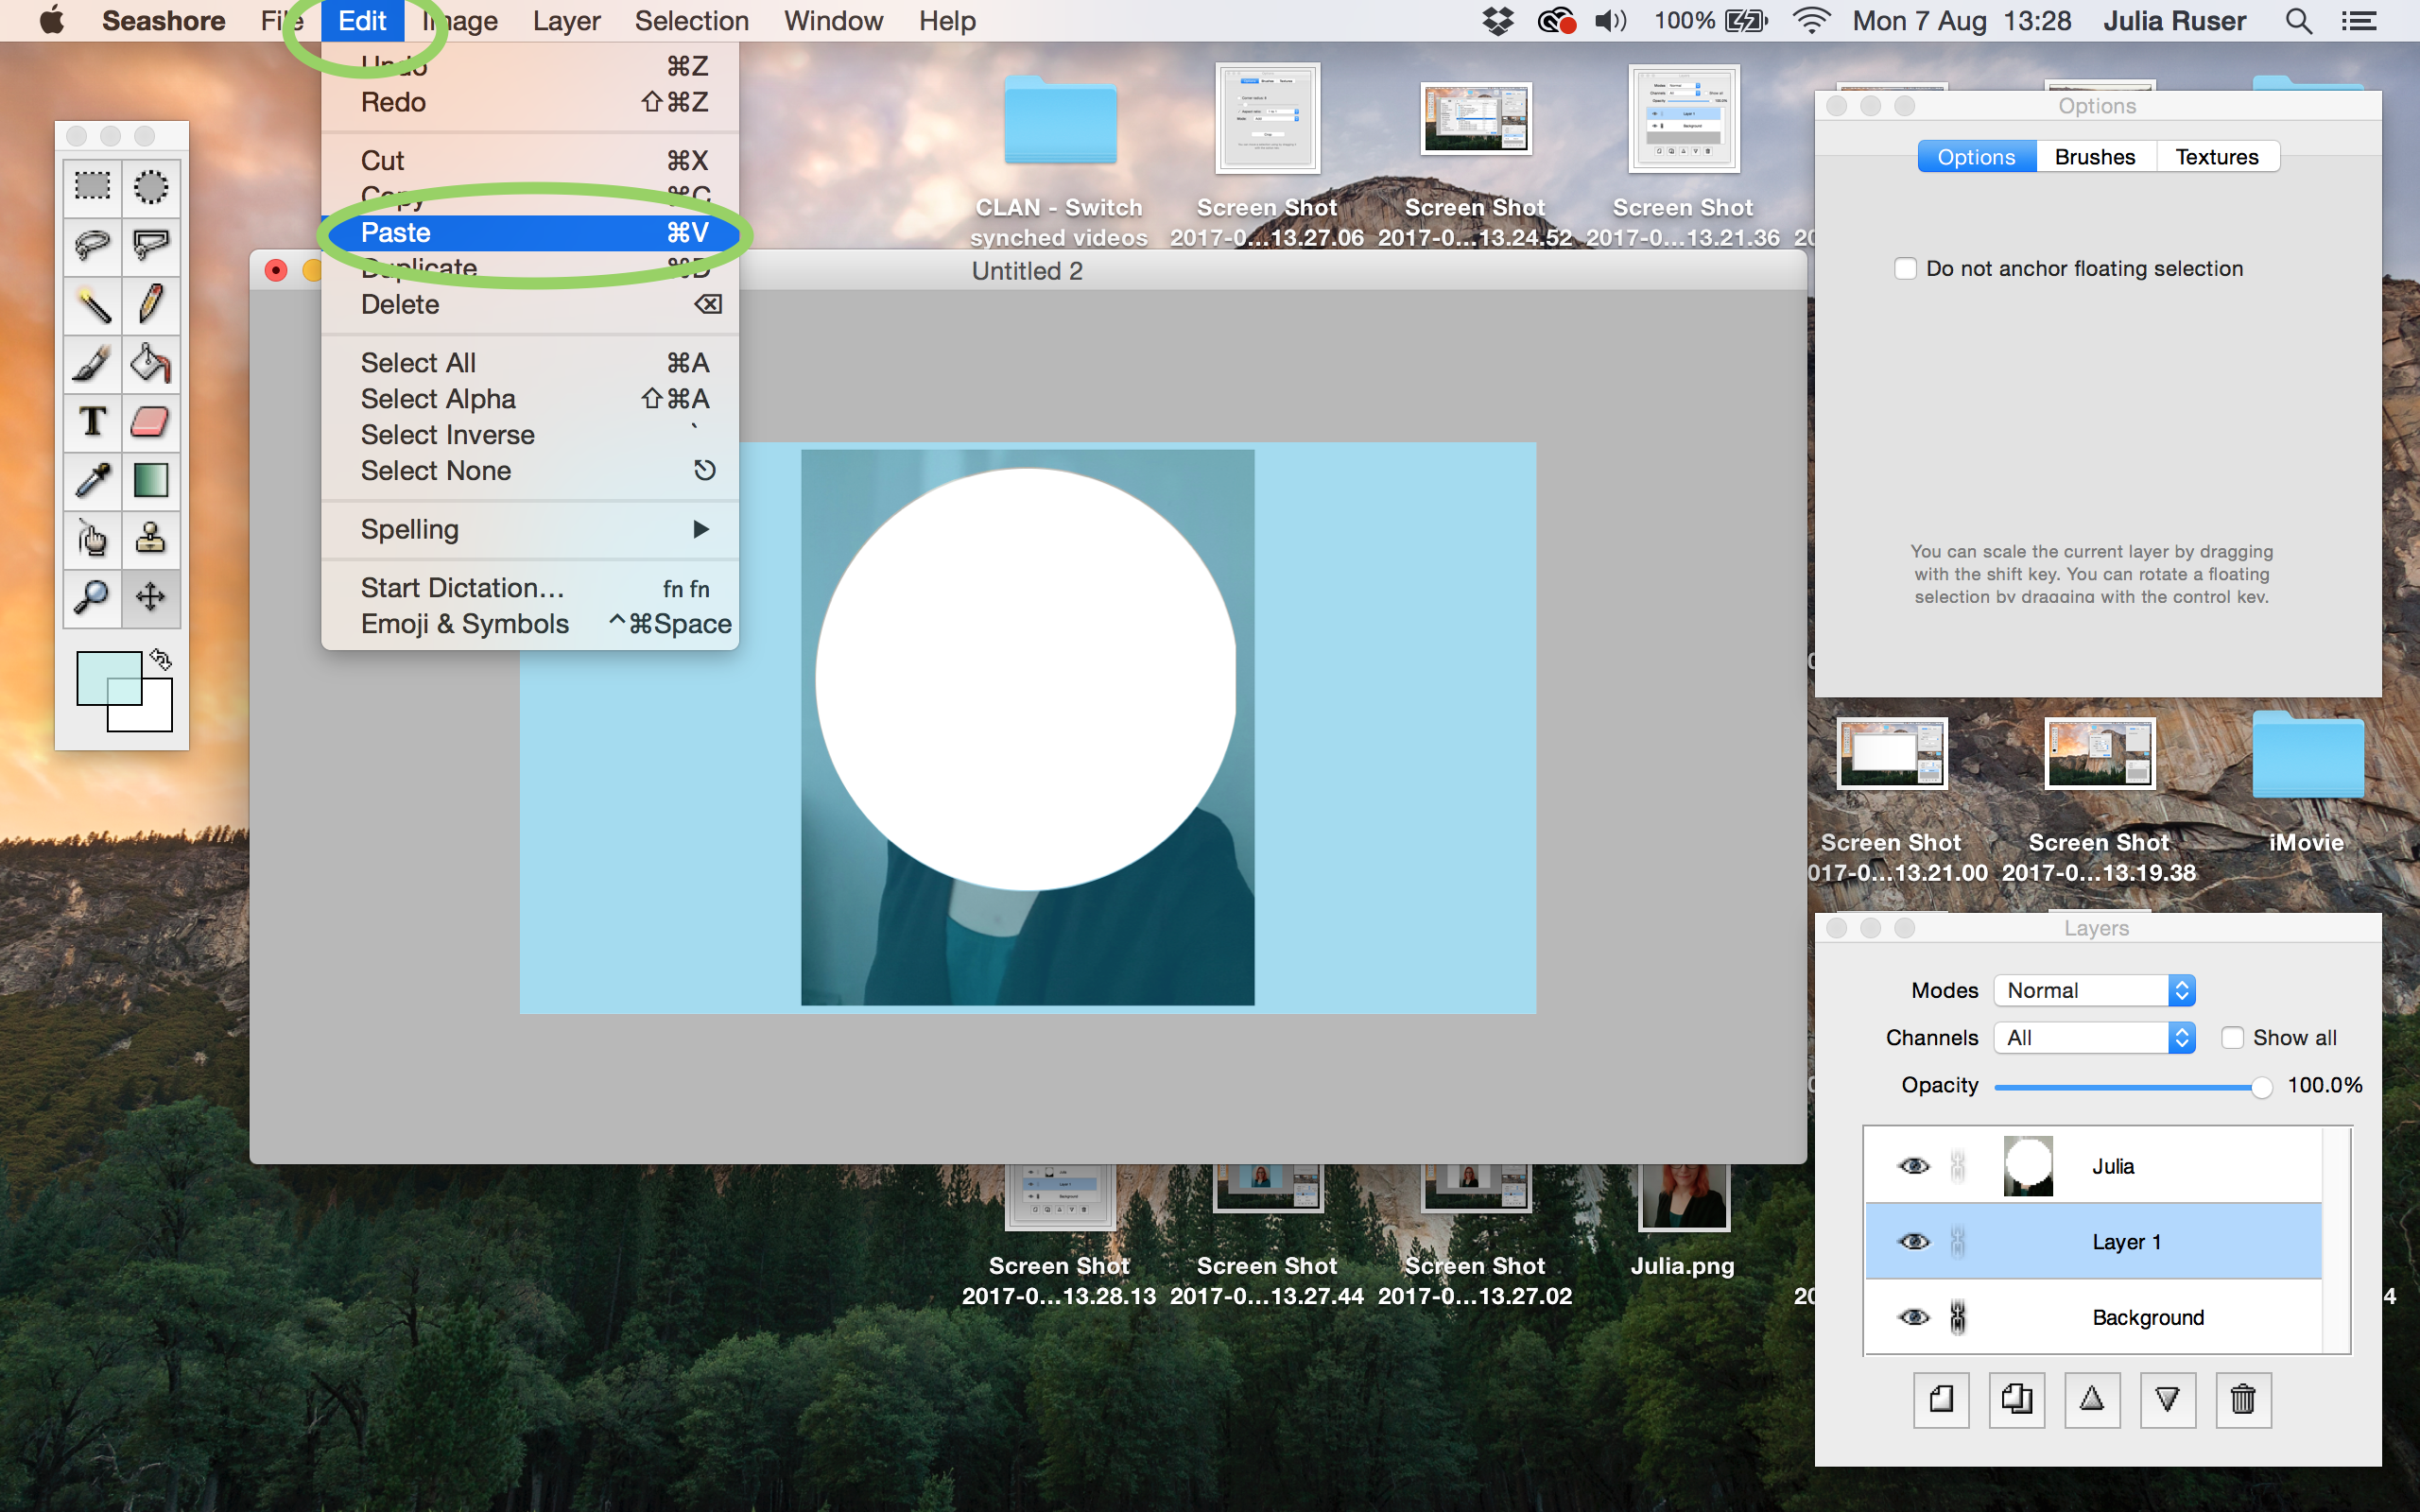
10. Go to “Edit” and click “Cut”

11. Make sure “Layer 1” is selected. Now go to “Edit” and click “Paste”
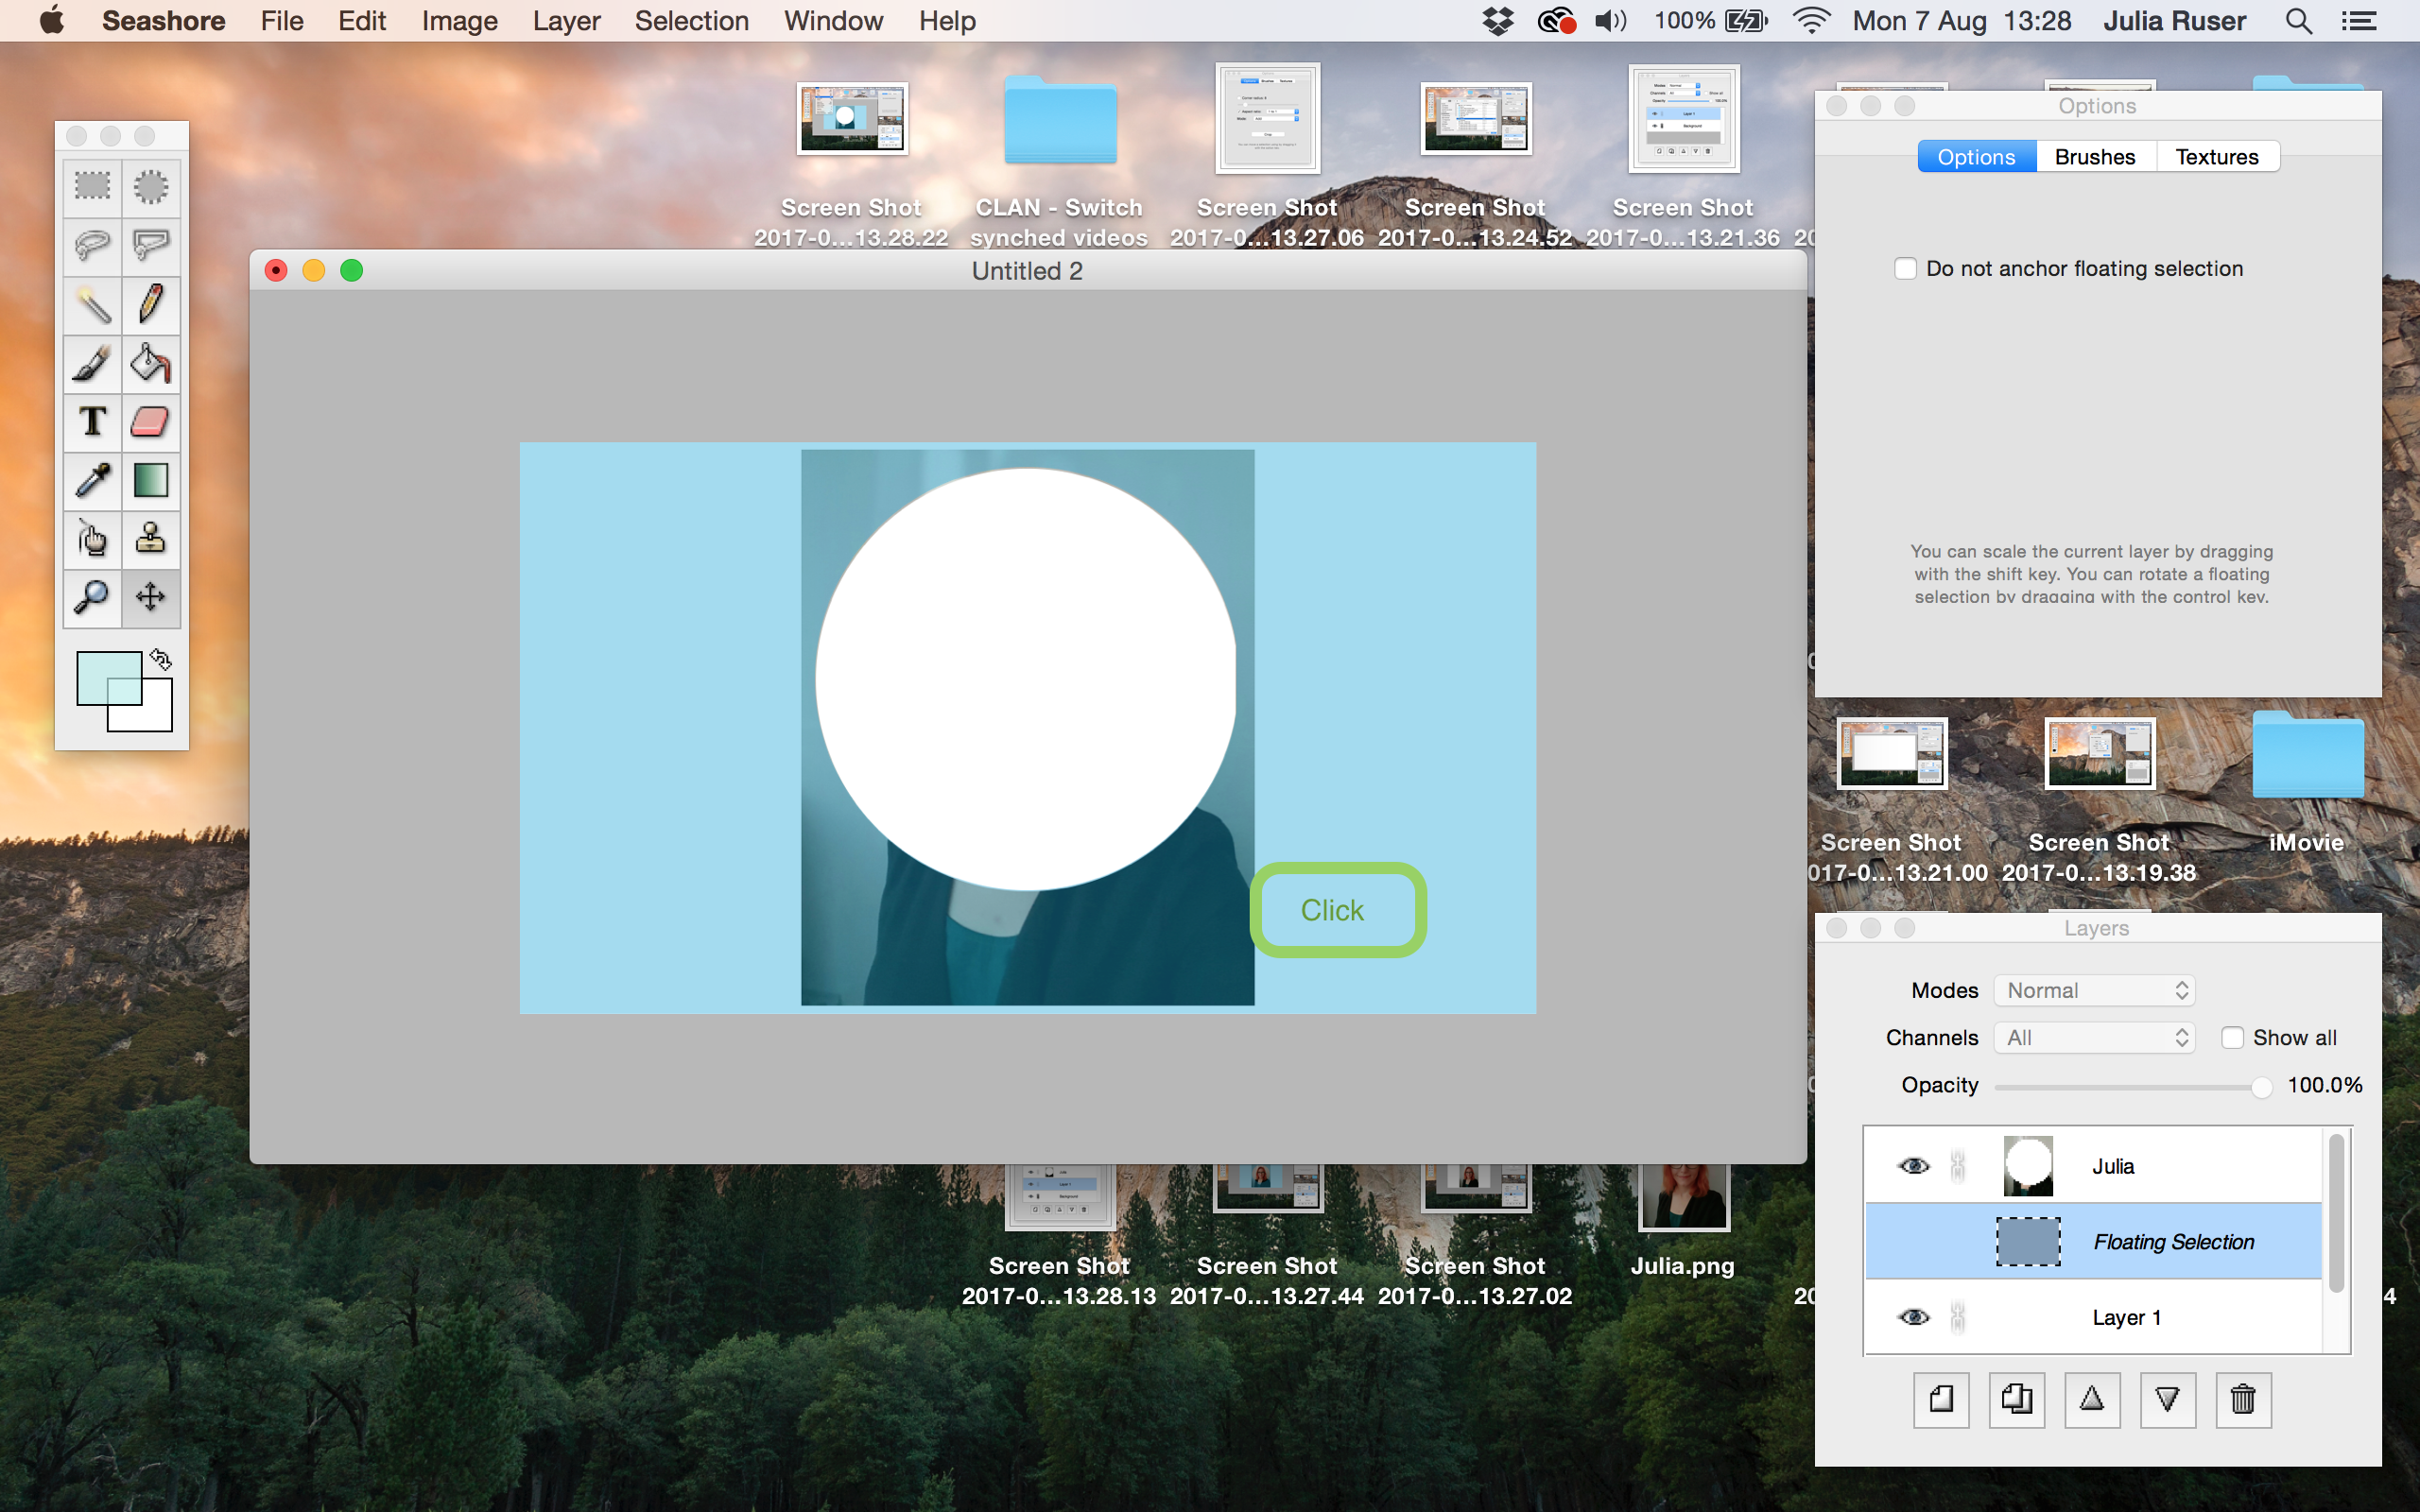
12. Click somewhere in the blue area (outside the circle). Now the selection you cut out should show up in “Layer 1”
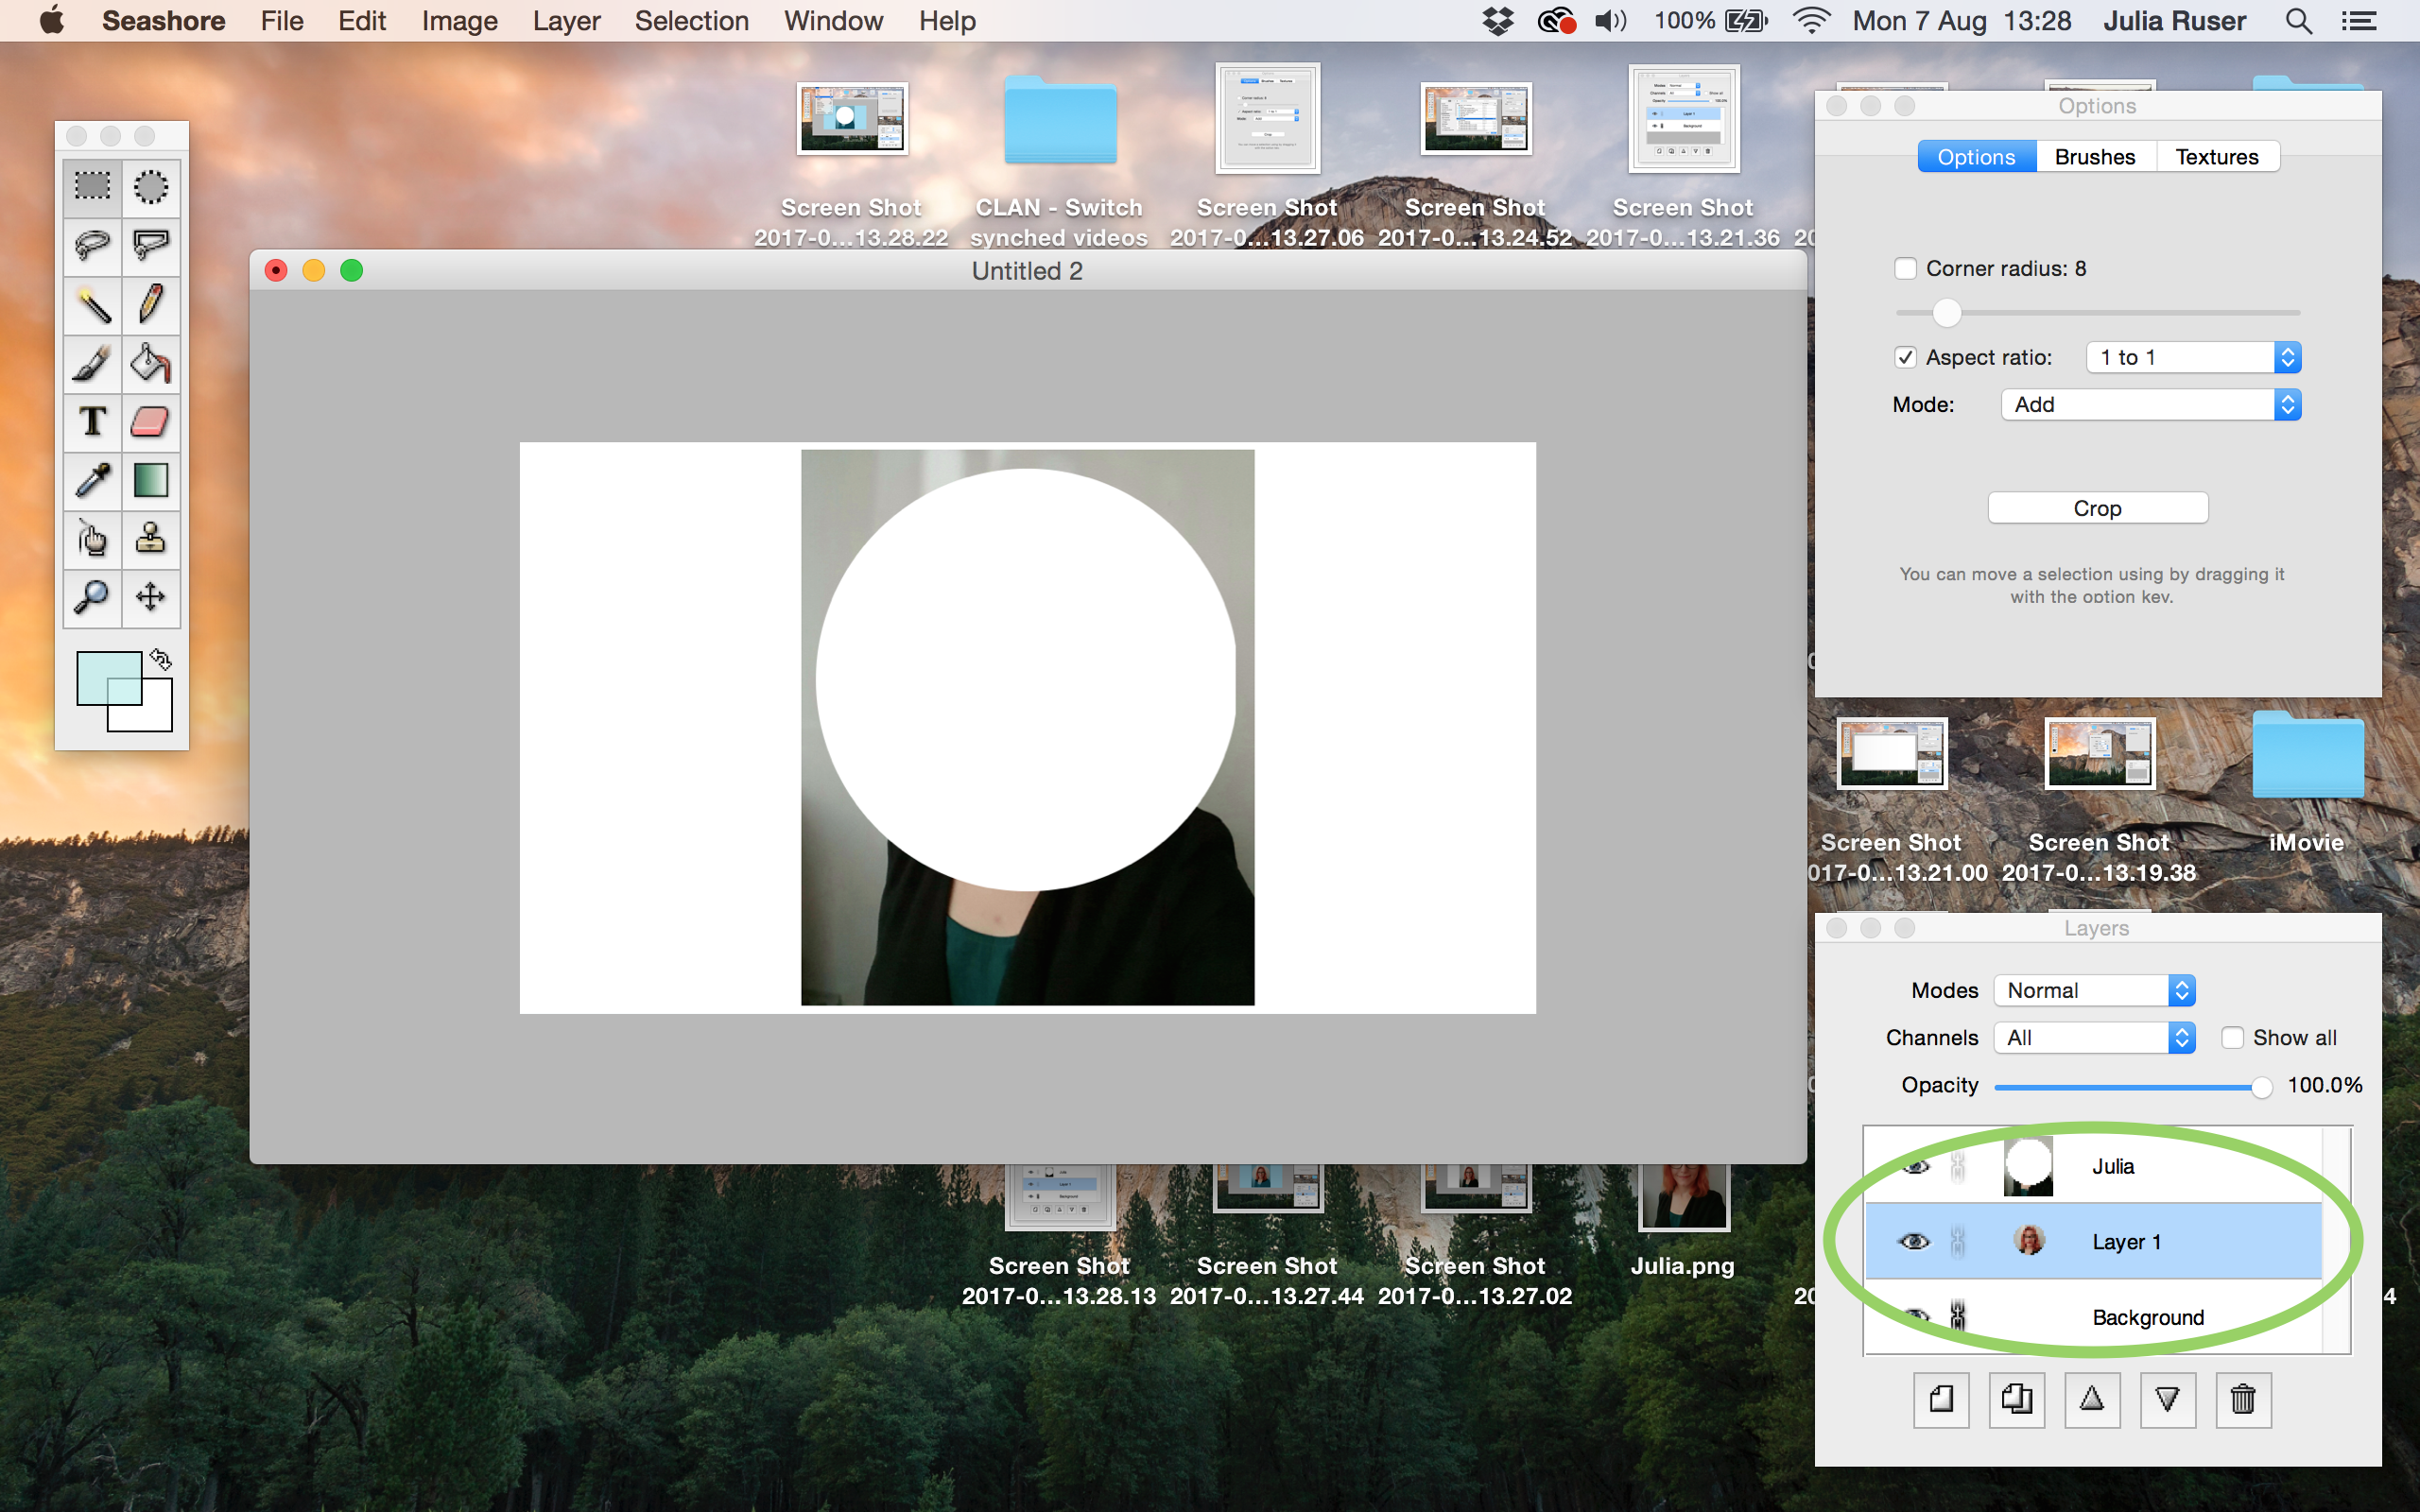
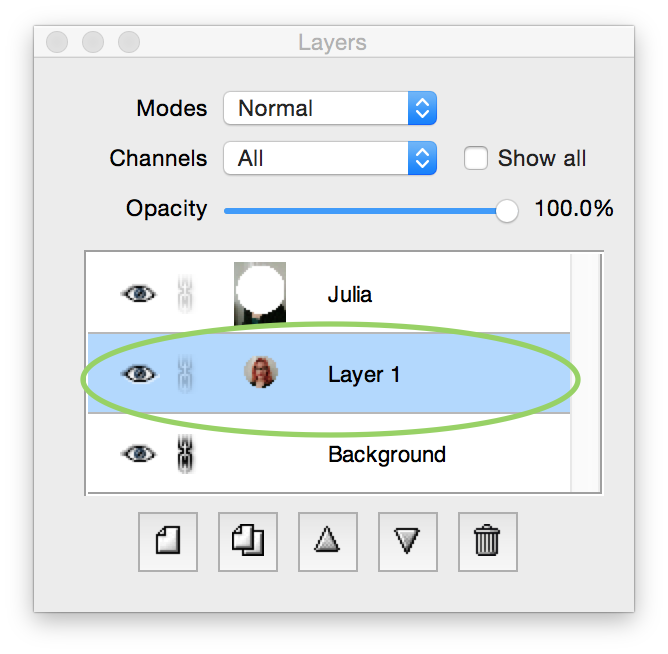
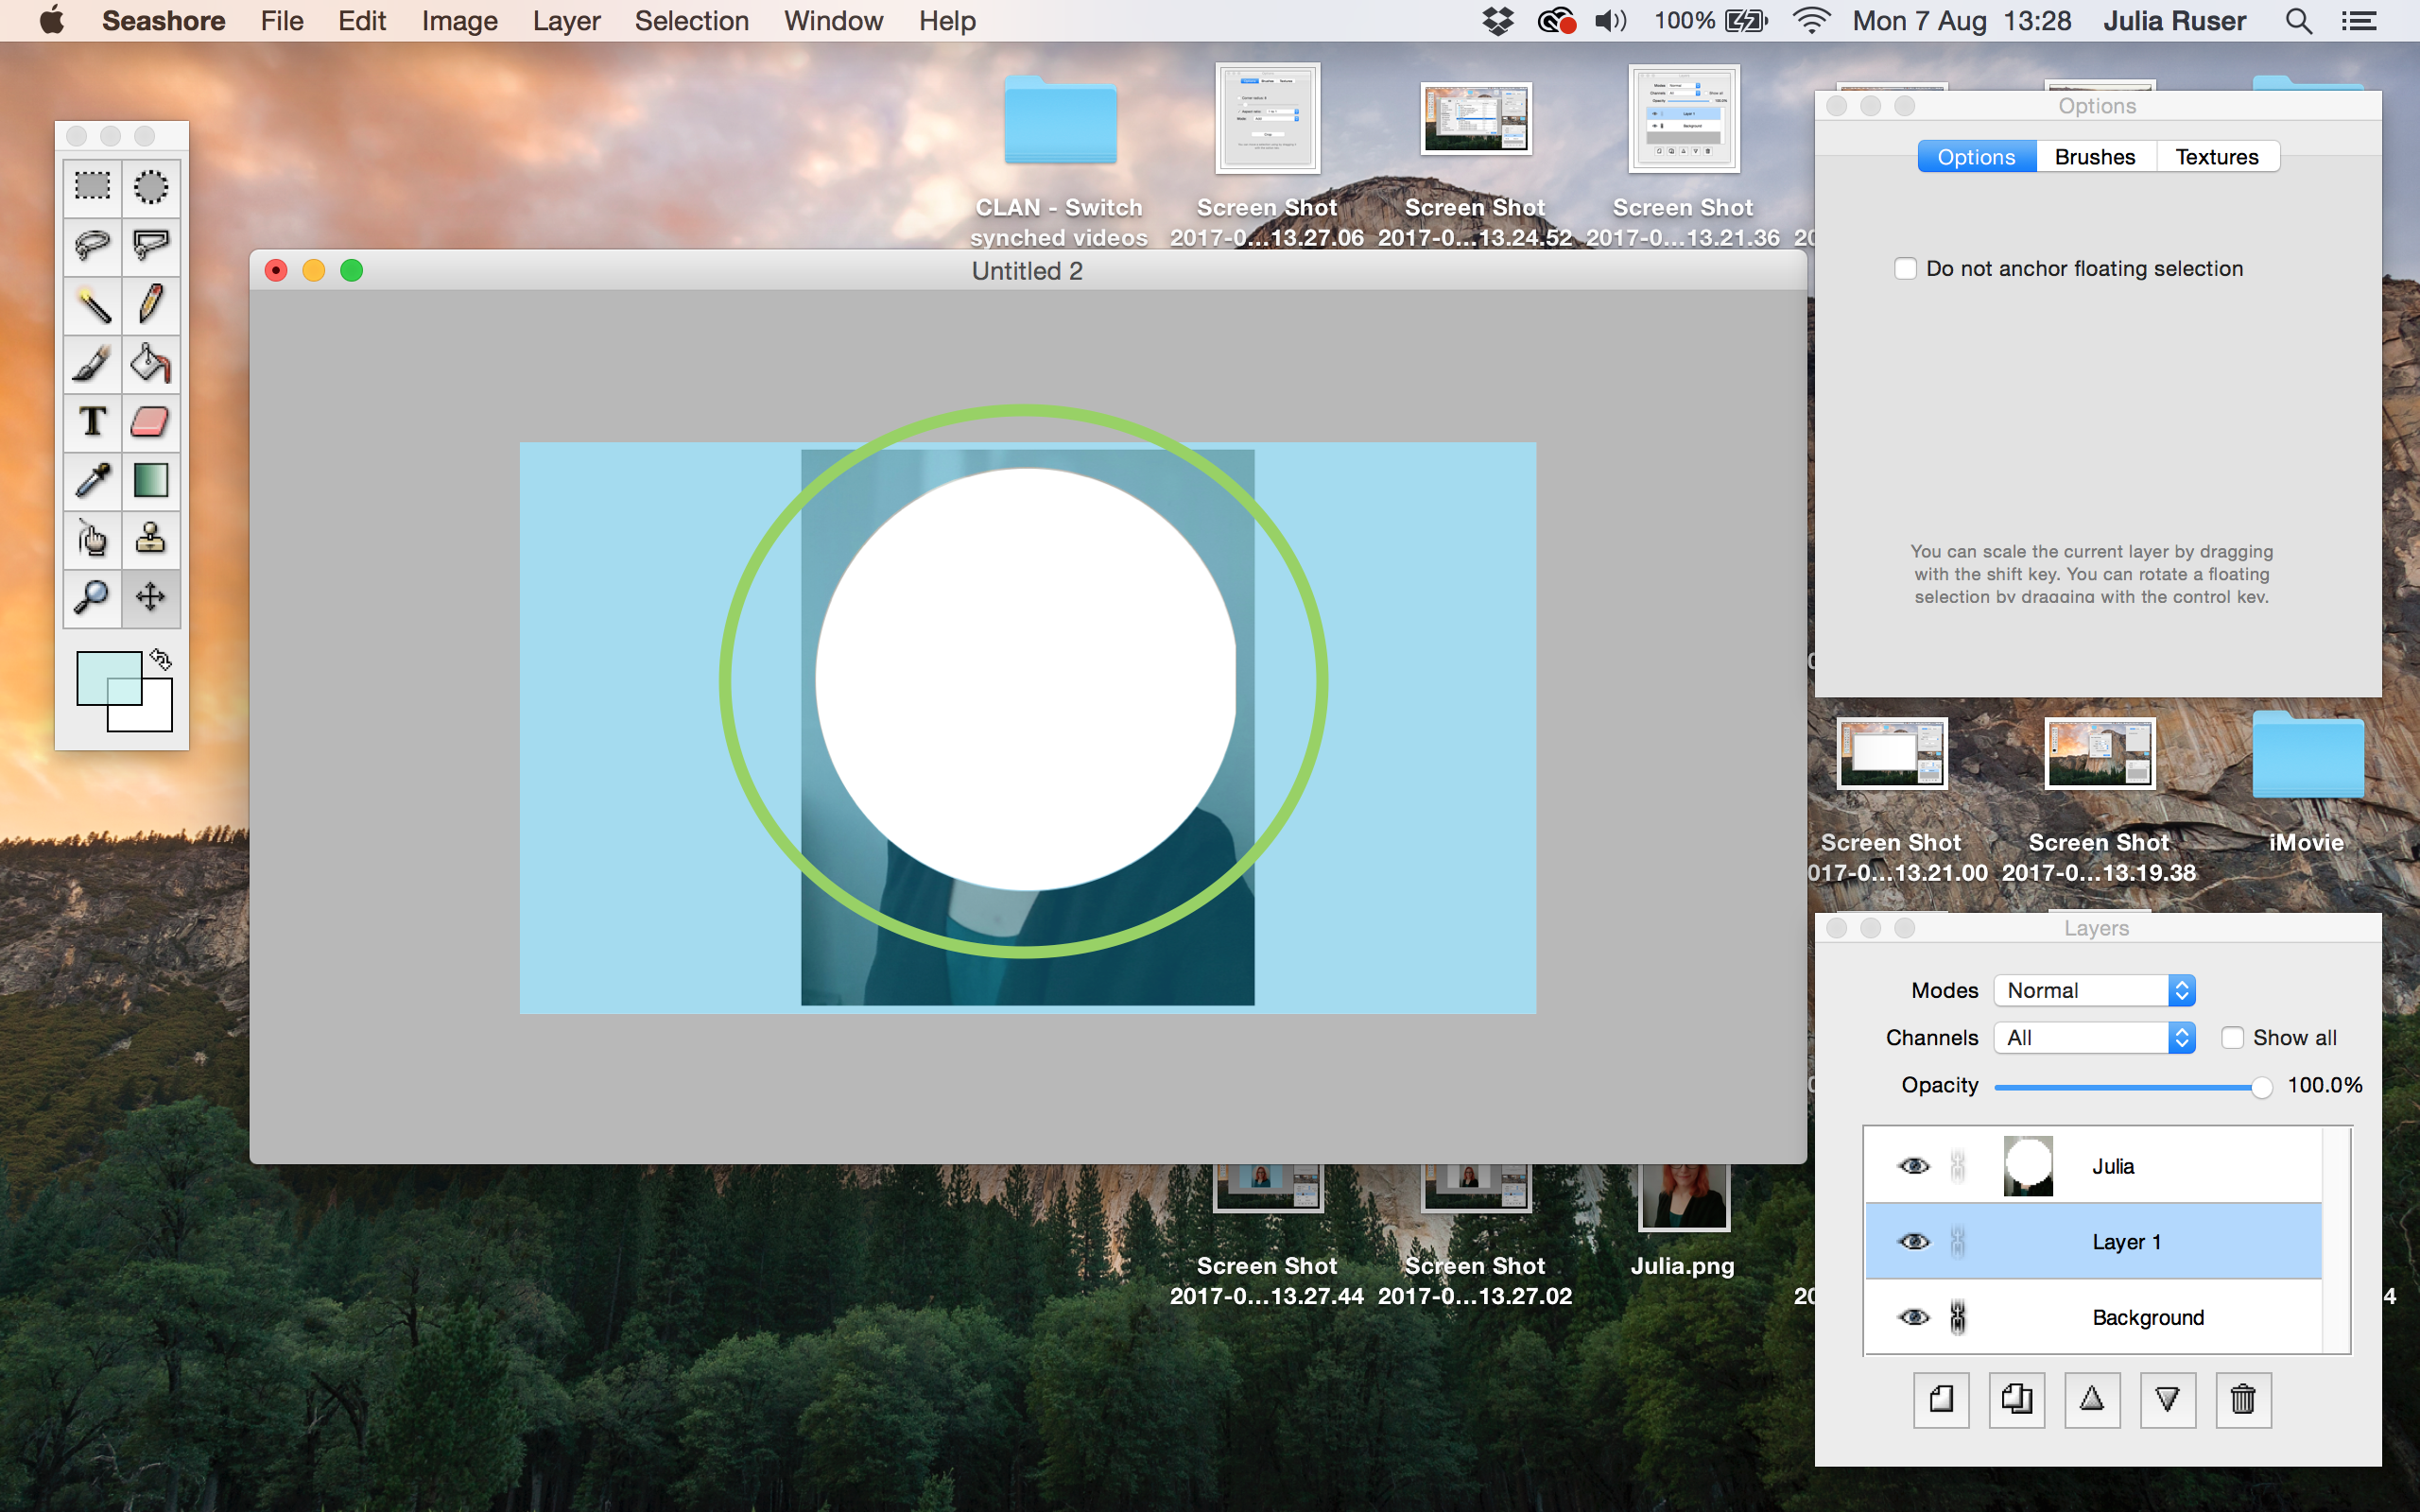
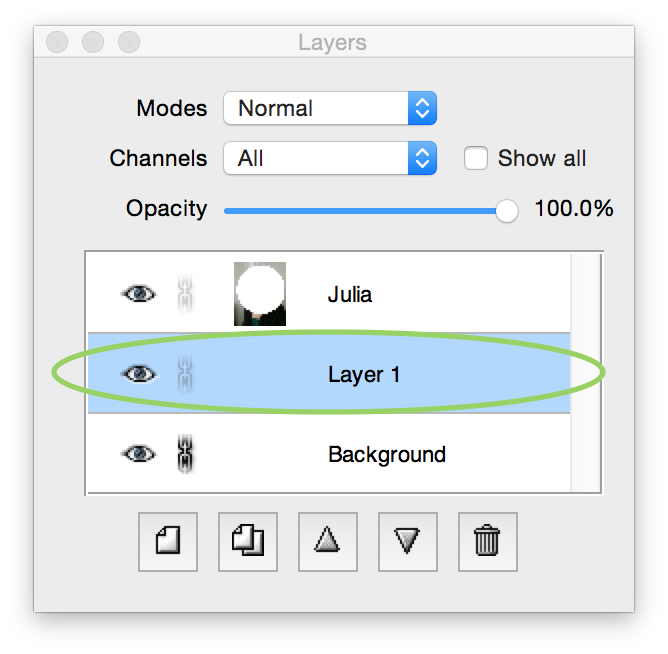
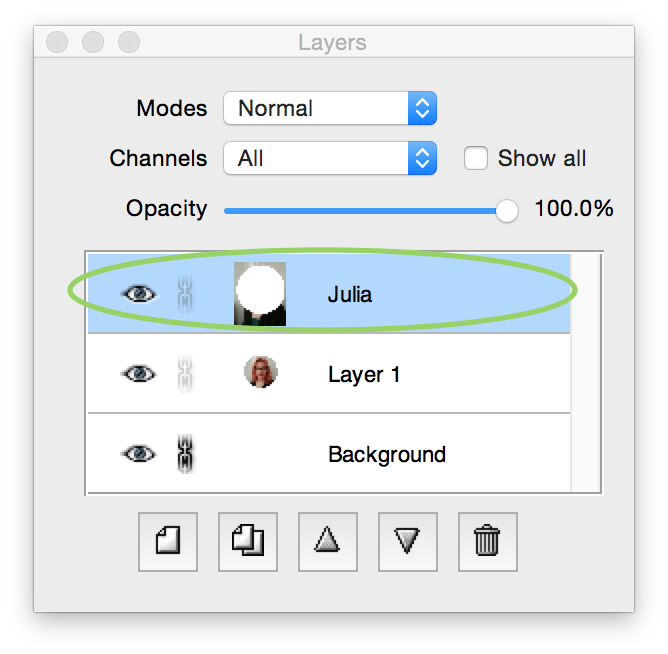
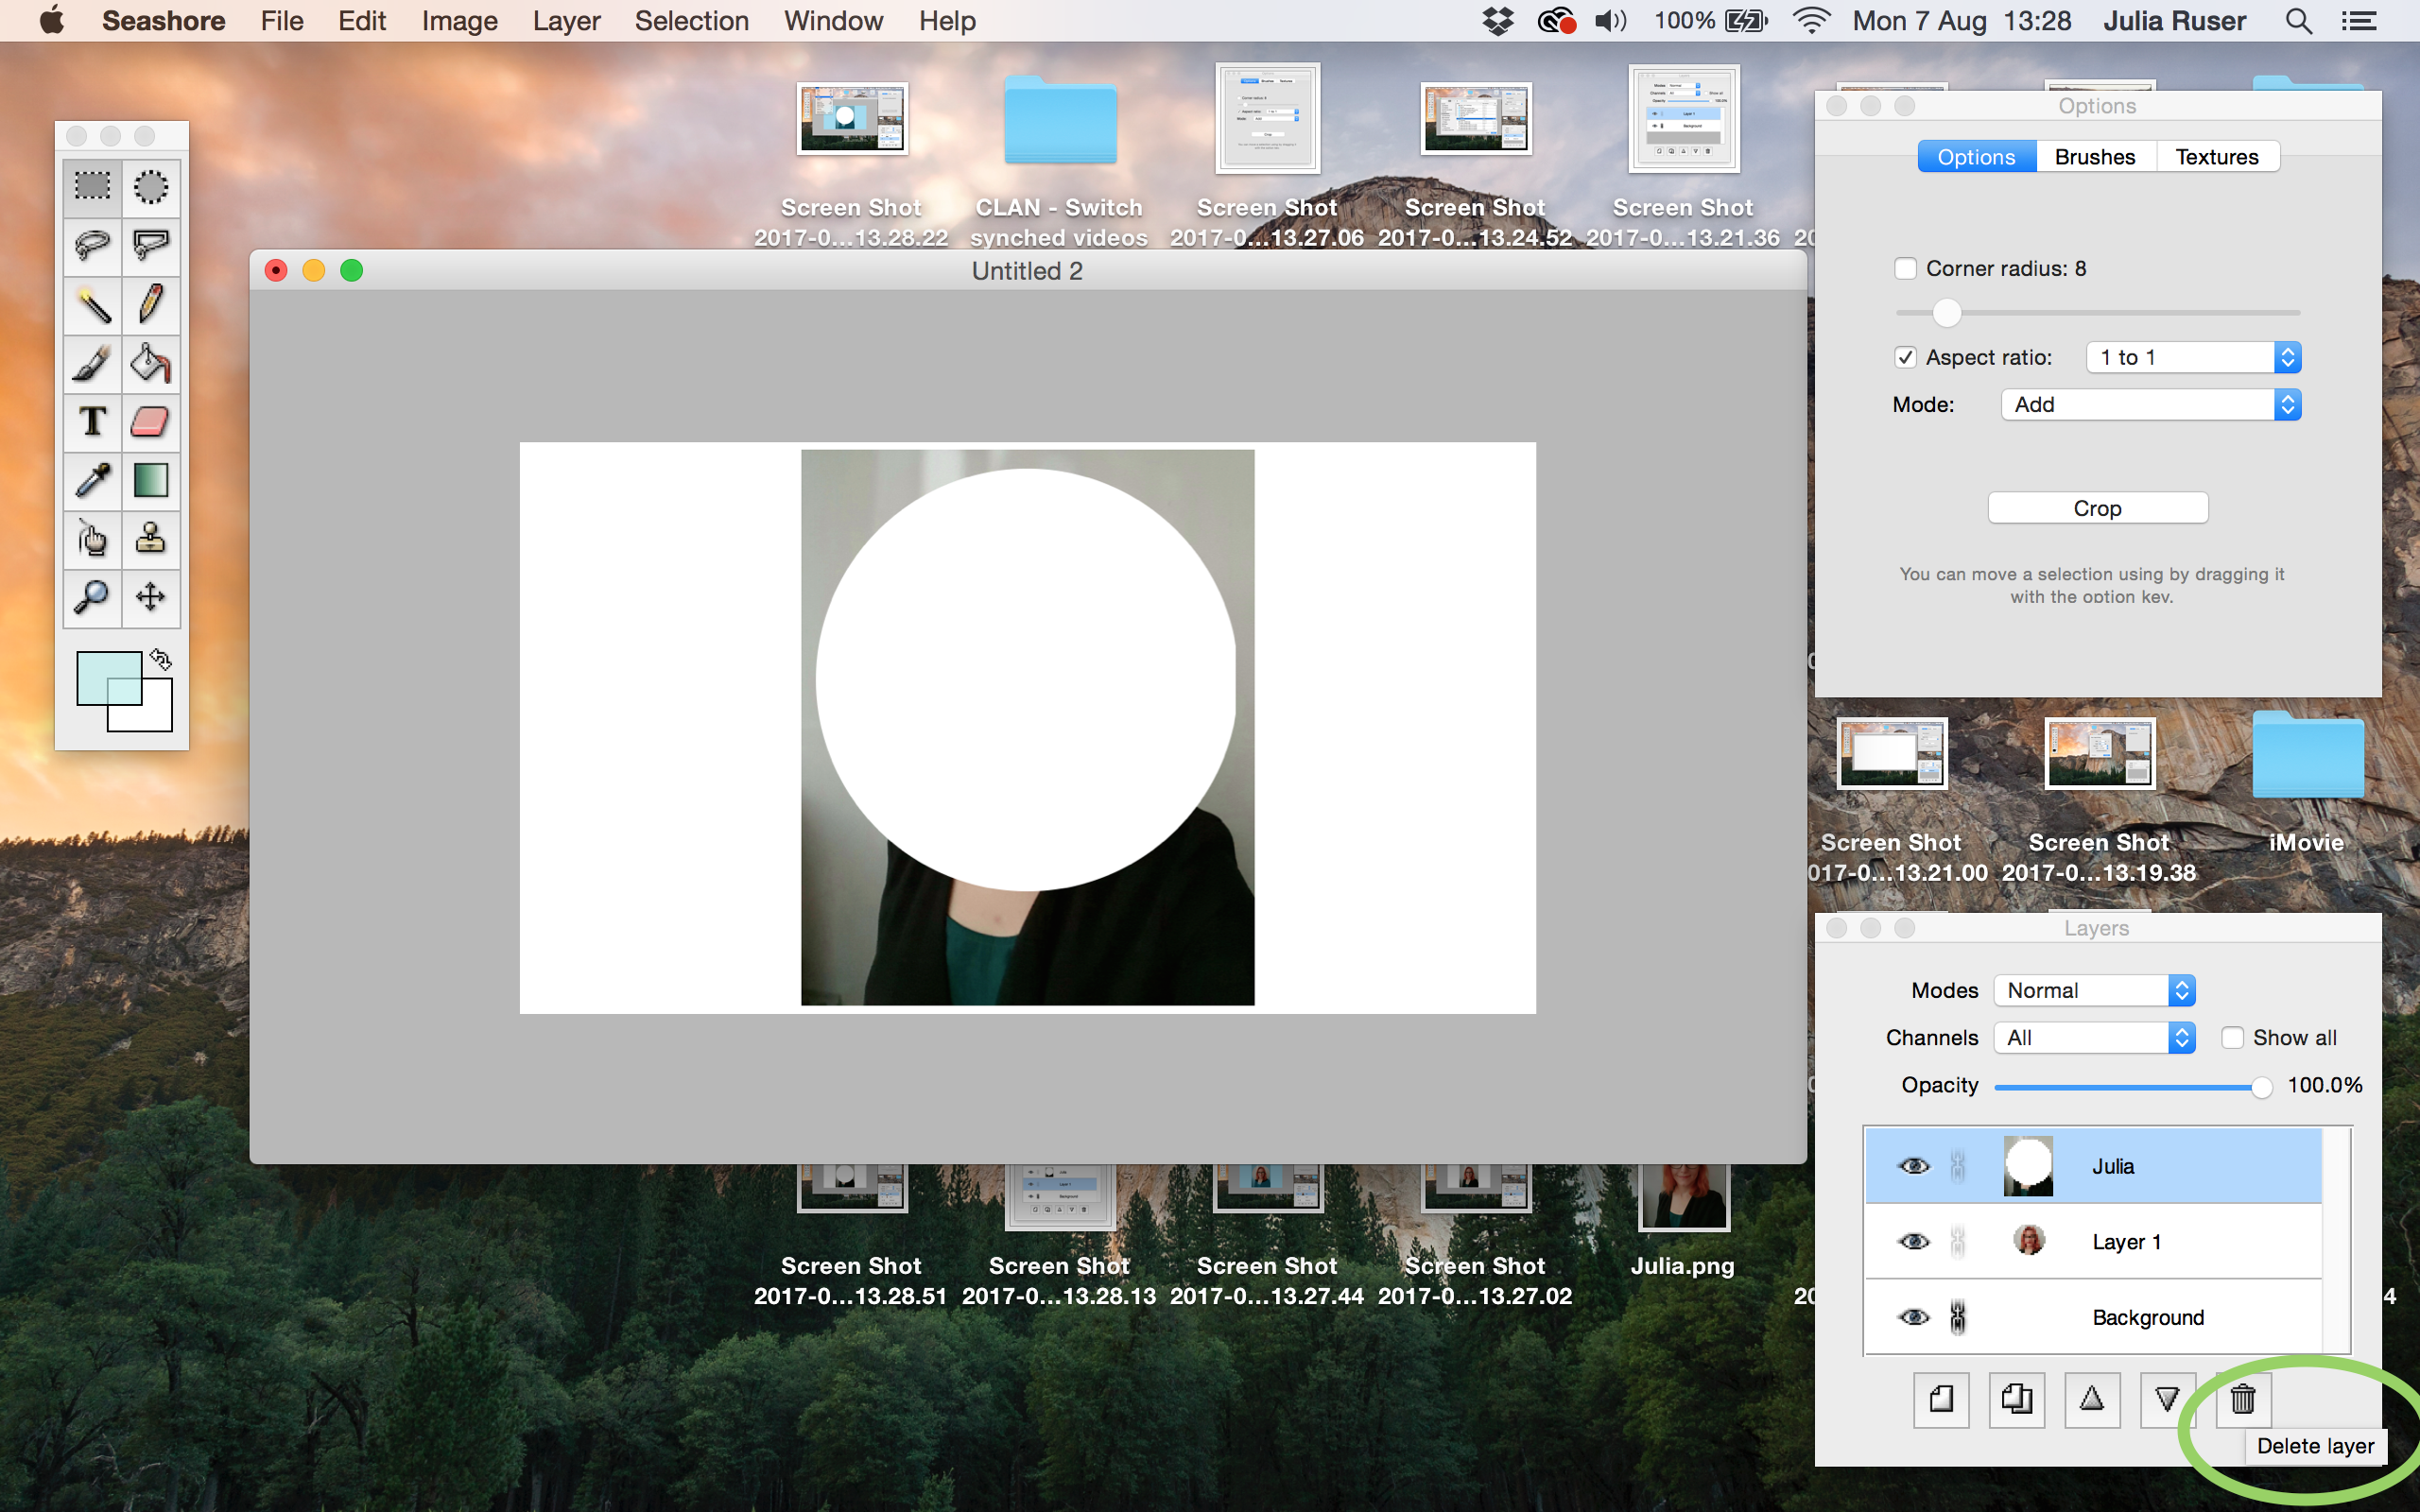
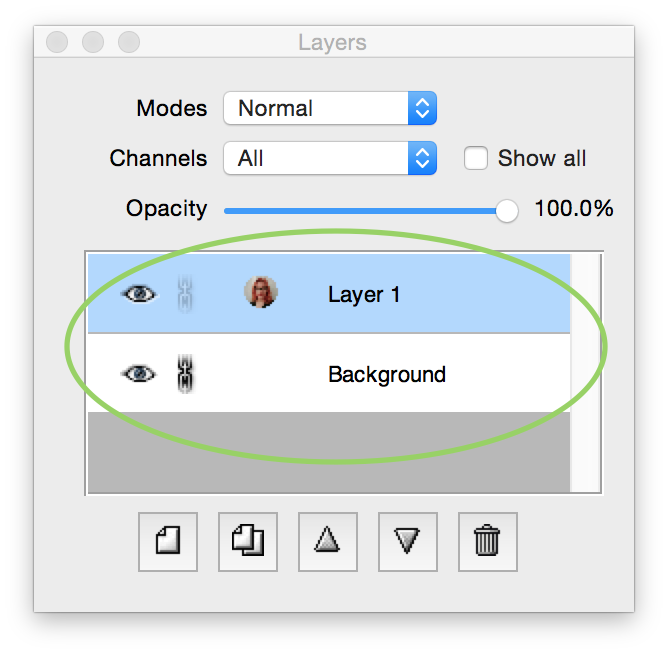
13. In the bottom right window: Select the top layer (the one with the name of the image you imported)

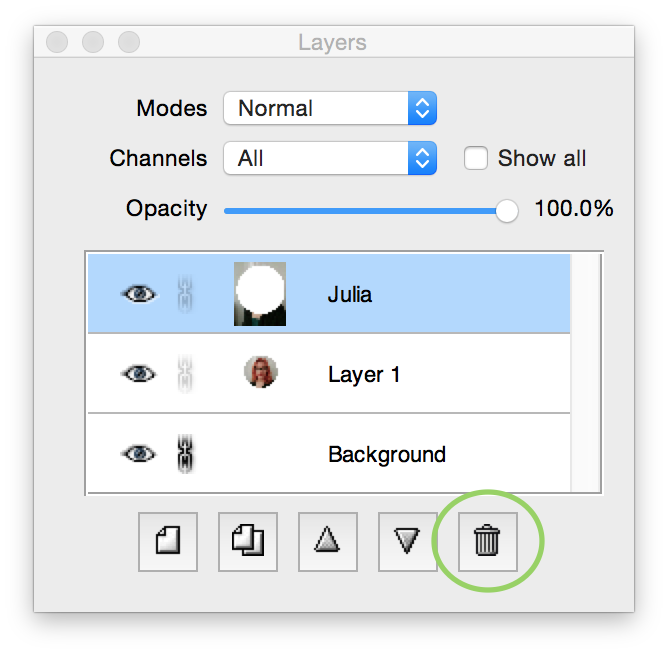
14. Click the “Bin button” on the bottom right to delete the image layer
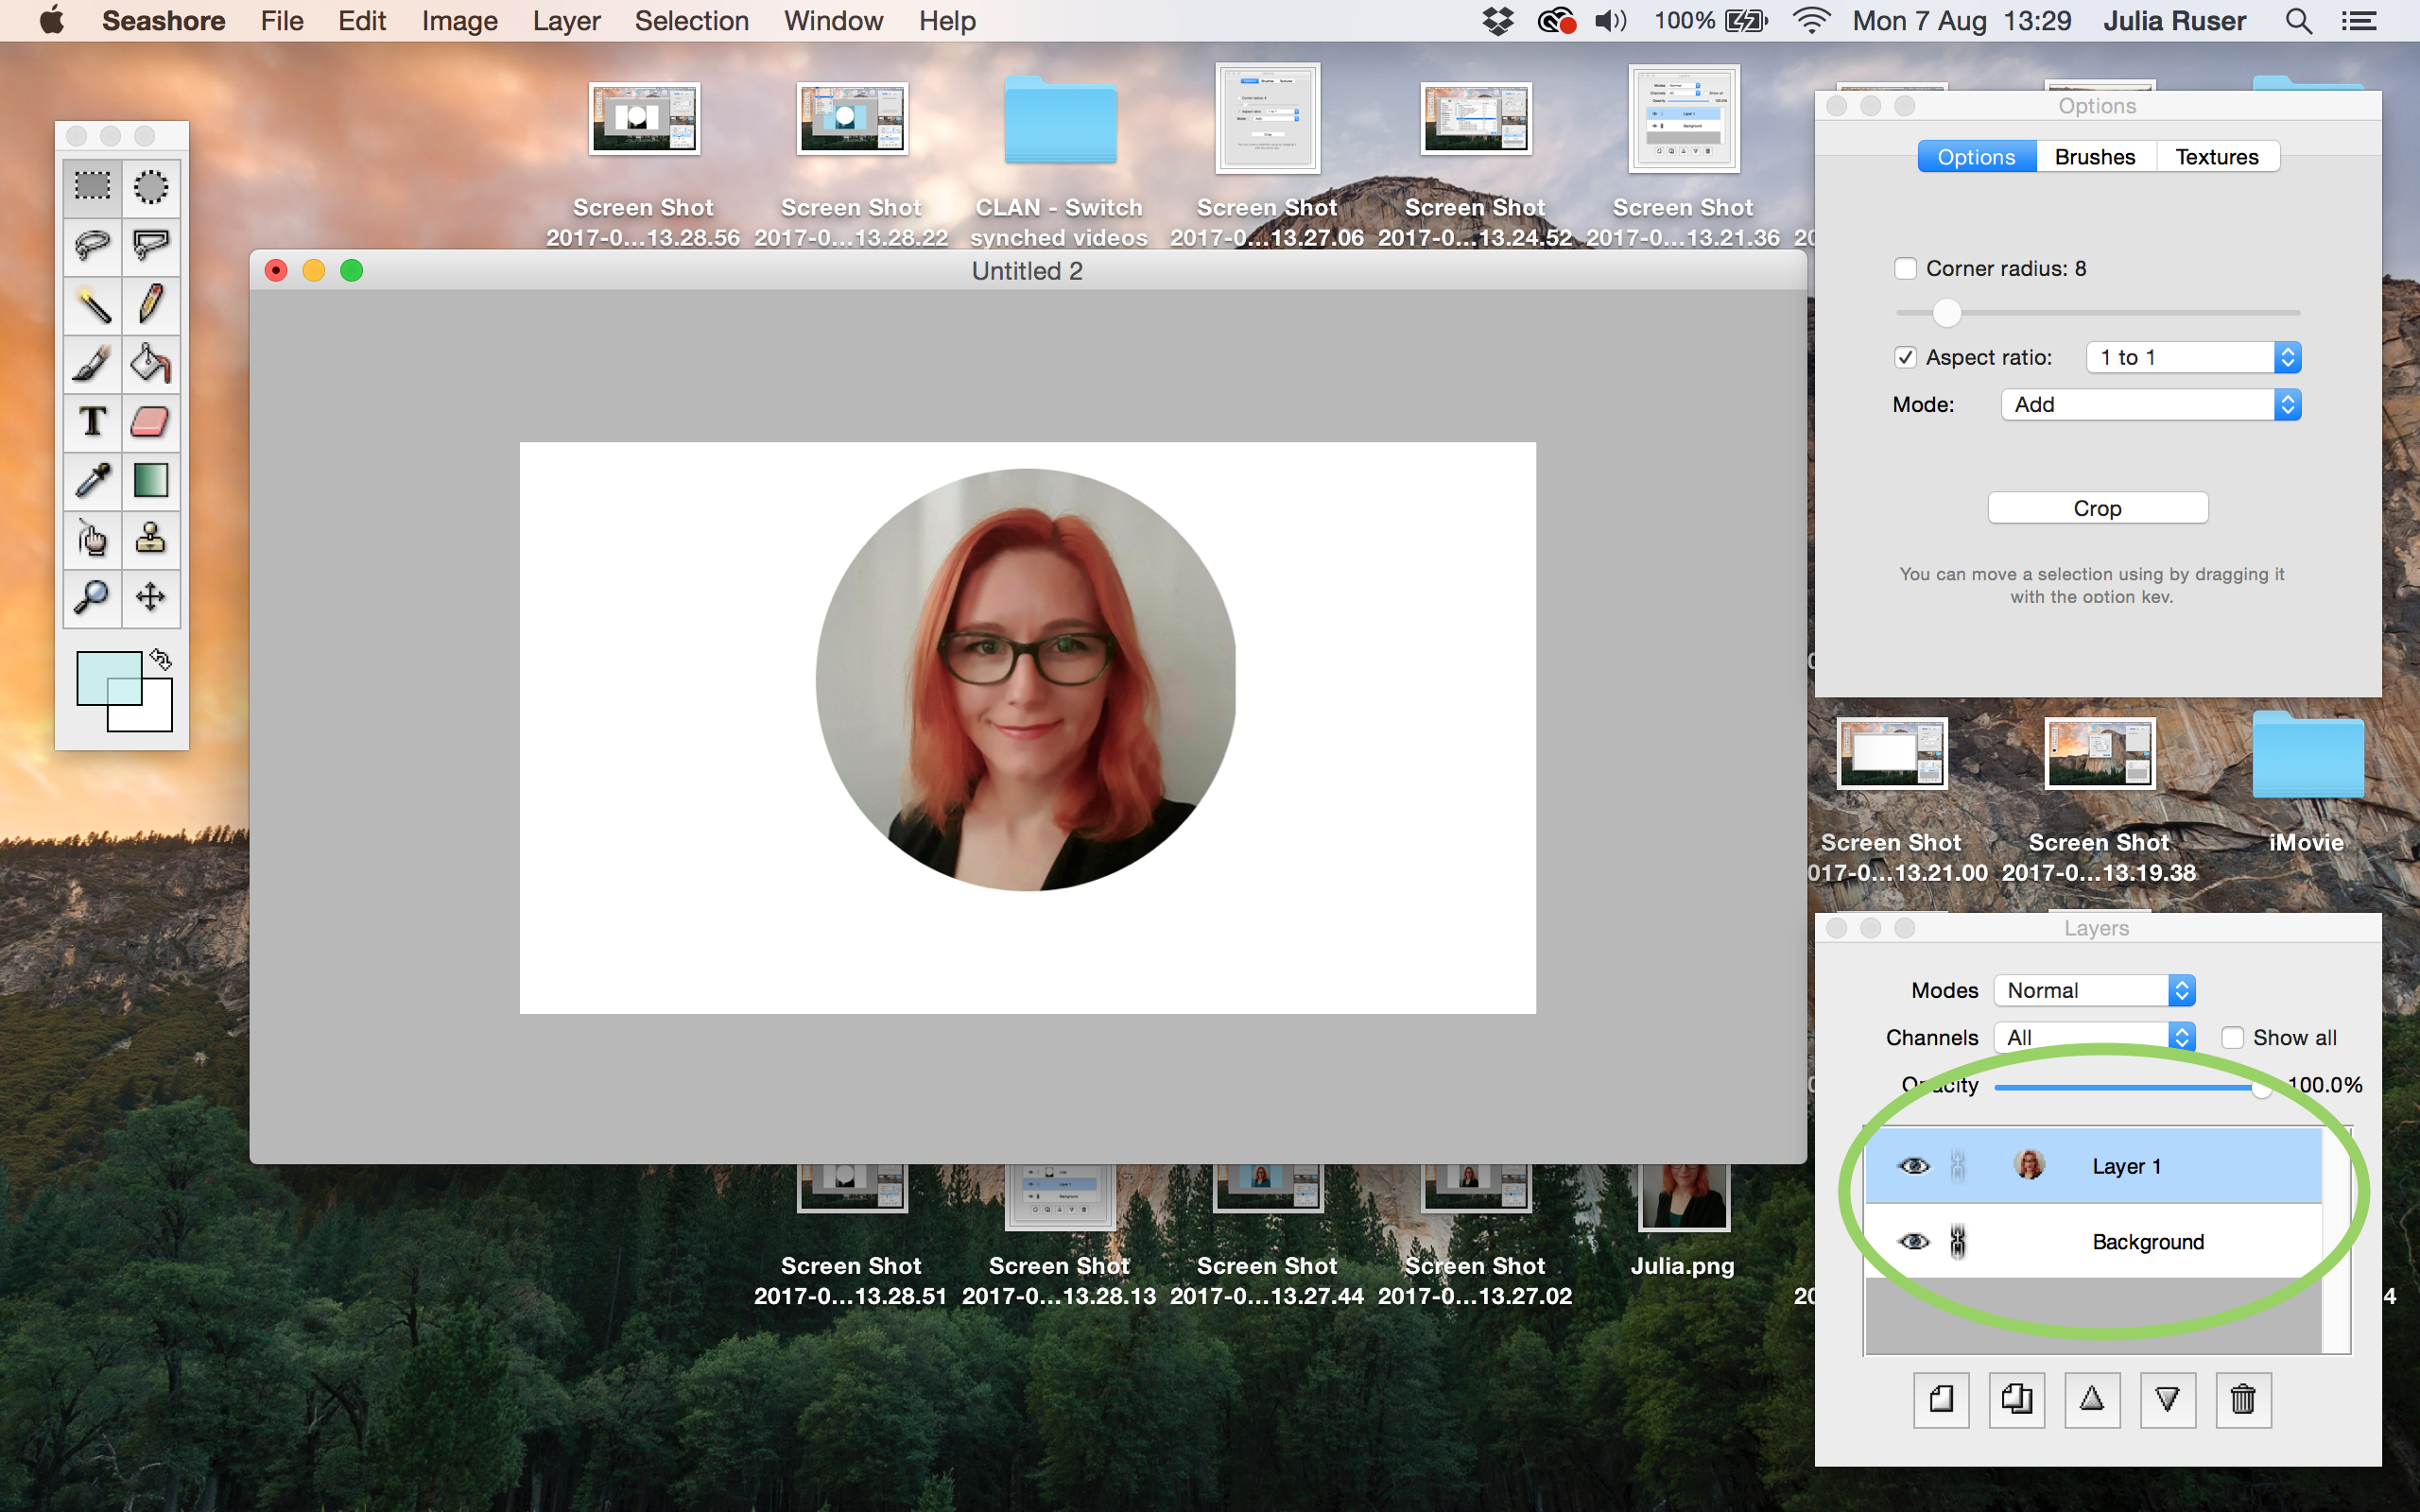
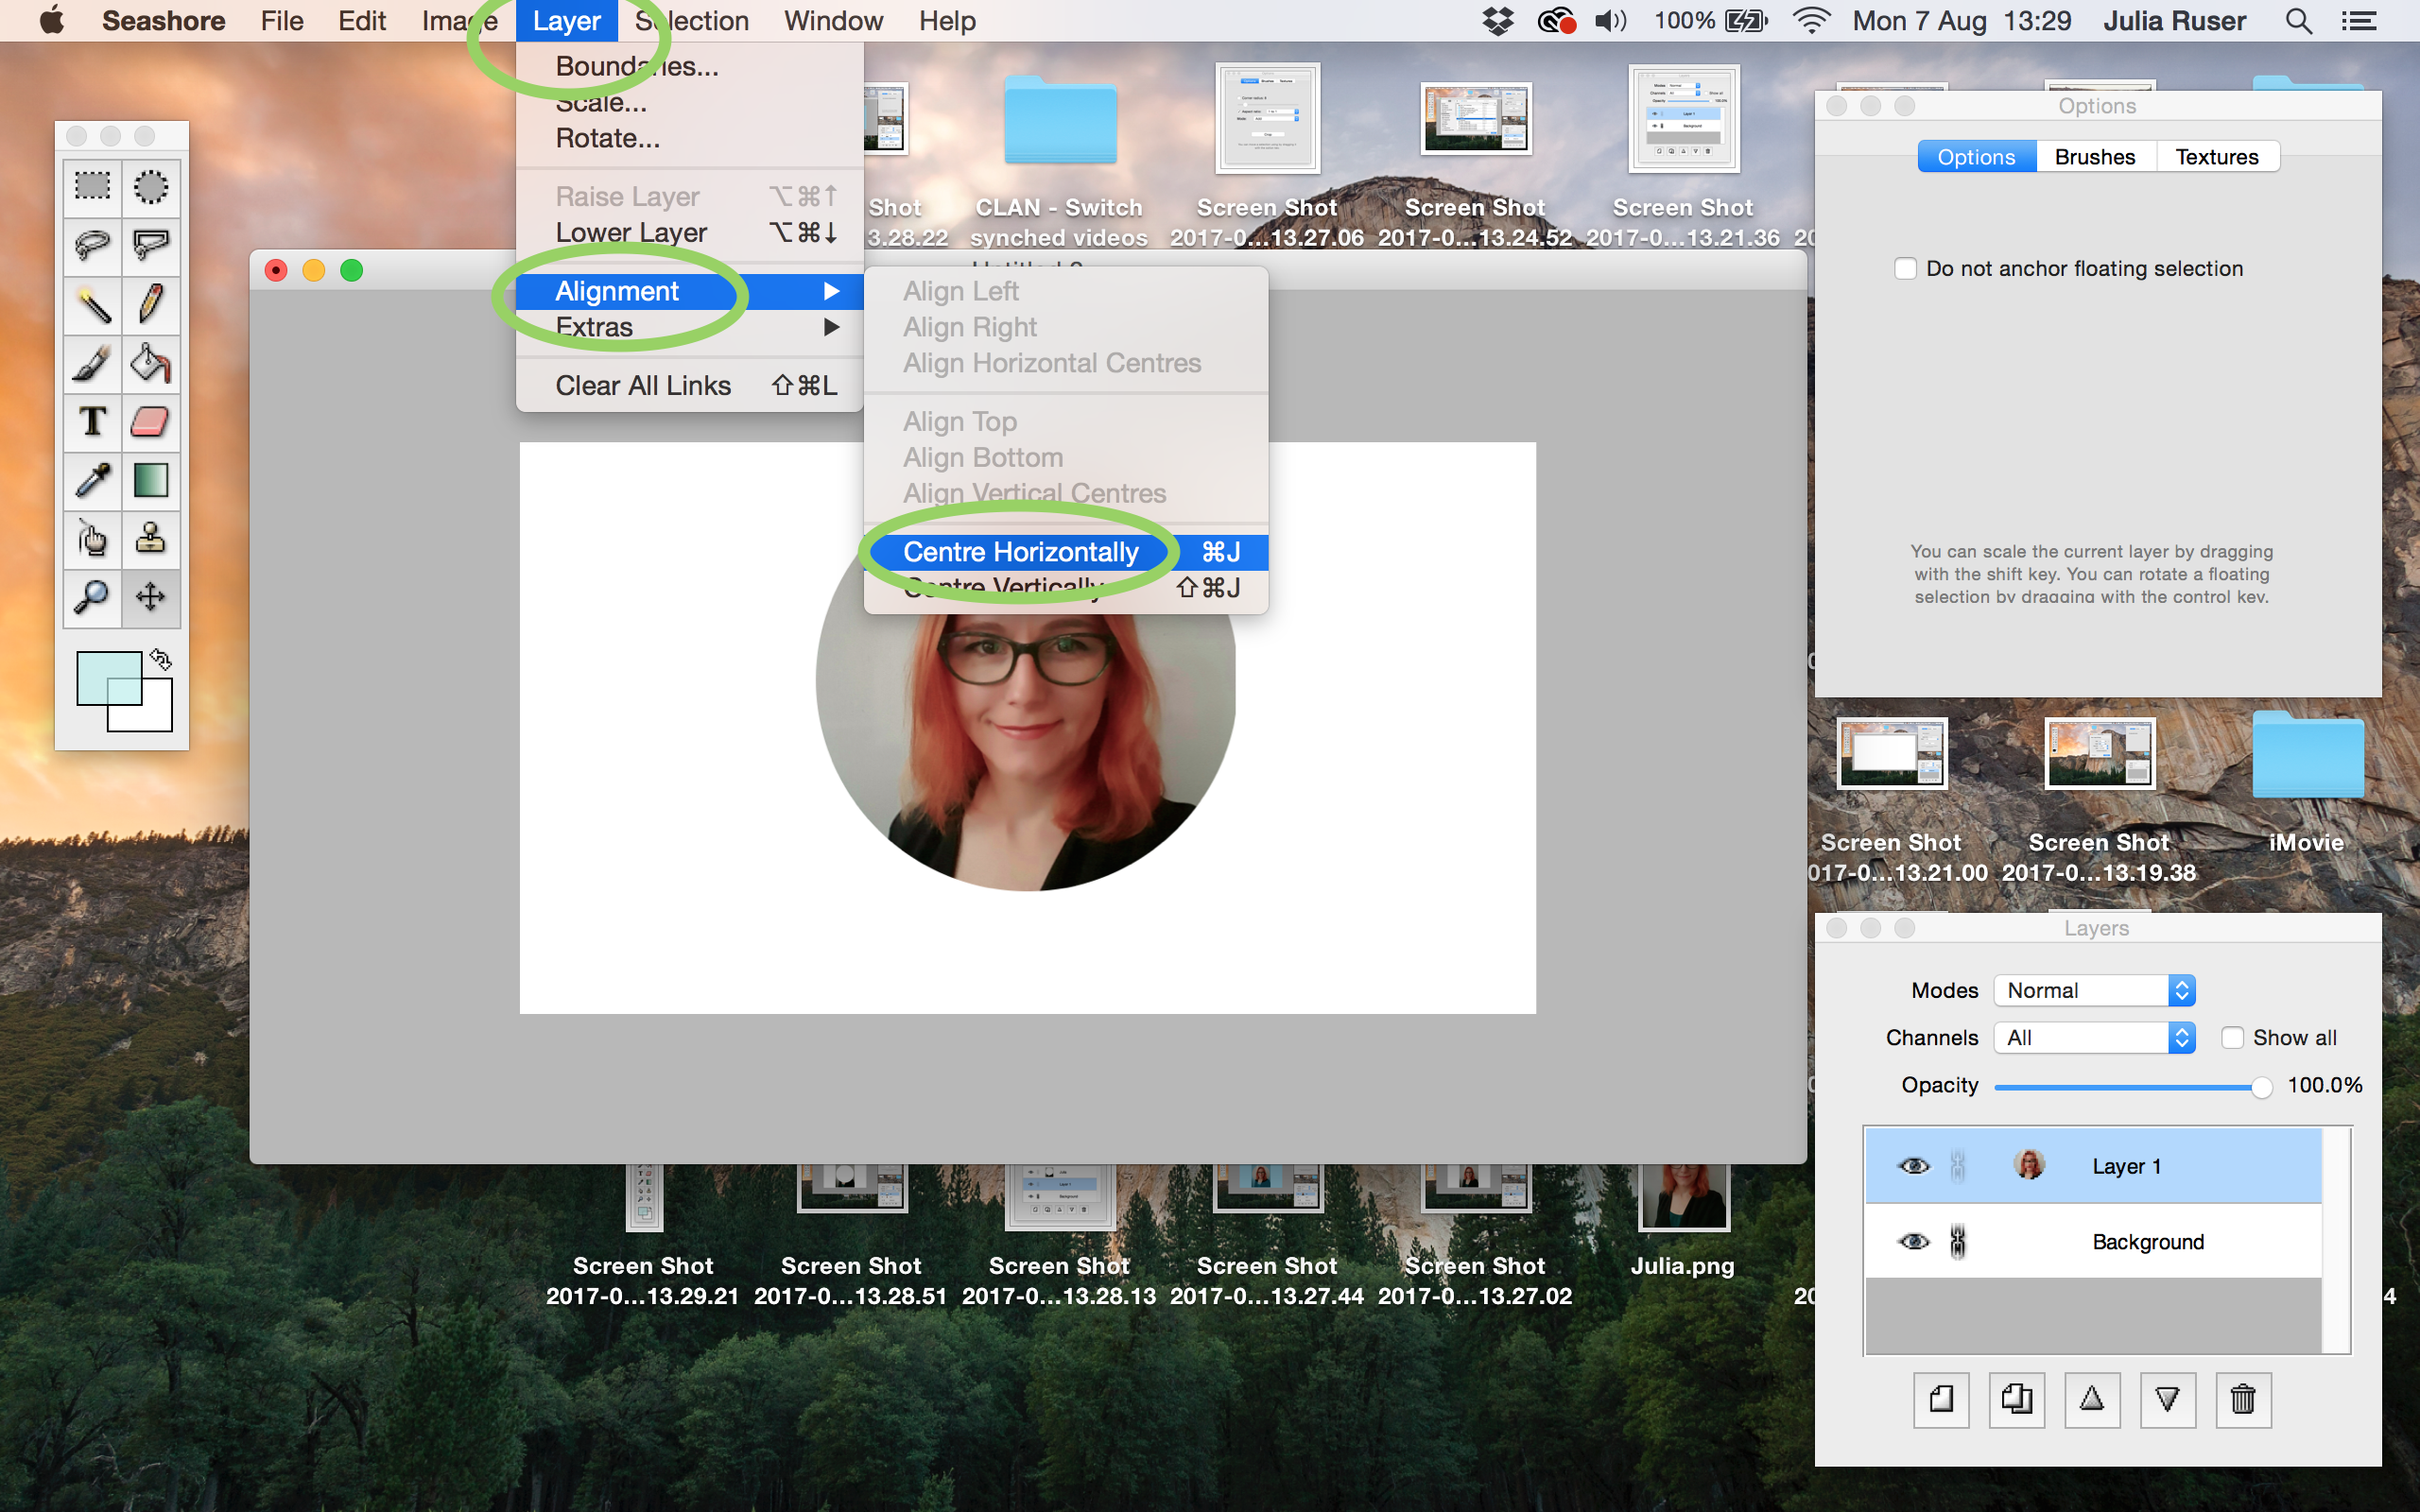
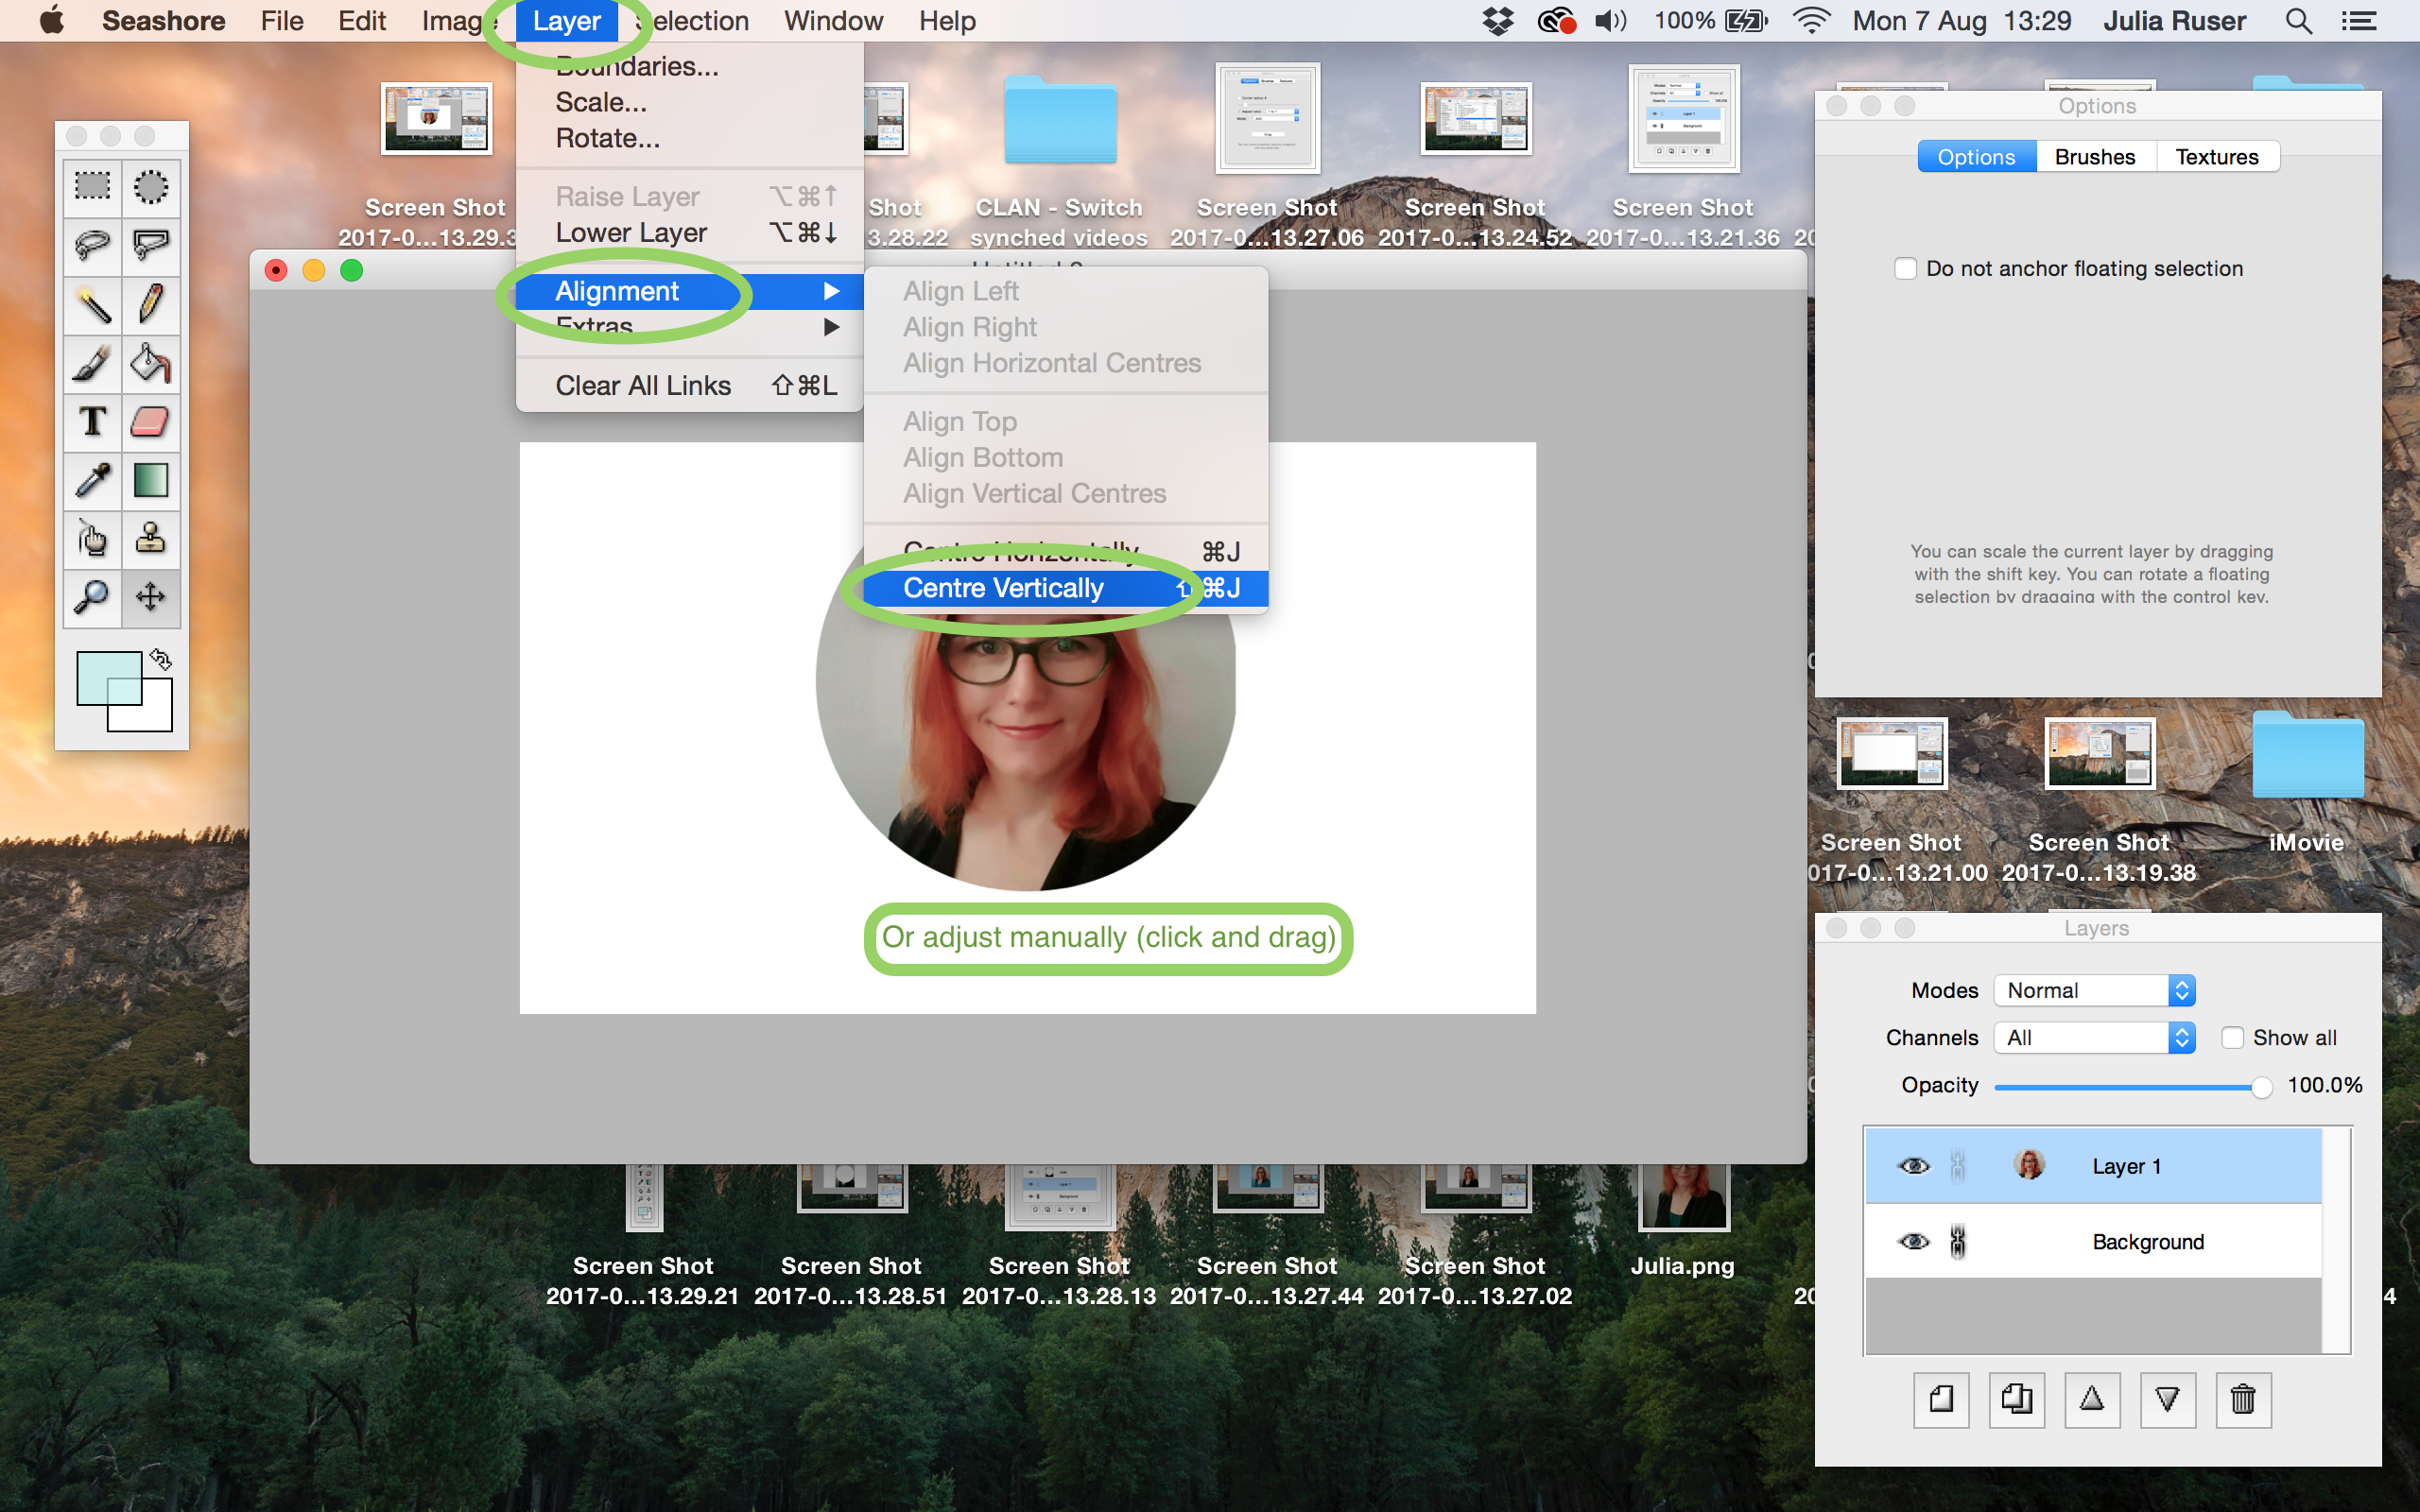
15. In the left window: Select the position tool
16. You have two choices to align the image on the background: Go to “Layer” and “Alignment”, then click “Centre Horizontally and Vertically” OR click and drag the image into position
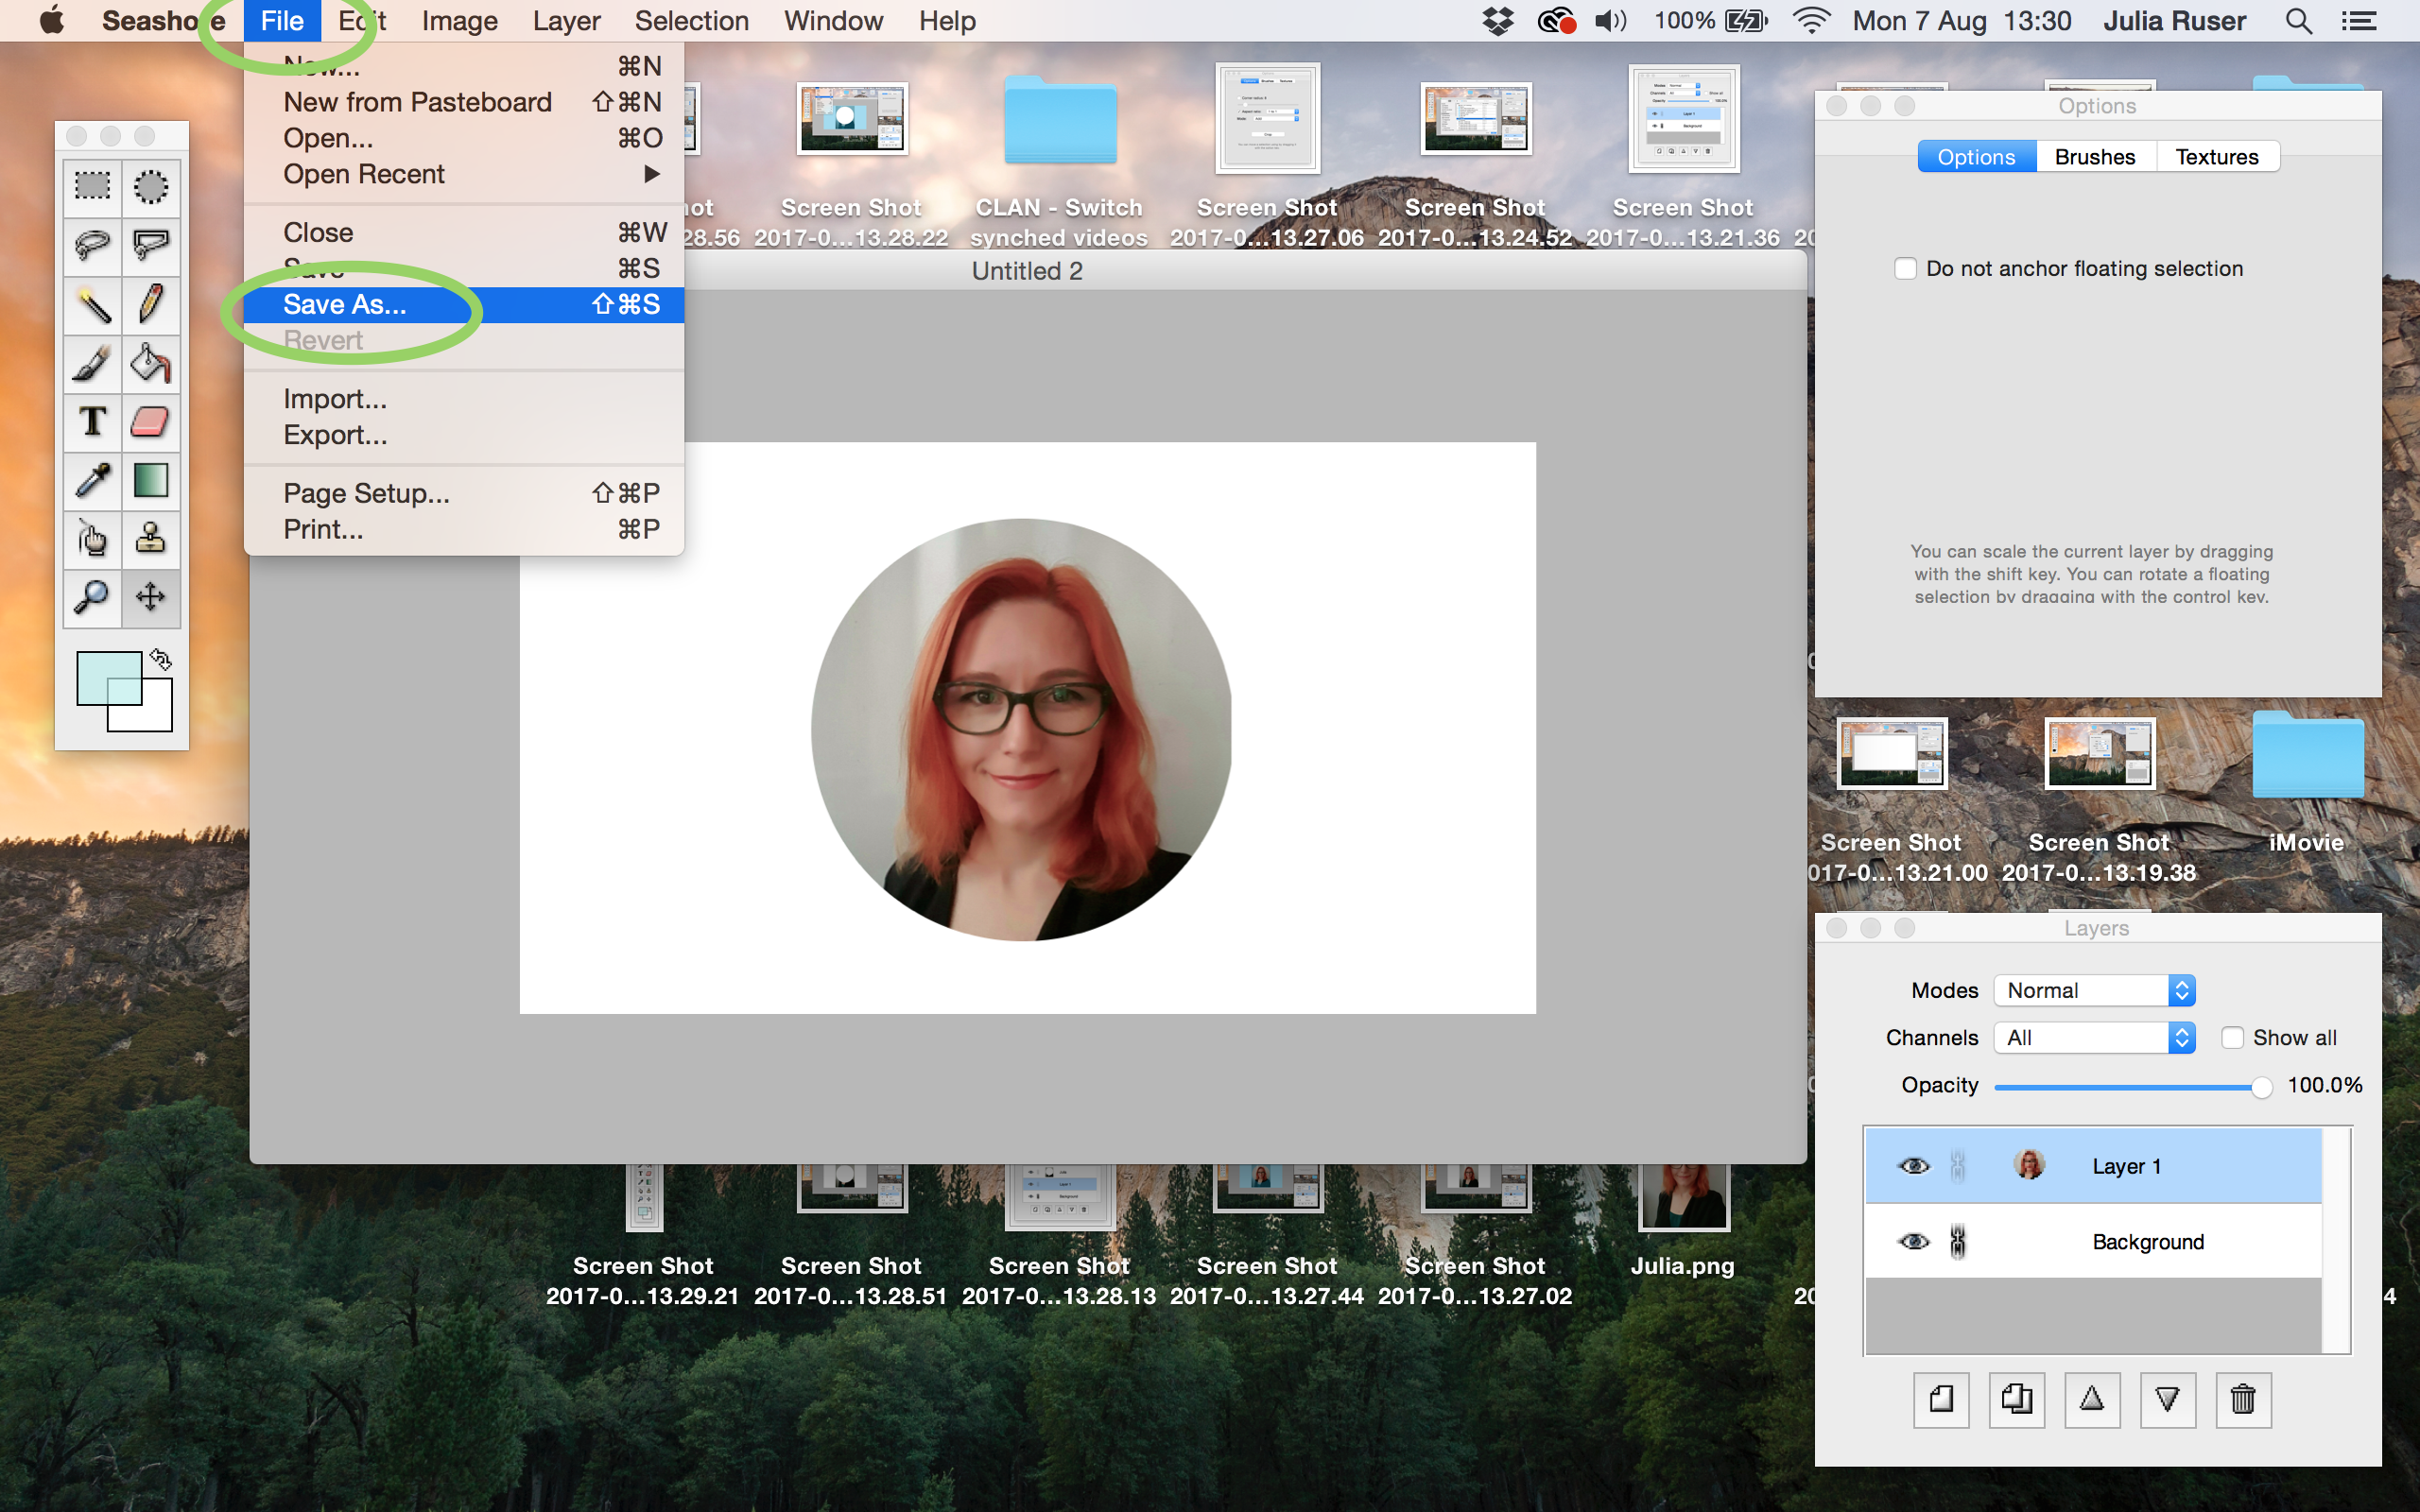
17. Go to “File” and “Save As”
18. Give your new file a name, select the file format (in this case png), and click “Save”
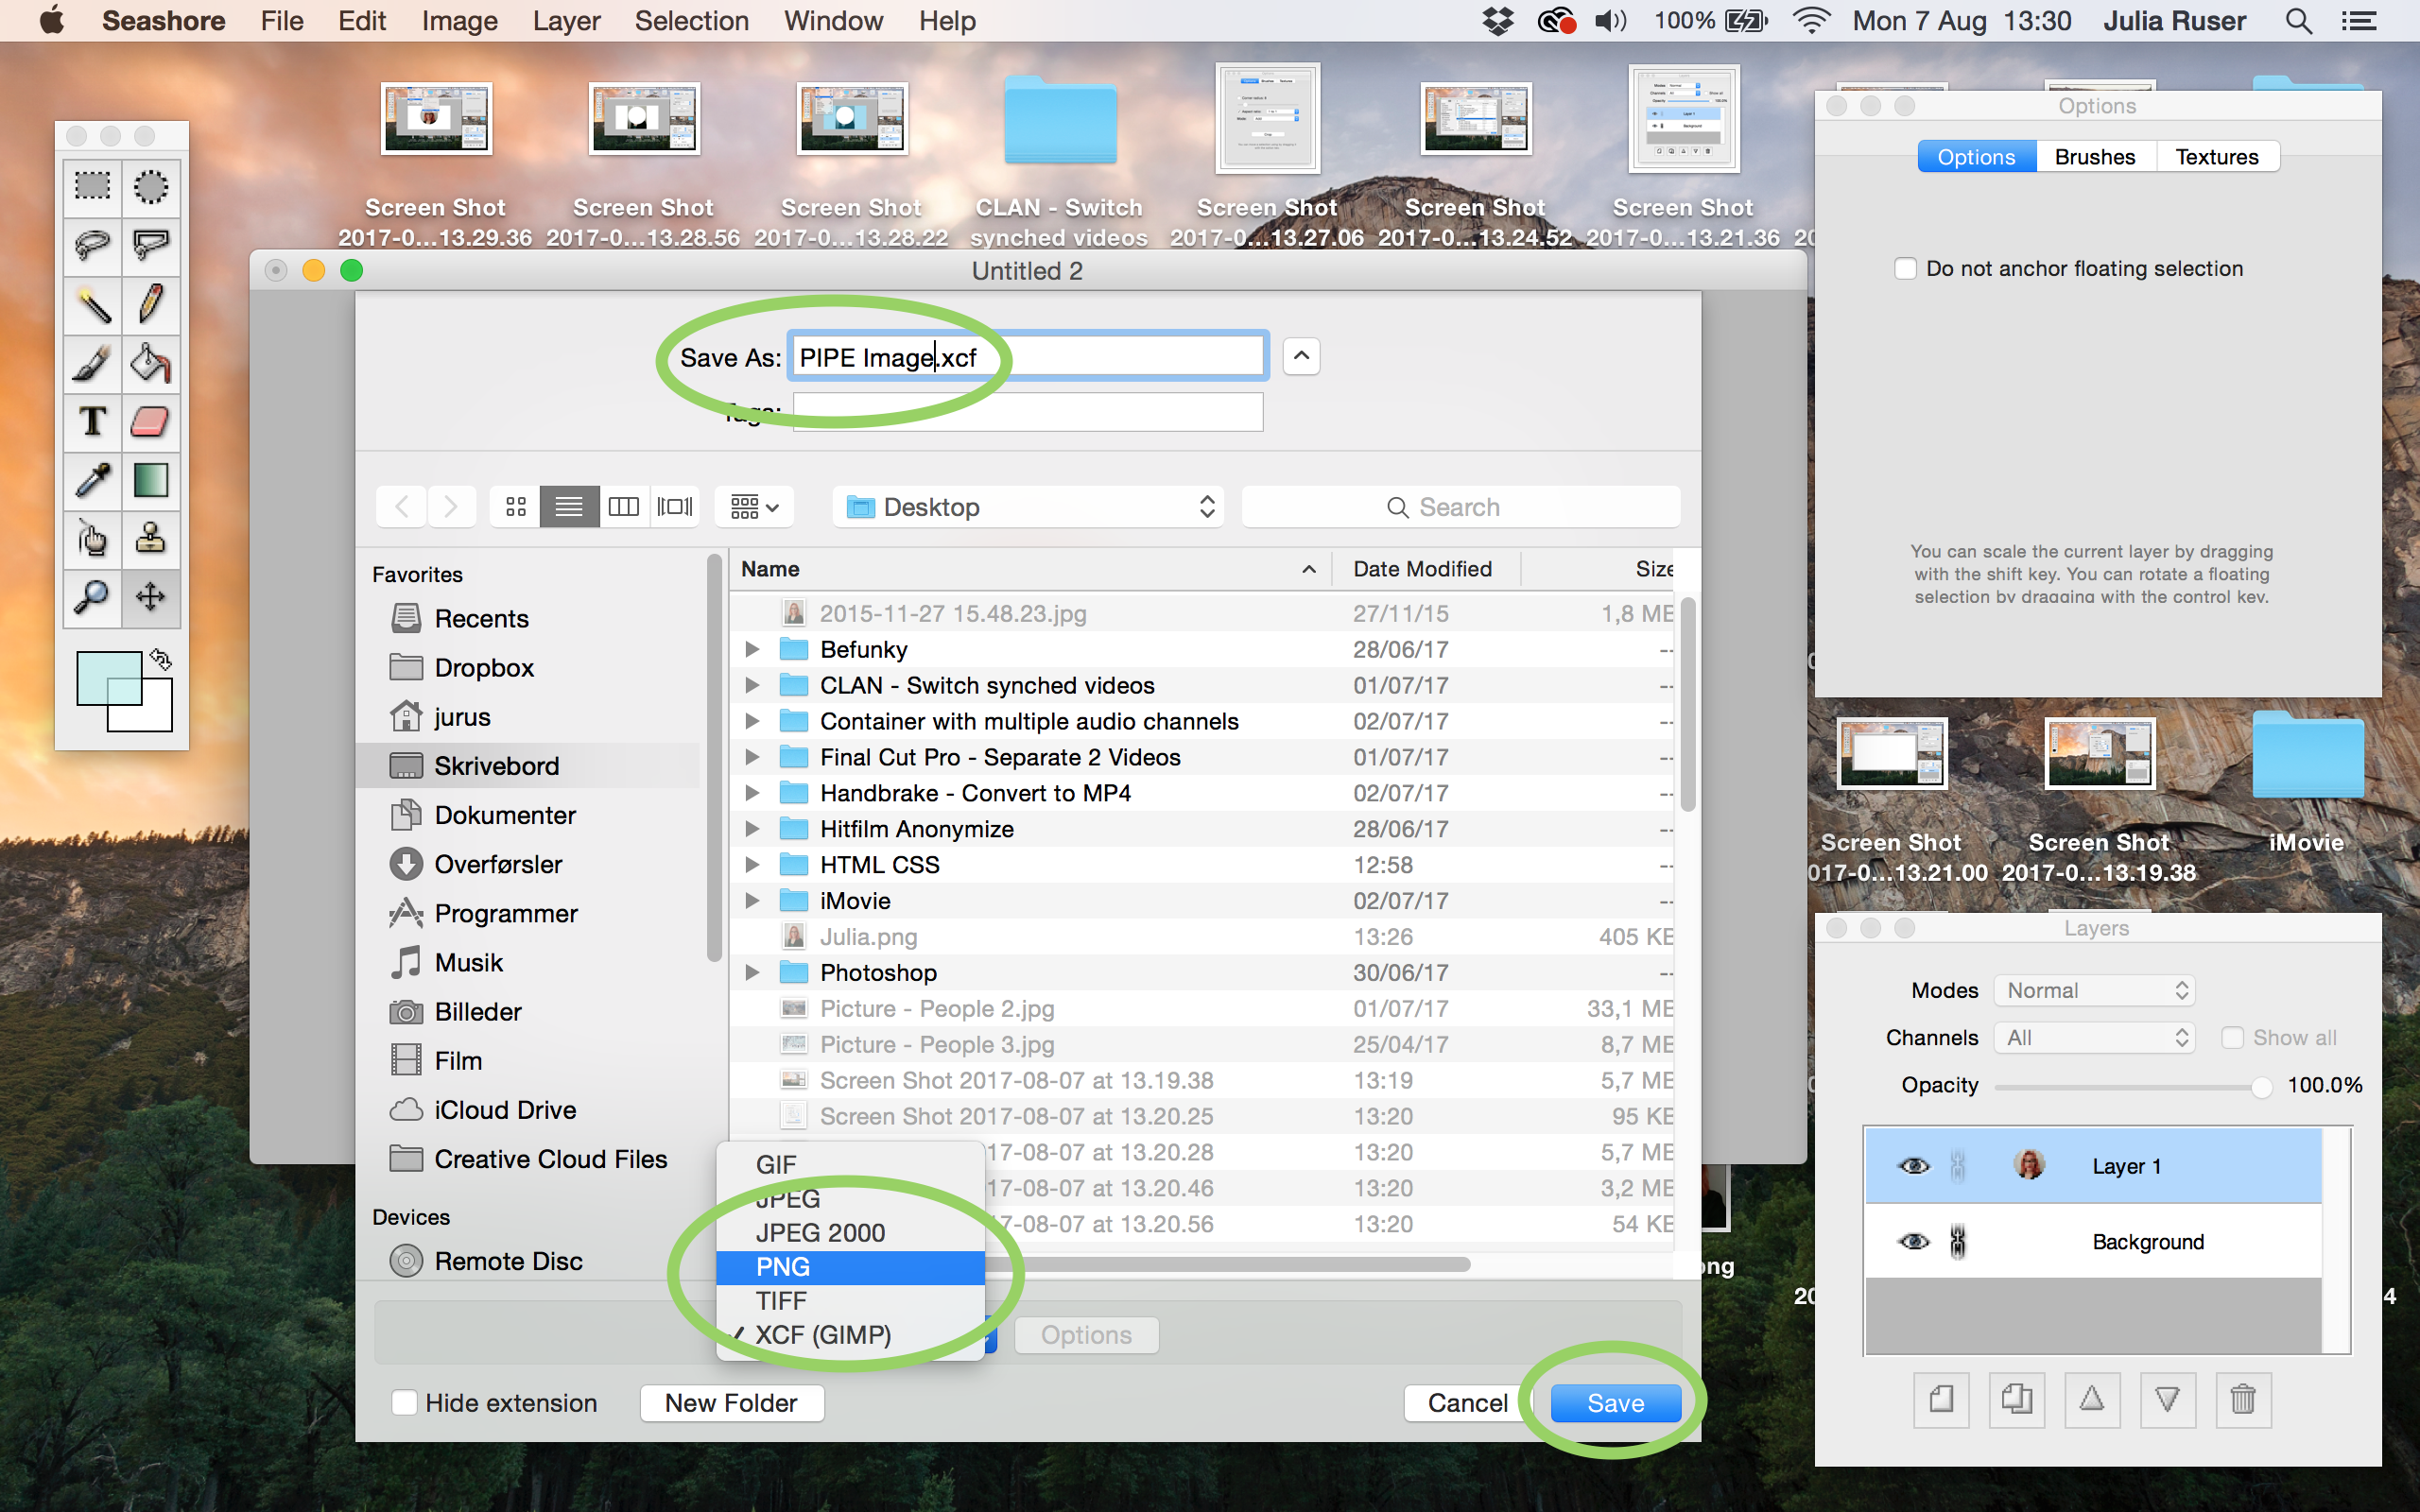
Done.